Introduction
Before you start reading this guide, we need to introduce some basic concepts that will be used later.
Chase
A chase is a save of multiple faders's positions. Each chase can be assigned to a single fader or to a button. After storing a chase, simply raise the single cursor (or the associated button) to control multiple DMX channels.
The faders
Within PiDMX, each fader can take on two different functions. The possible functions are as follows:
DMX fader
A DMX-type fader allows direct control of a DMX channel. Sliding the fader changes the value of a specific DMX channel (from 0 to 255). By pressing the fader's button, the DMX channel will take on the maximum value: 255.
Chase Fader
A chase slider allows direct control of the chase. Scrolling the fader changes the value of the DMX channels within the chase from their minimum to their maximum. By pressing the cursor's button, the values of the DMX channels stored within the chase will assume their maximum value.
Chase List Fader
A fader of type "Chase List" let you control a sequence of Chases. Is possible switch between a stage and the next one moving the fader manuali or pressing the button associated to the fader. For each Chase you can choose the fade in/out time and the delay in/out time.
Fixture
A fixture is a device that can be controlled using the DMX protocol. Each fixture can be controlled by one or more DMX channels.
In this manual, we will use the term “parameter” to refer to the function controlled by a DMX channel of a fixture. The phase in which the fixtures present in the show are specified is called "patching".
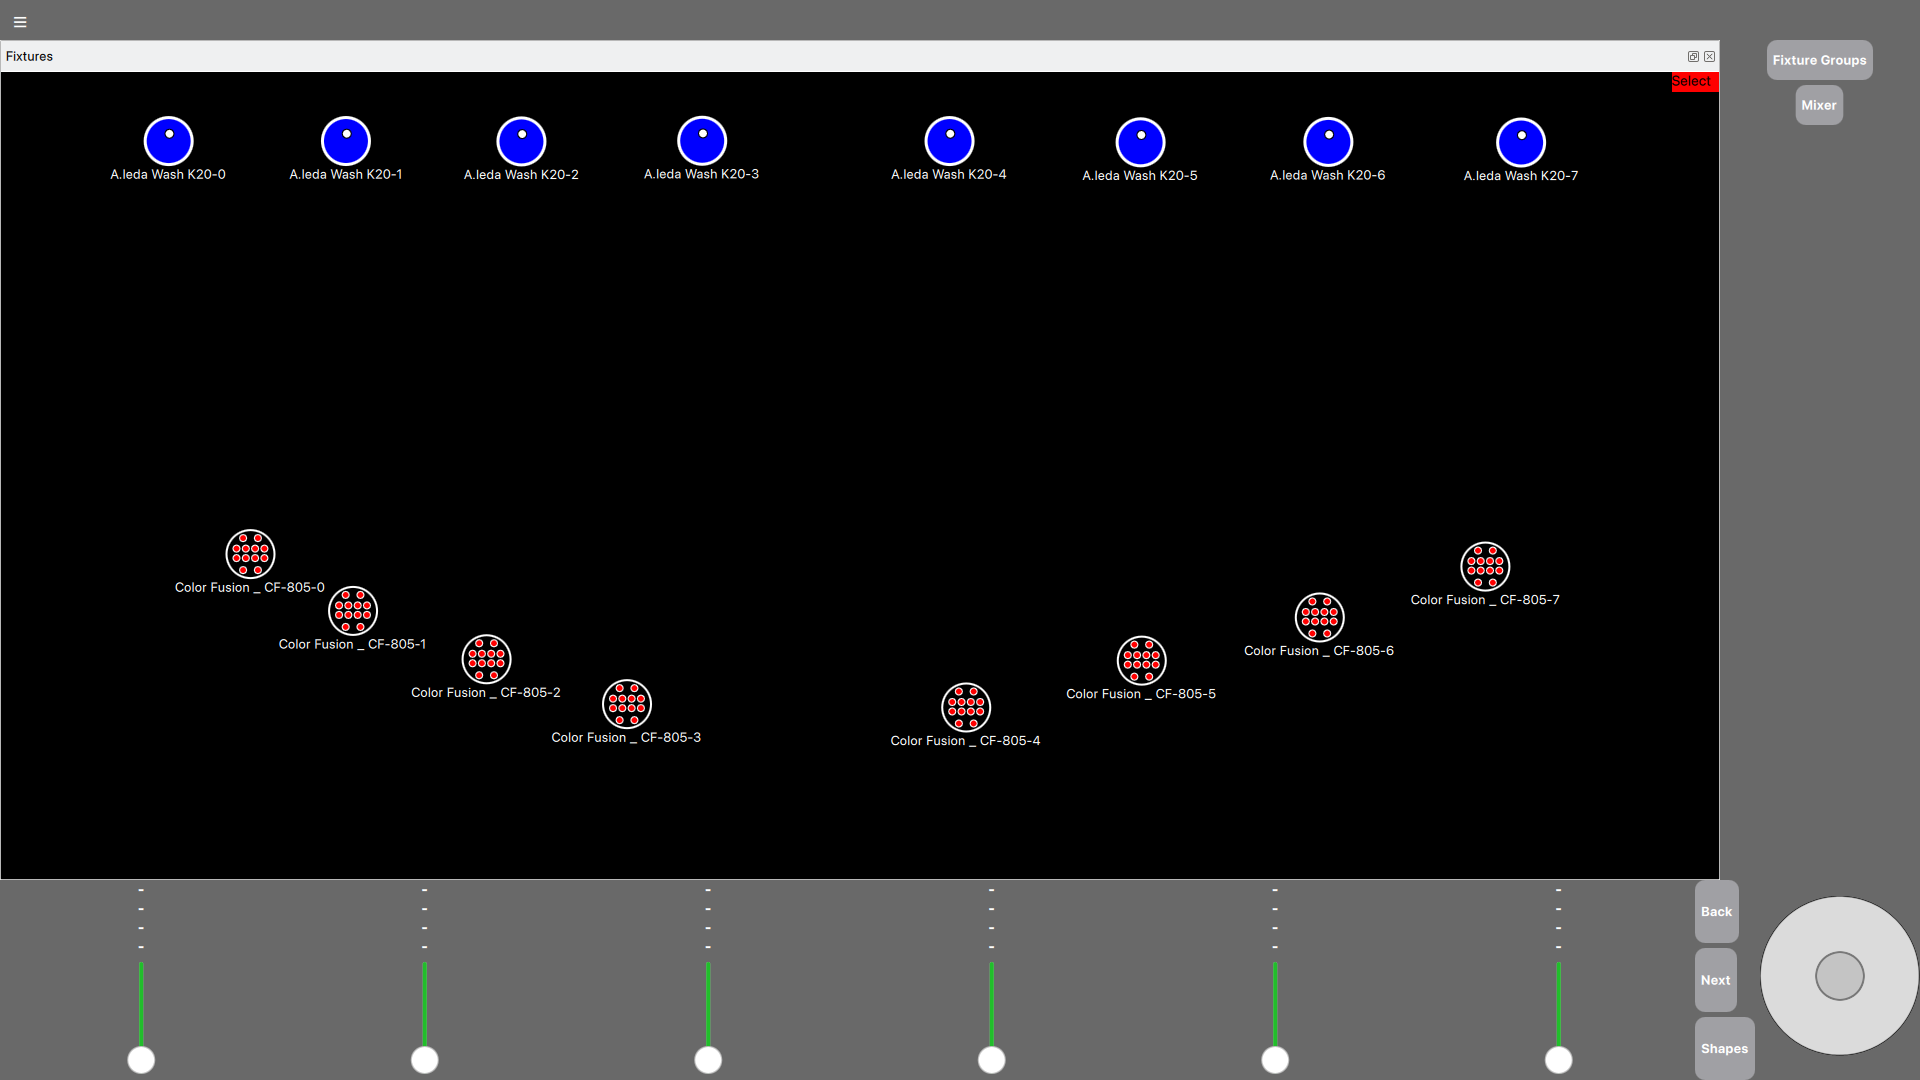
From the main page of "PiDMX" it is possible to view the patched fixtures, select them and see in real time how each single fixture is responding to the values set in the relative DMX channels. This display is independent of the value of the "Master" slider which sets the general intensity.
In the following screenshot you can see how the 8 beams are lit and with the color set to blue and the 8 LEDs par are lit red.
Getting started on PiDMX
During the first approaches with the software, the use of the visualization software " Capture Visualizer " is strongly recommended.
Download
Download from the download section the version of "PiDMX" for your operating system and install "PiDMX Mobile" to your mobile device.
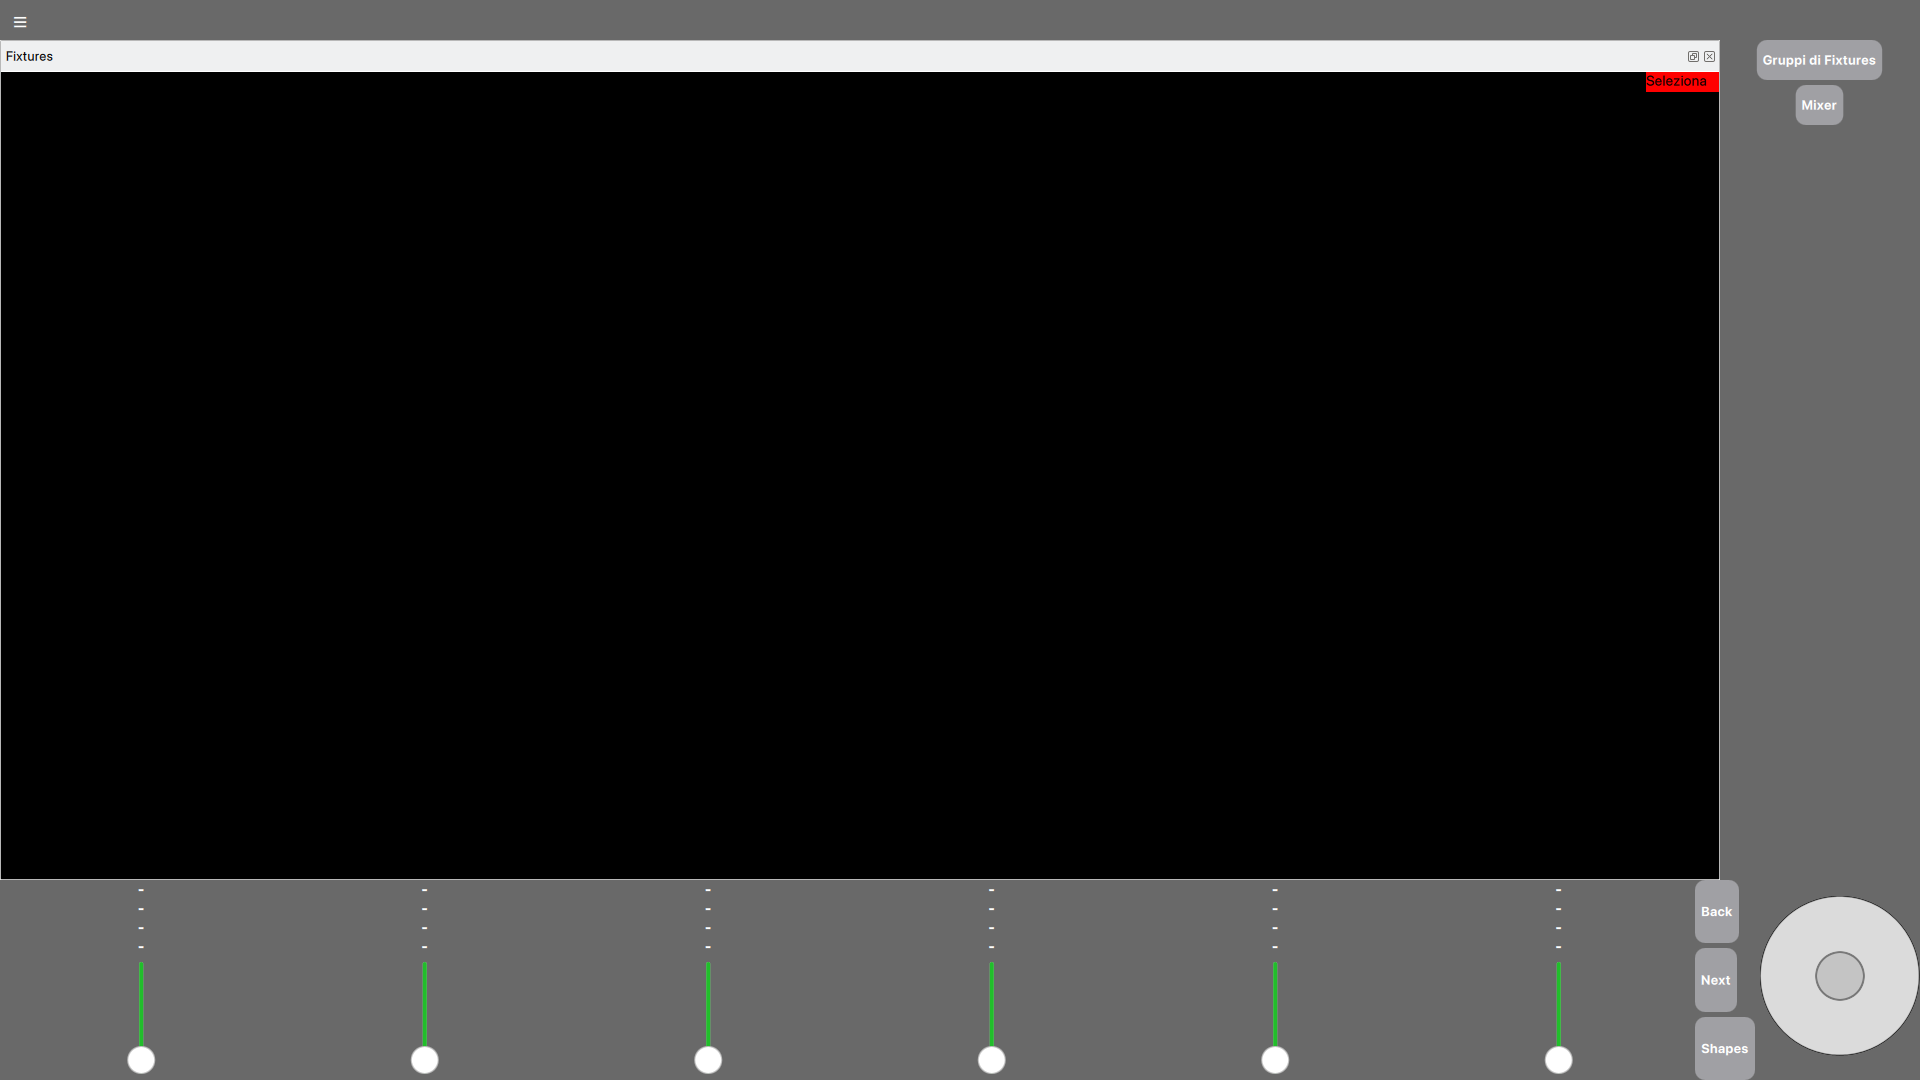
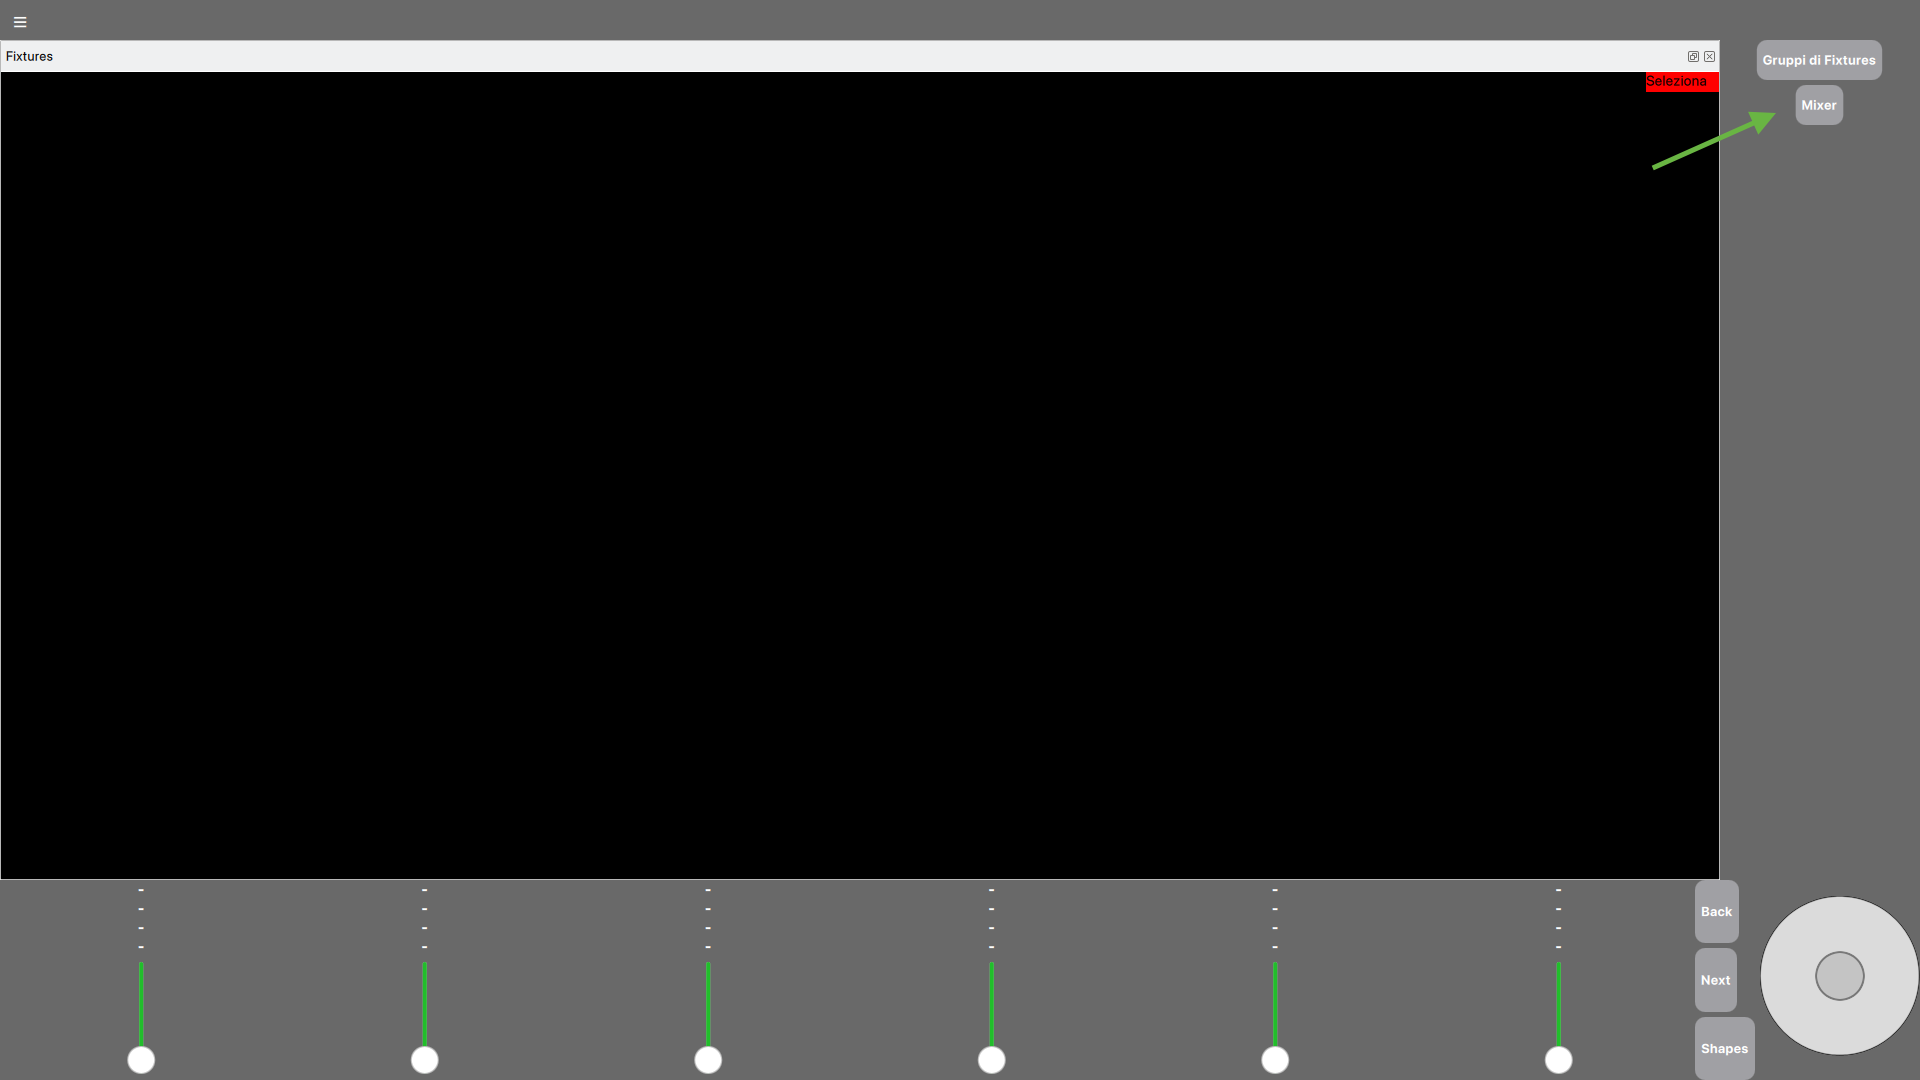
After downloading and extracting the archive, start the "PiDMX" software. The interface shown is the following:
Mixer Window
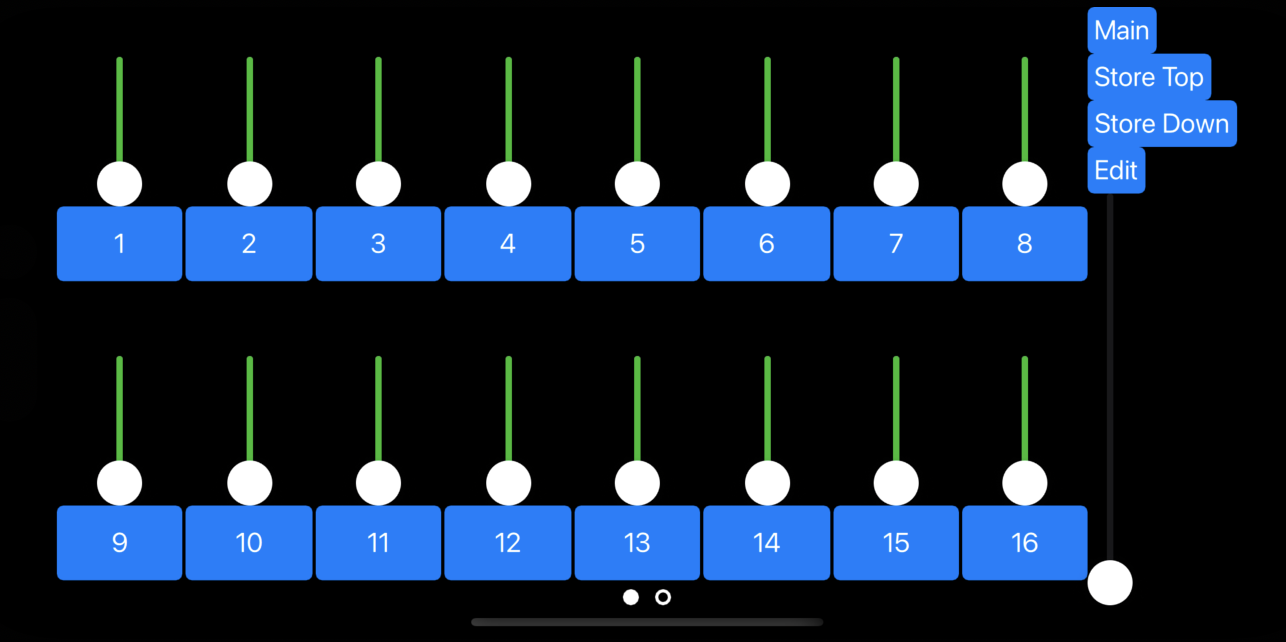
The software has an integrated mixer. This one will be shown after you click on the "Mixer" button located on the top right side of the Home Screen.
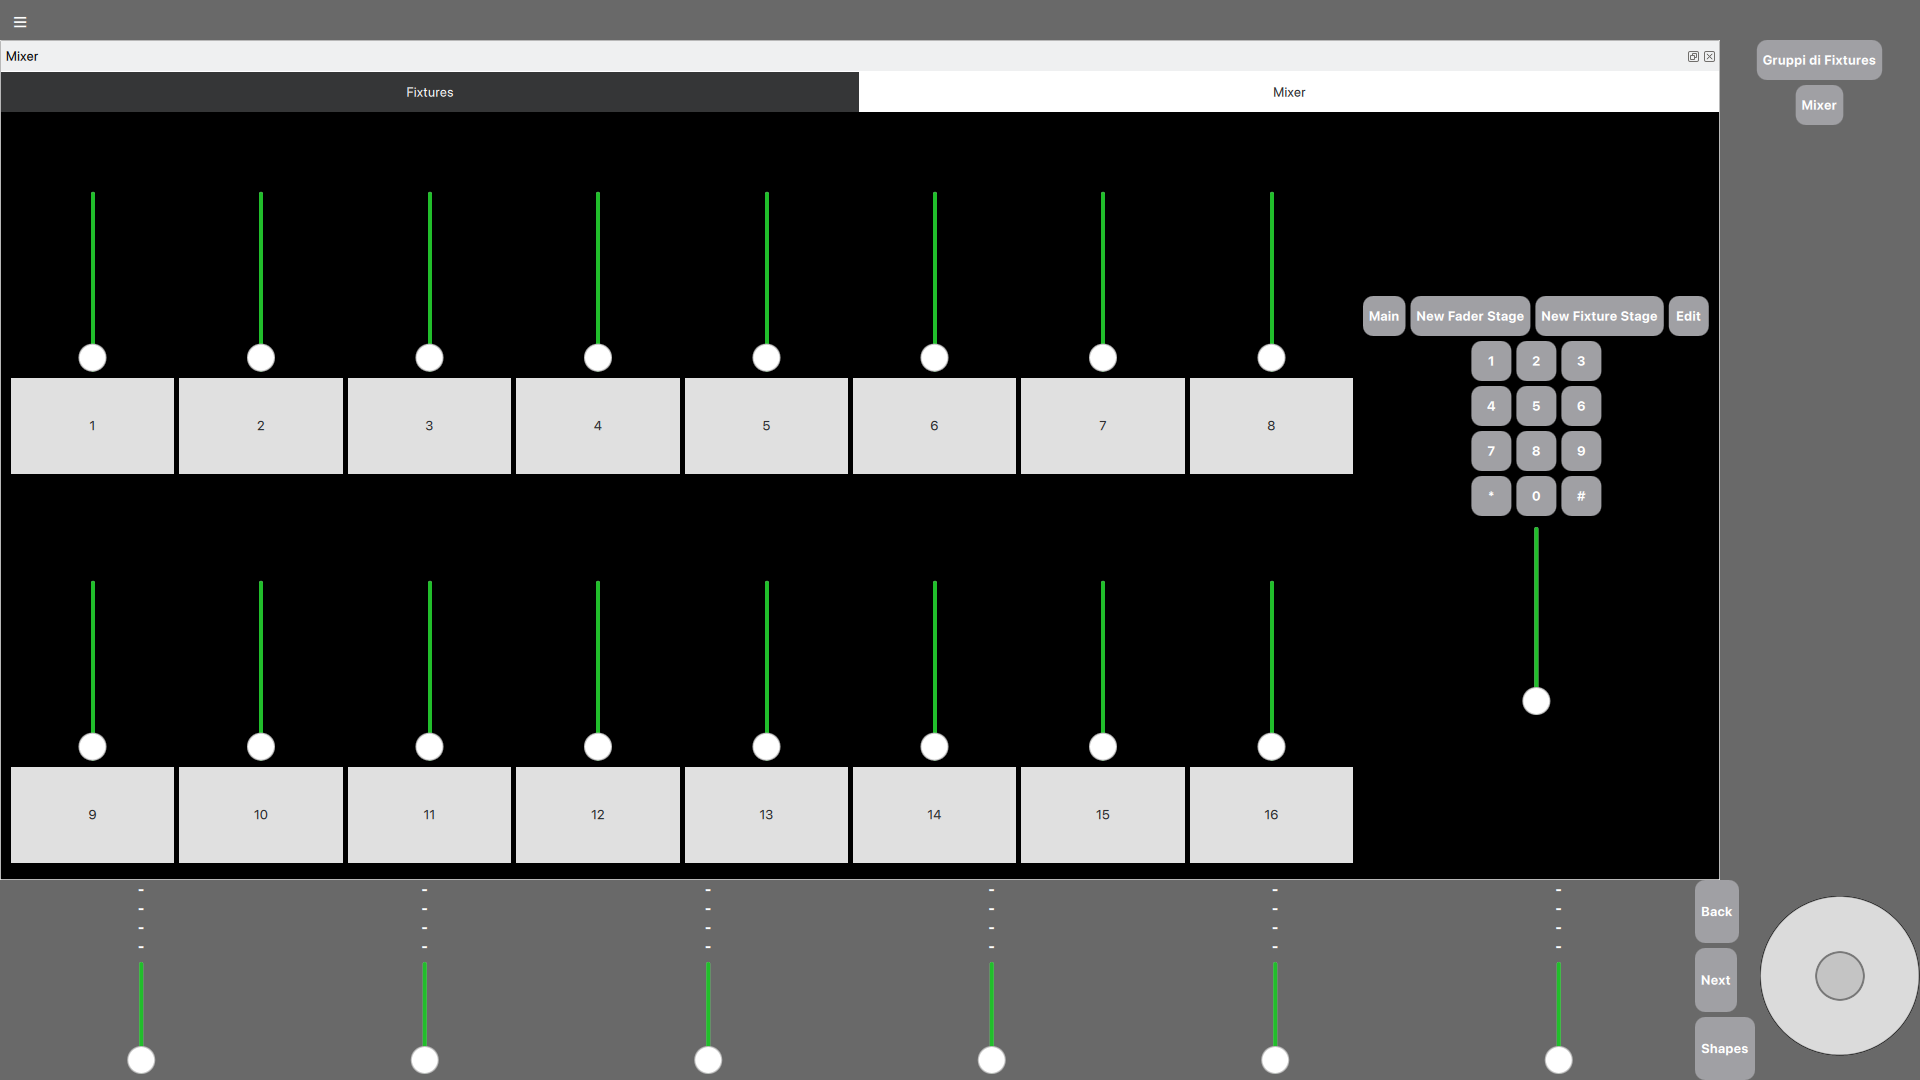
The integrated mixer has:
- 16 faders;
- 1 Master Fader;
- 4 functional buttons:
- A Keypad.
Initially the 16 faders controls the first 16 DMX channels, respectively. To edit the function of the faders, please refer to the paragraph "Faders Customizations".
The "Main" button bring you to the Home Screen. The fader located under the keypad is the master fader which control the overall output values.
The button "New Fader Stage" is explained in the section "Storing a chase".
The button "New Fixture Stage" is explained in the section "Storing a chase from fixture's parameters".
The button "Edit" is explained in the section "Faders Customizations".
Docking System
The "Docking" system allows an easy modification of the PiDMX interface layout. It allows you to place several windows adjacently or insert them one inside the other. To do this, simply hold down the top part of the window you want to move and drag it to the desired position.
The following video illustrates how it works:
You can also undock it entirely from the interface and move it to a second screen, for example, as below:
Faders Customization
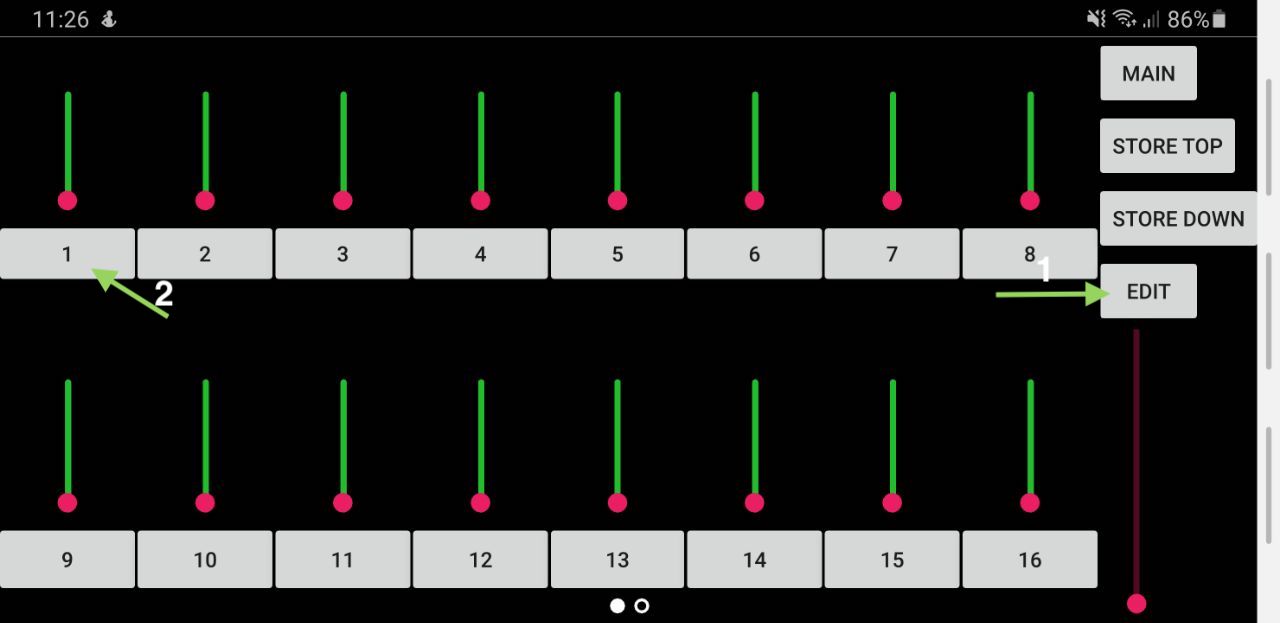
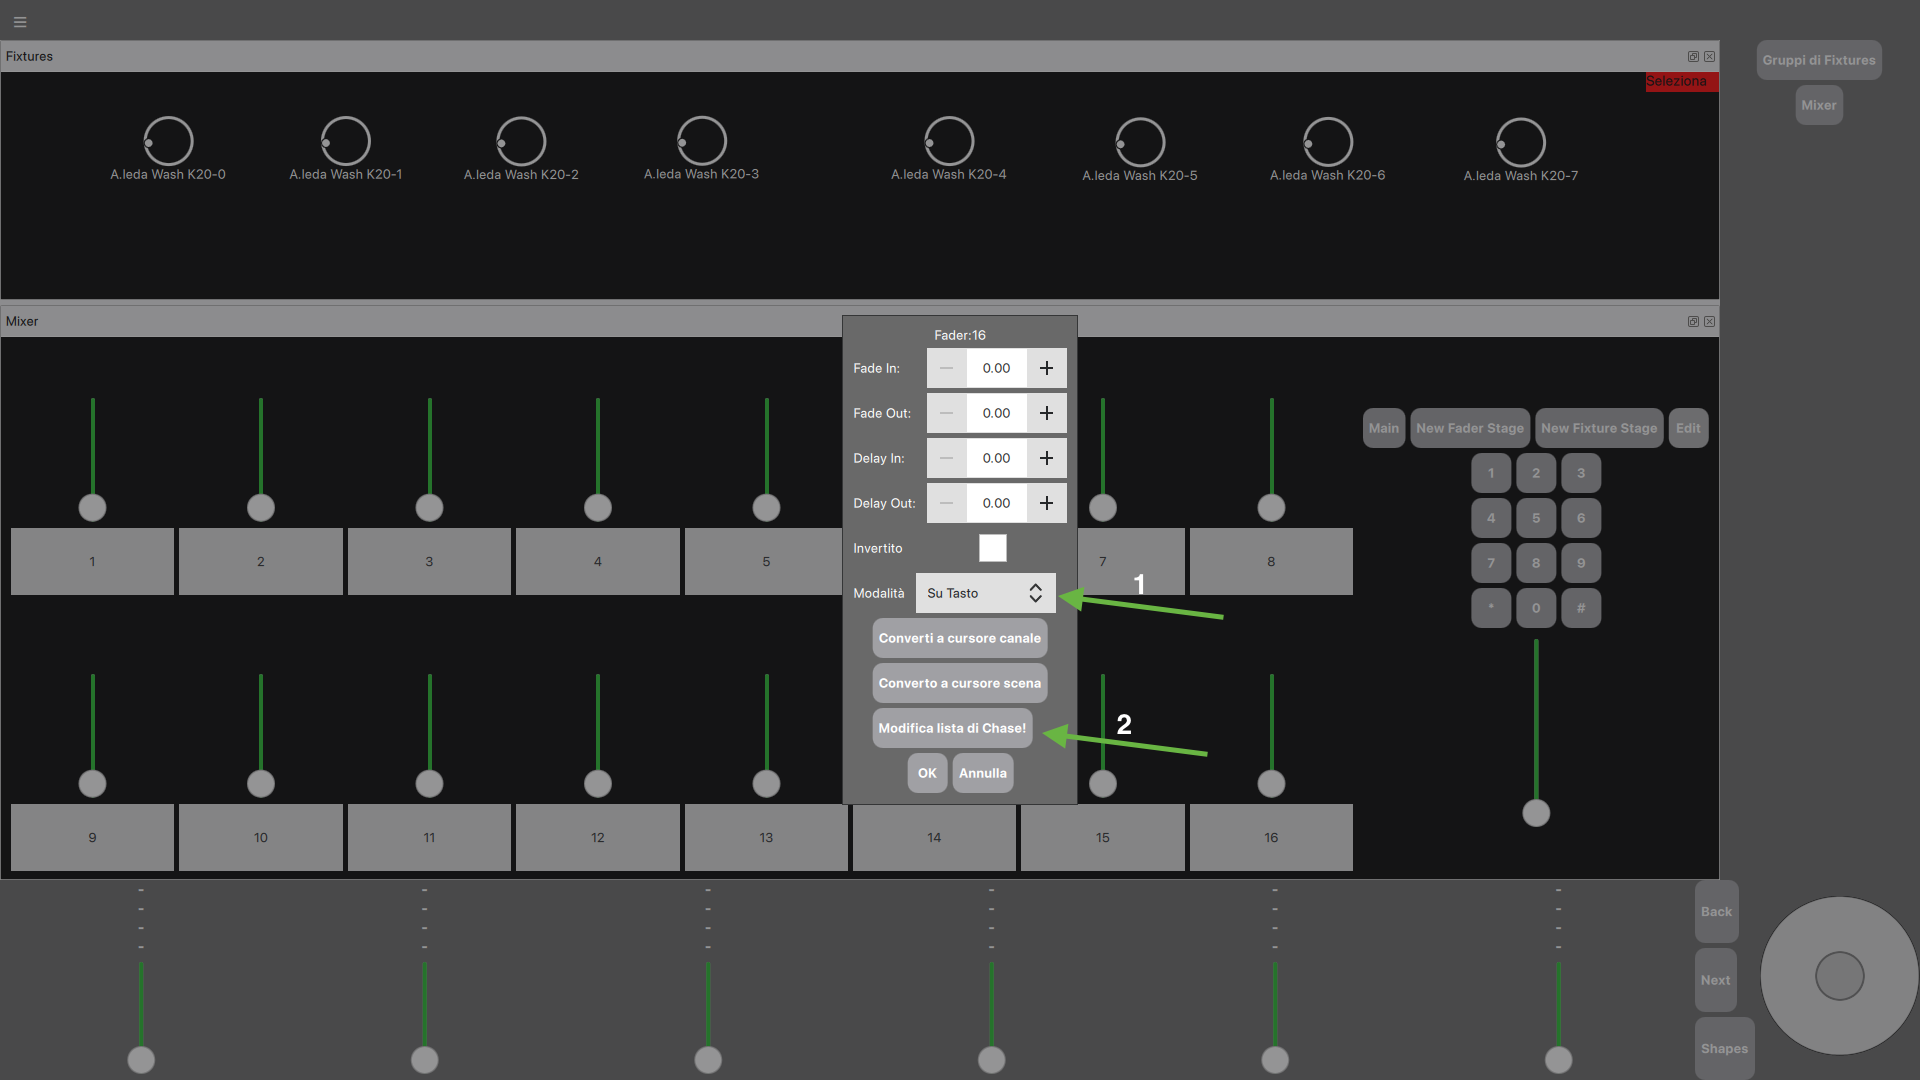
It is possible to change the type of a fader, that is, to convert it from a fader that manages a single DMX channel to a fader that manages a chase. Using the "PiDMX Mobile" application, hold down the "Edit" button on the right and simultaneously press the button associated with a fader.
The screenshot of "PiDMX Mobile" and the window that will be displayed on "PiDMX" are shown below:
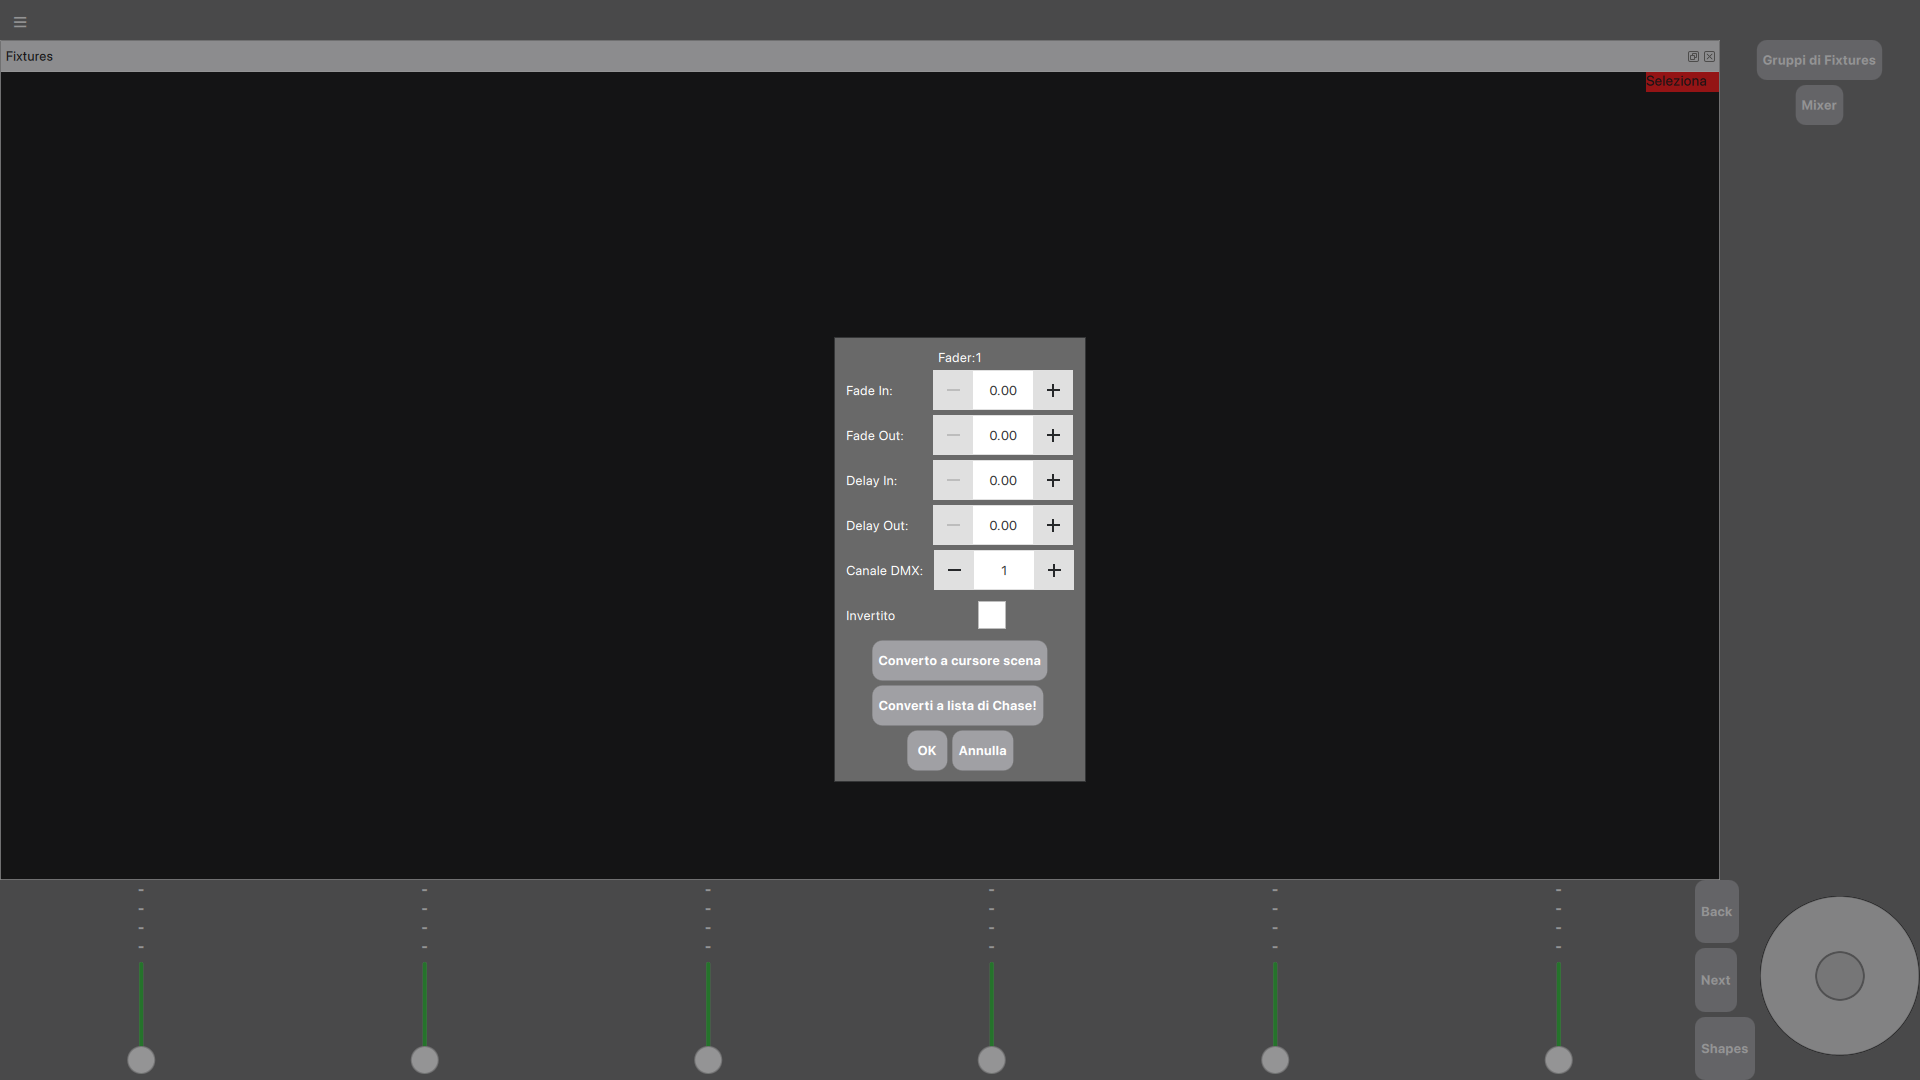
The following parameters can be managed for each button relating to a fader:
If the selected fader is of the "DMX" type, then the button will appear to convert it into a "Chase" type cursor, otherwise the opposite happens.
After making the desired changes, simply click on the "Ok" button to save.
Storing a chase
First we distinguish between "Chase Up" and "Chase Down". In this section we will only talk about the "Chase Up".
First of all, make sure you have at least one "Chase" type cursor available (See Faders Customization).
To store a new chase, simply raise the sliders to the desired values as follows:
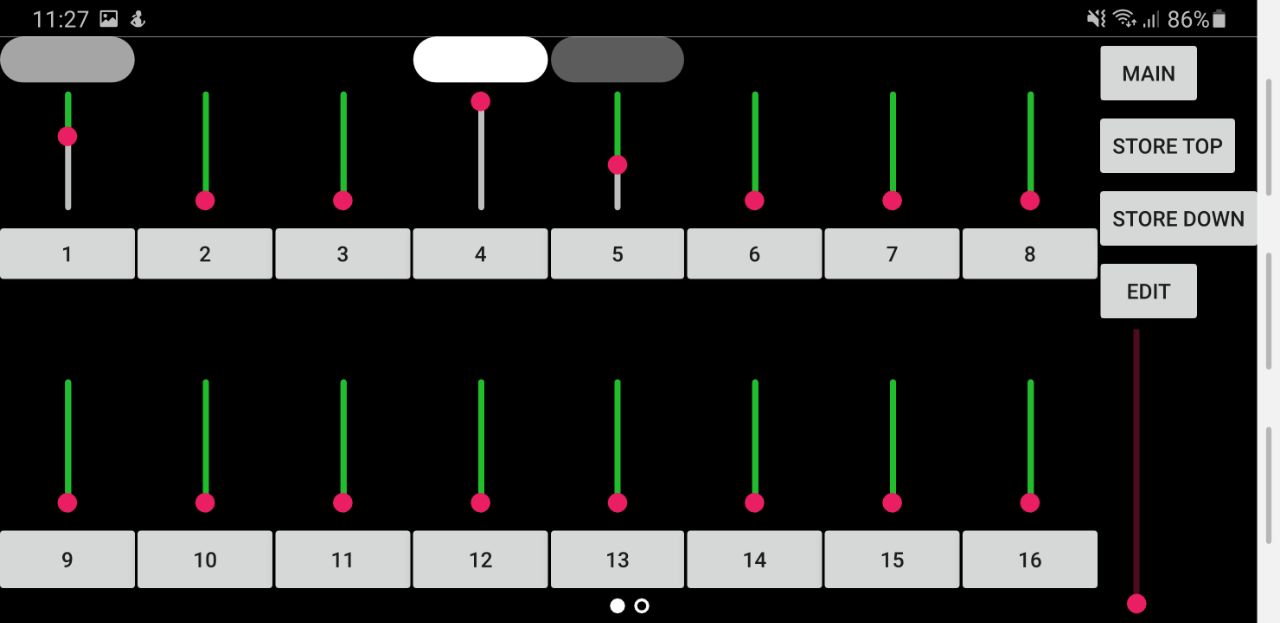
After placing the cursors at the desired positions, to store an "chase up", simply hold down the "Store Up" button and simultaneously press the button of the fader where you want to store the chase.
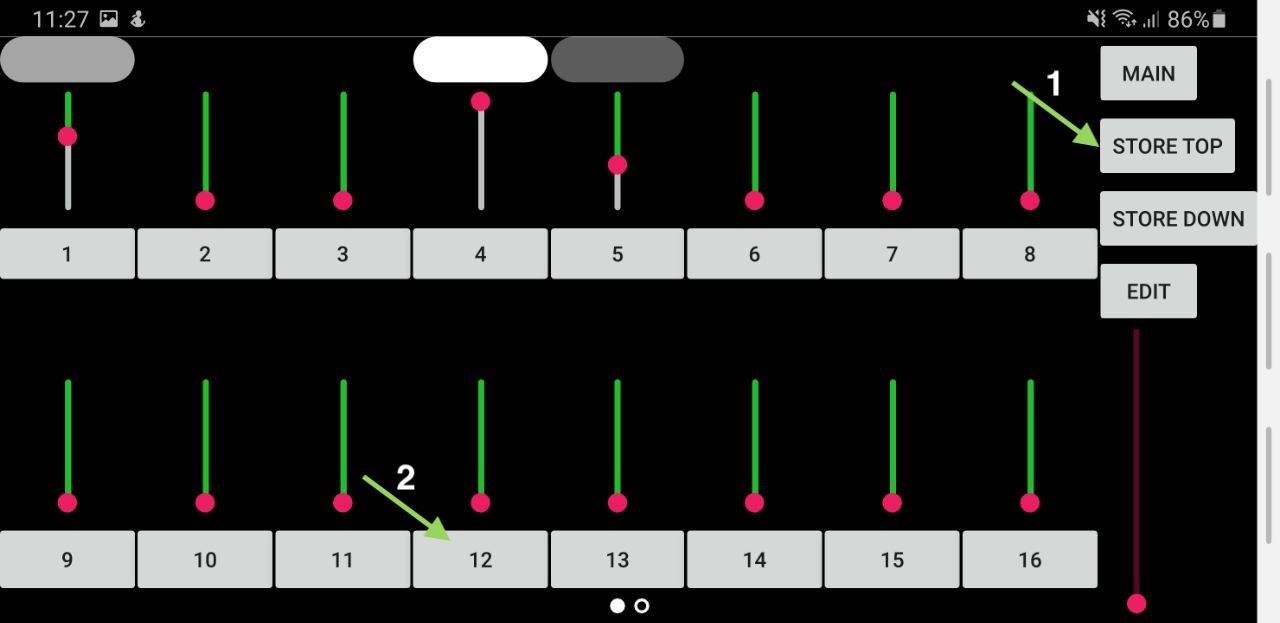
Then lower all the faders and move the fader in which you have stored the chase to see the result (in the example, the fader is the 12th).
Fixture
Patching
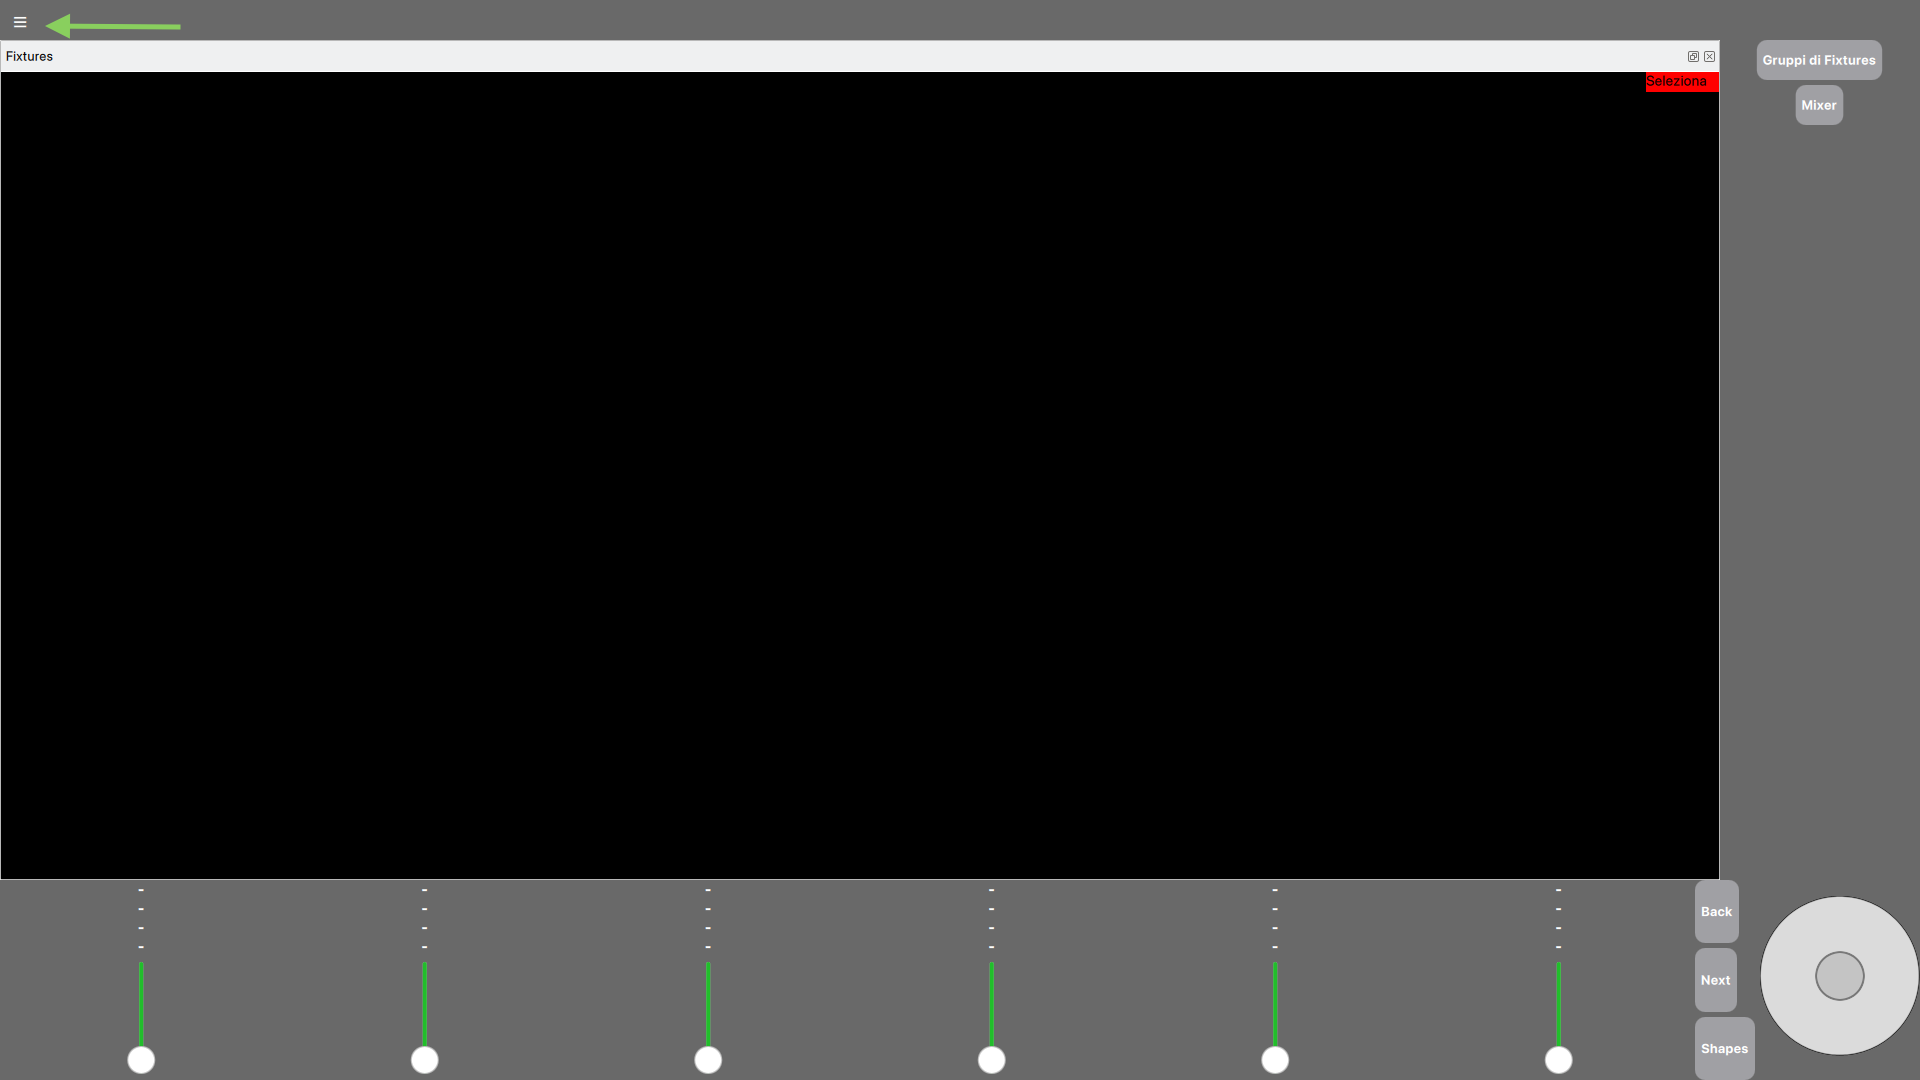
The patching page allows the insertion of new fixtures. To do this, open the menu by clicking on the icon at the top left and select the "Patch" item.
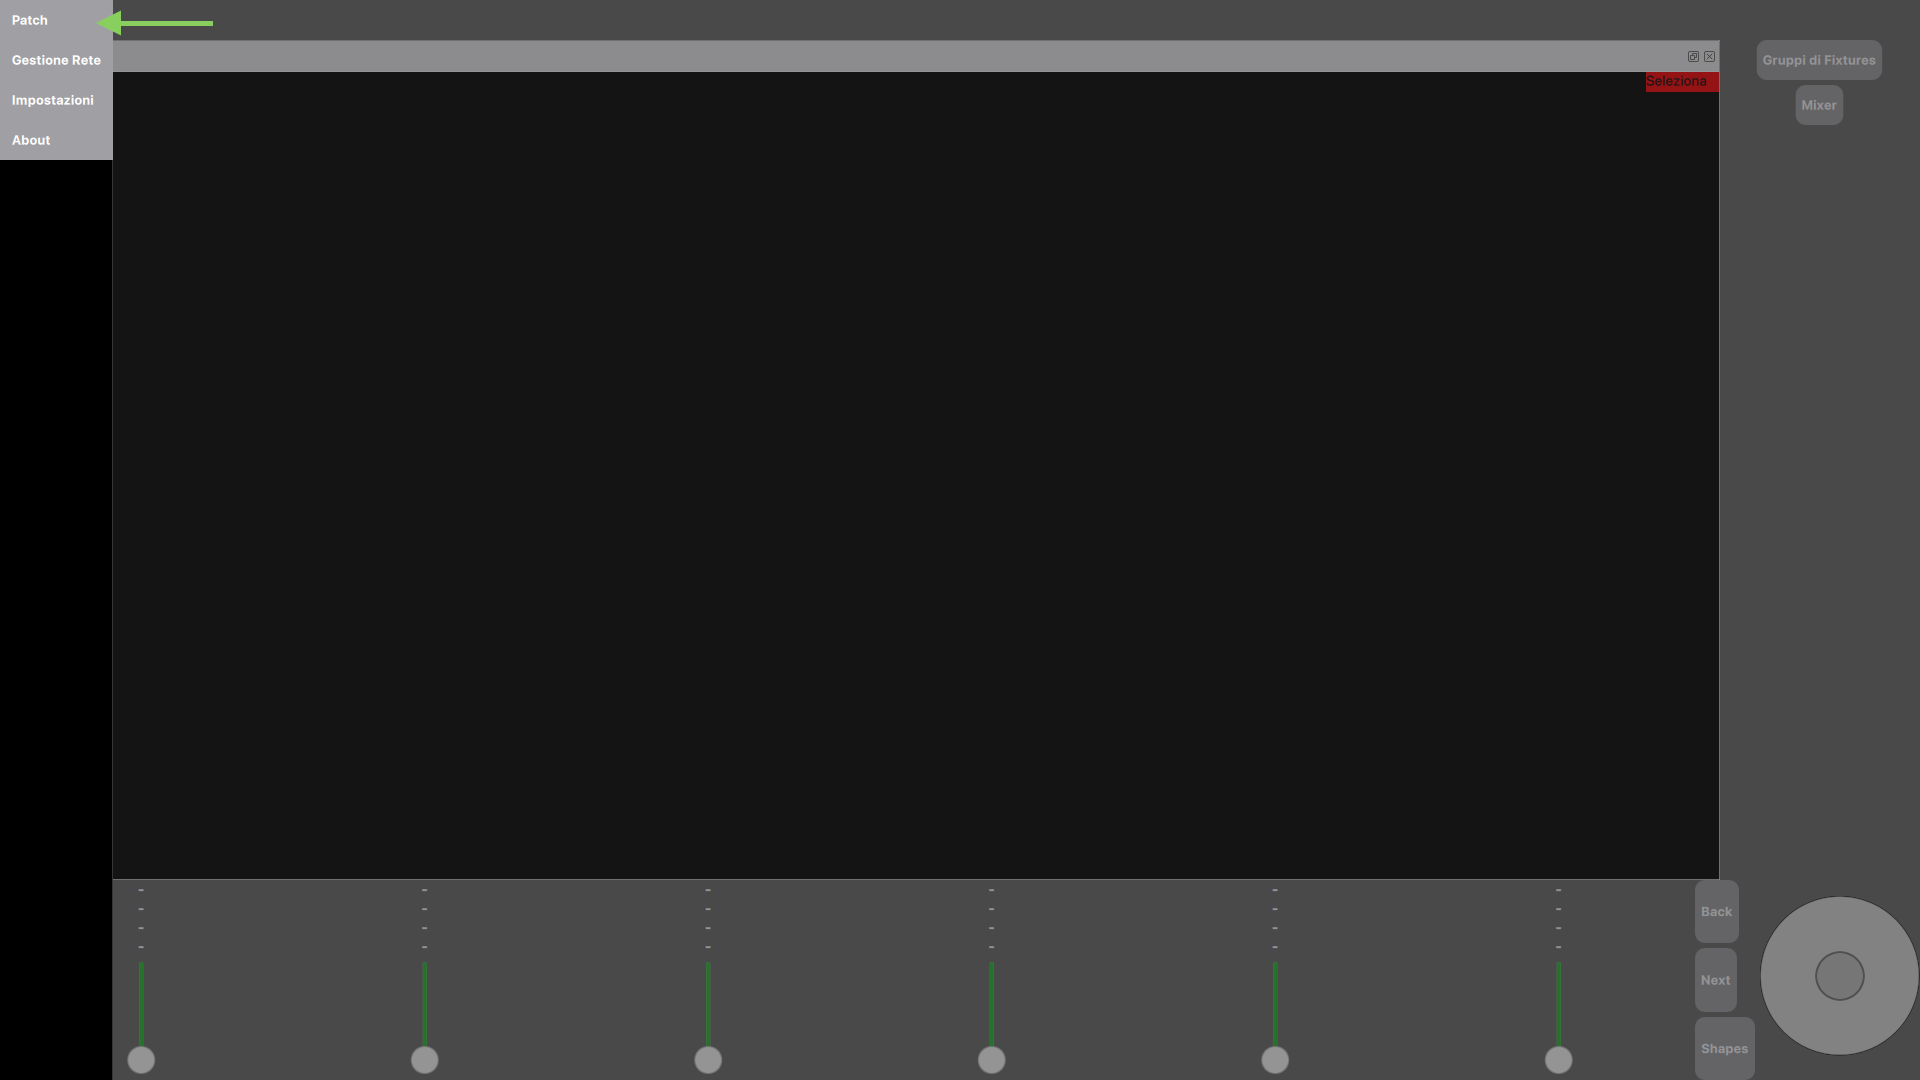
To choose the brand of the fixture, simply click on its name and only after choosing the brand the list of available models will be displayed.
After selecting a model, the relative DMX modes supported by the fixture will appear.
On the left there are fields for entering the DMX universe (1), the DMX address (2) and the name that will be displayed on the home page (3).
Furthermore, field (4) specifies the number of fixtures of the same type that you want to insert.
After setting all the fields correctly, the "Patch" button will appear to complete the procedure.
The interface displayed is the following:
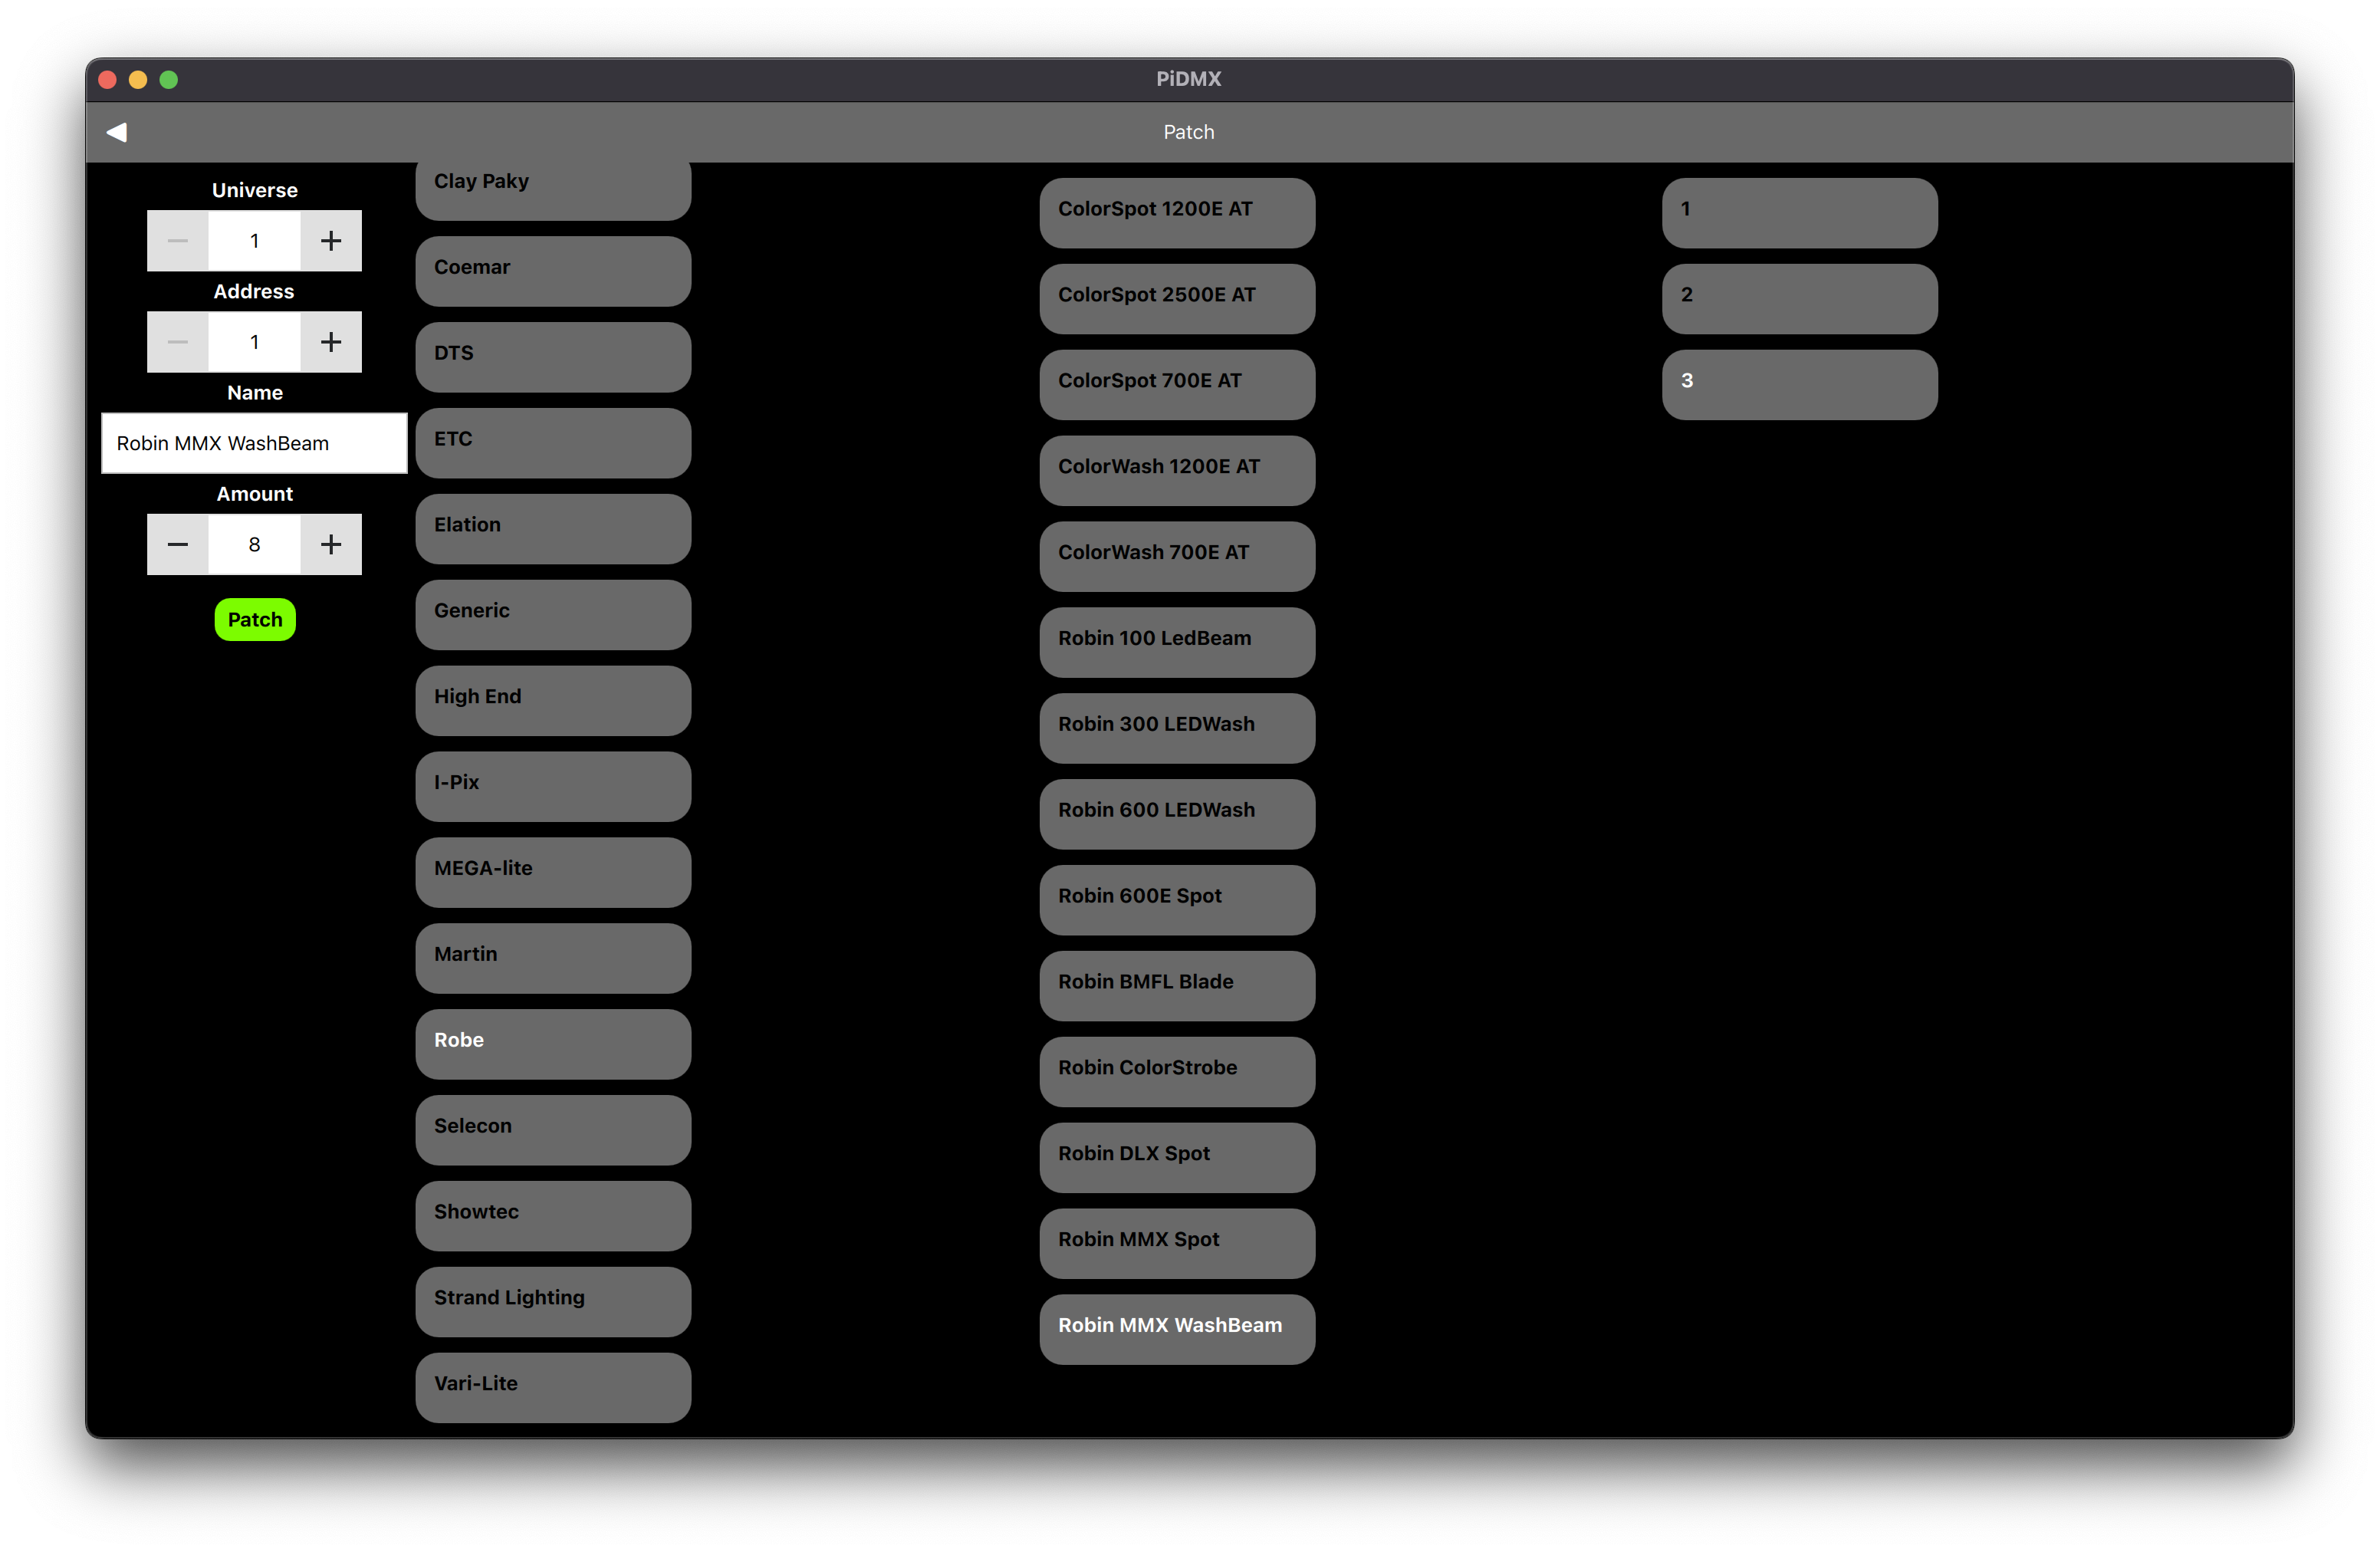
Click on the "OK" button to remove the patching notice and return to the main screen by clicking on the arrow at the top left, as shown in the following image:
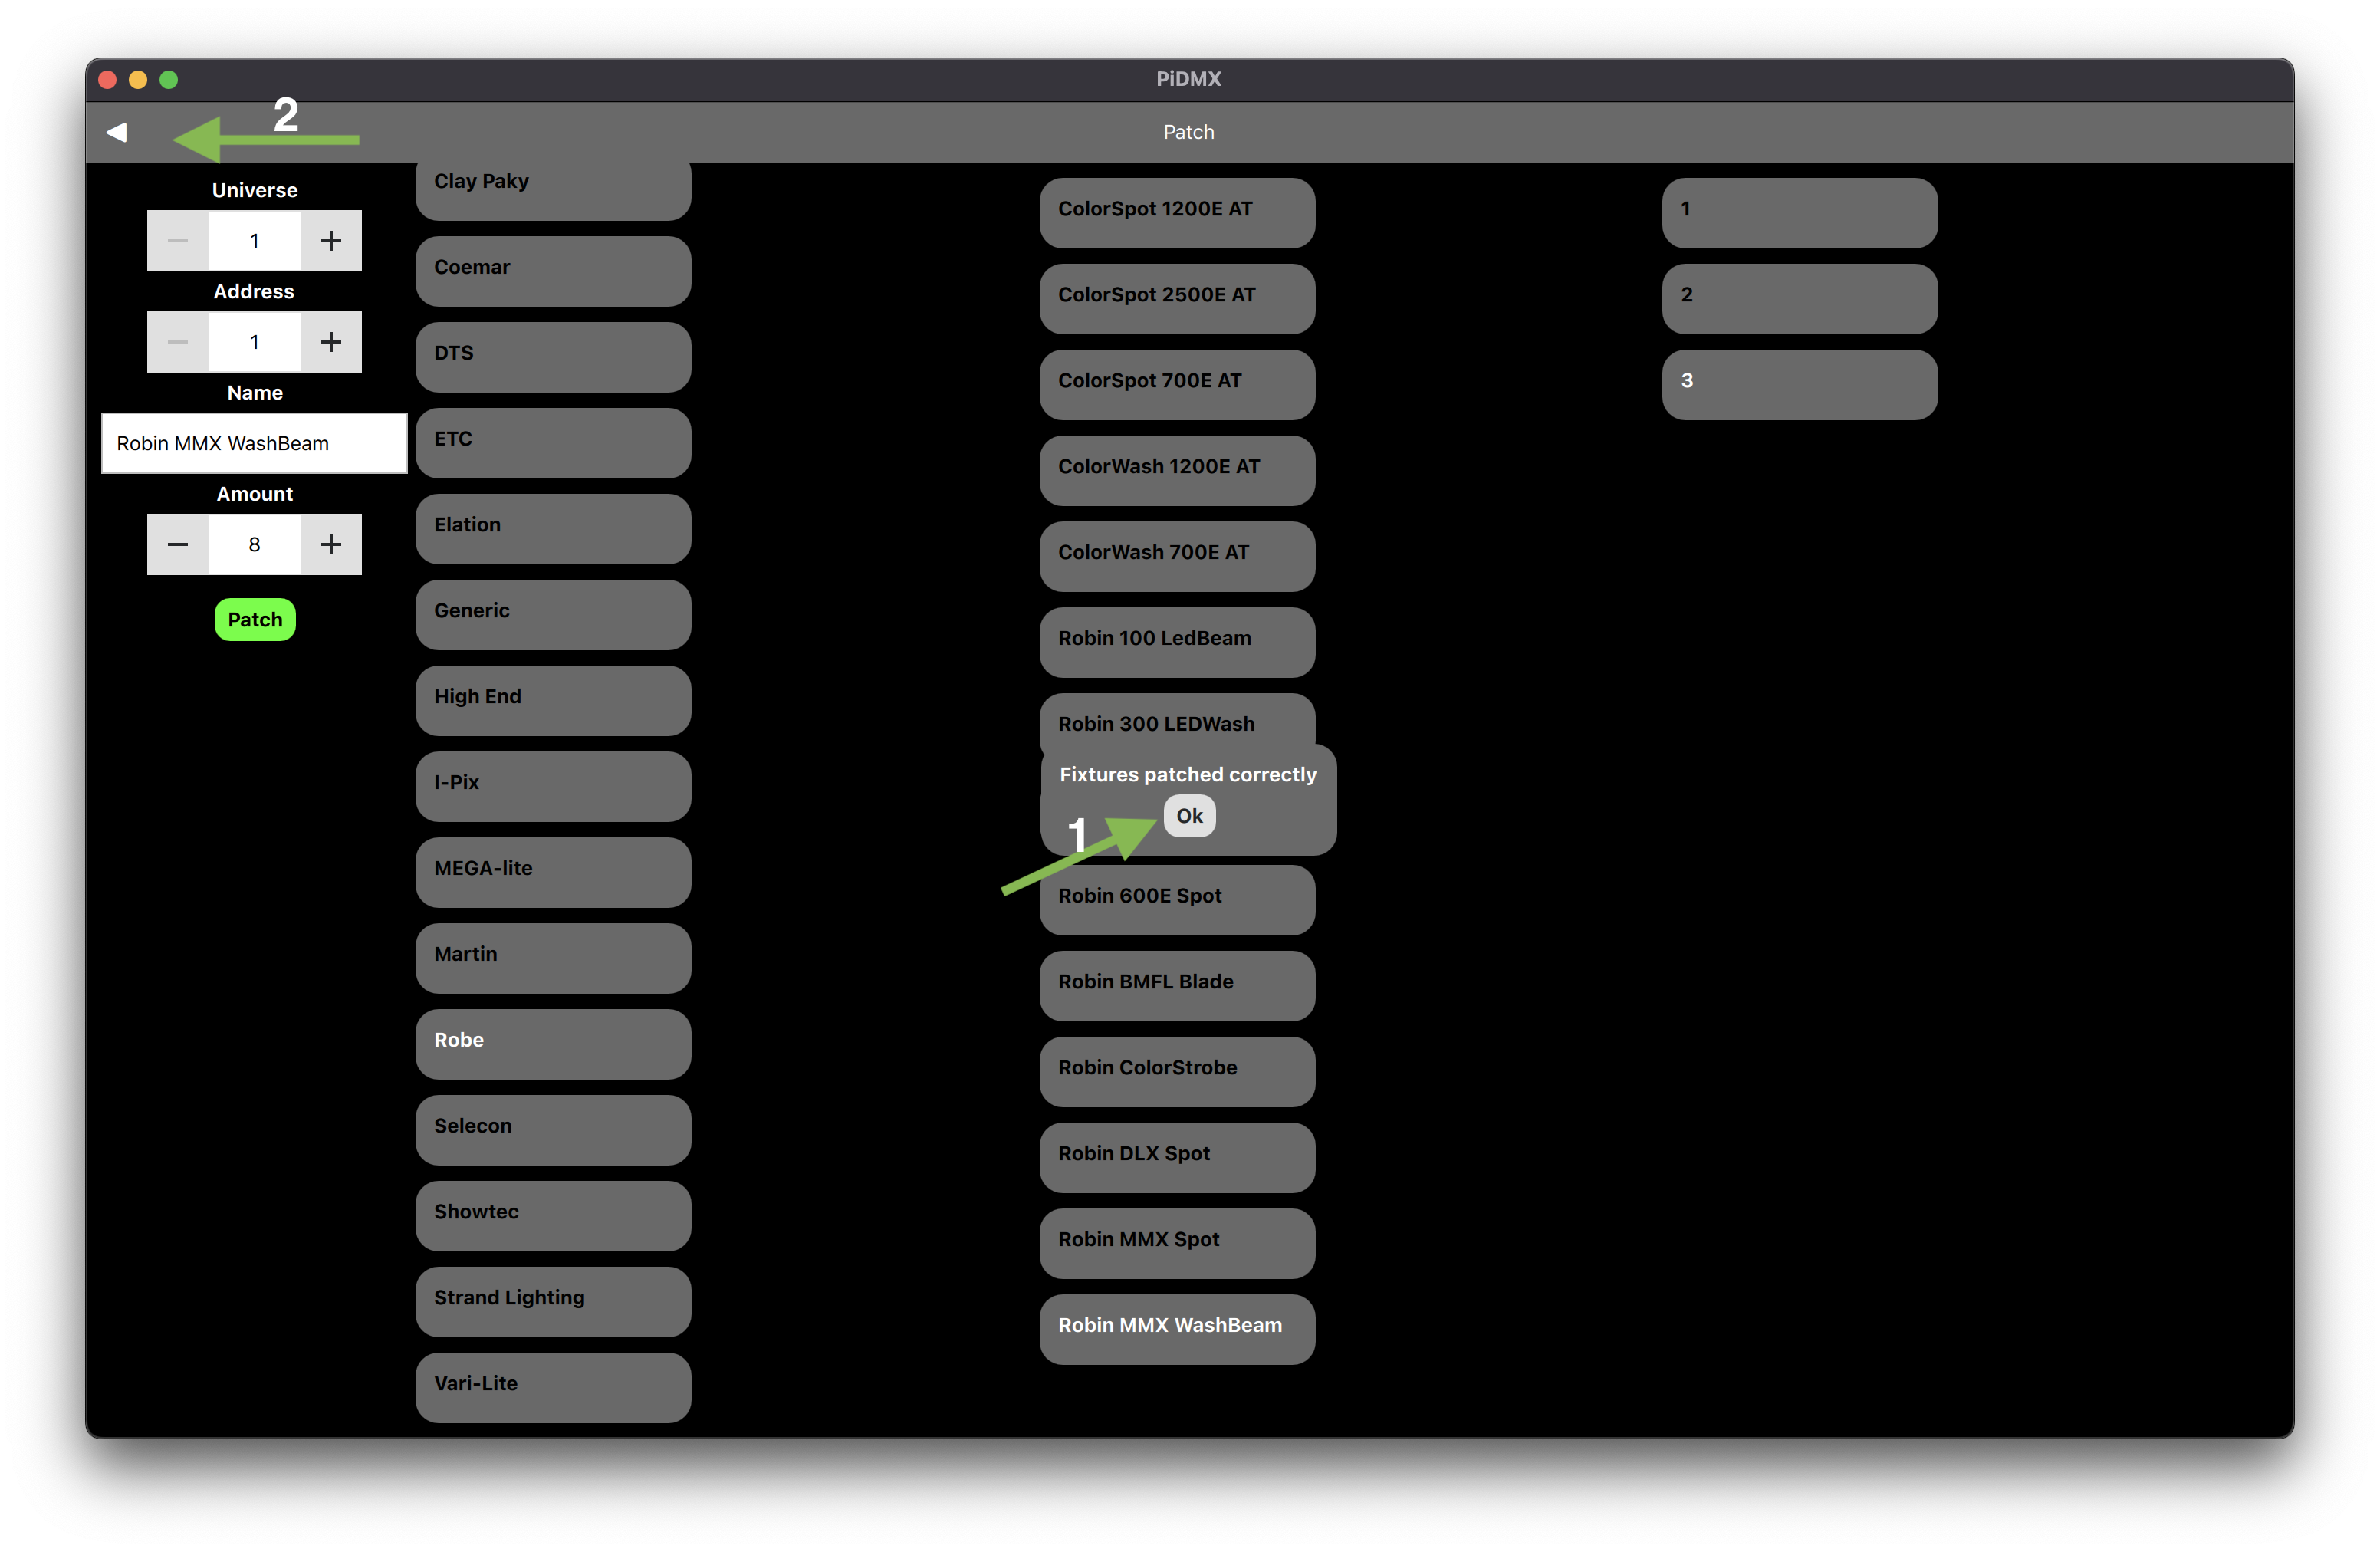
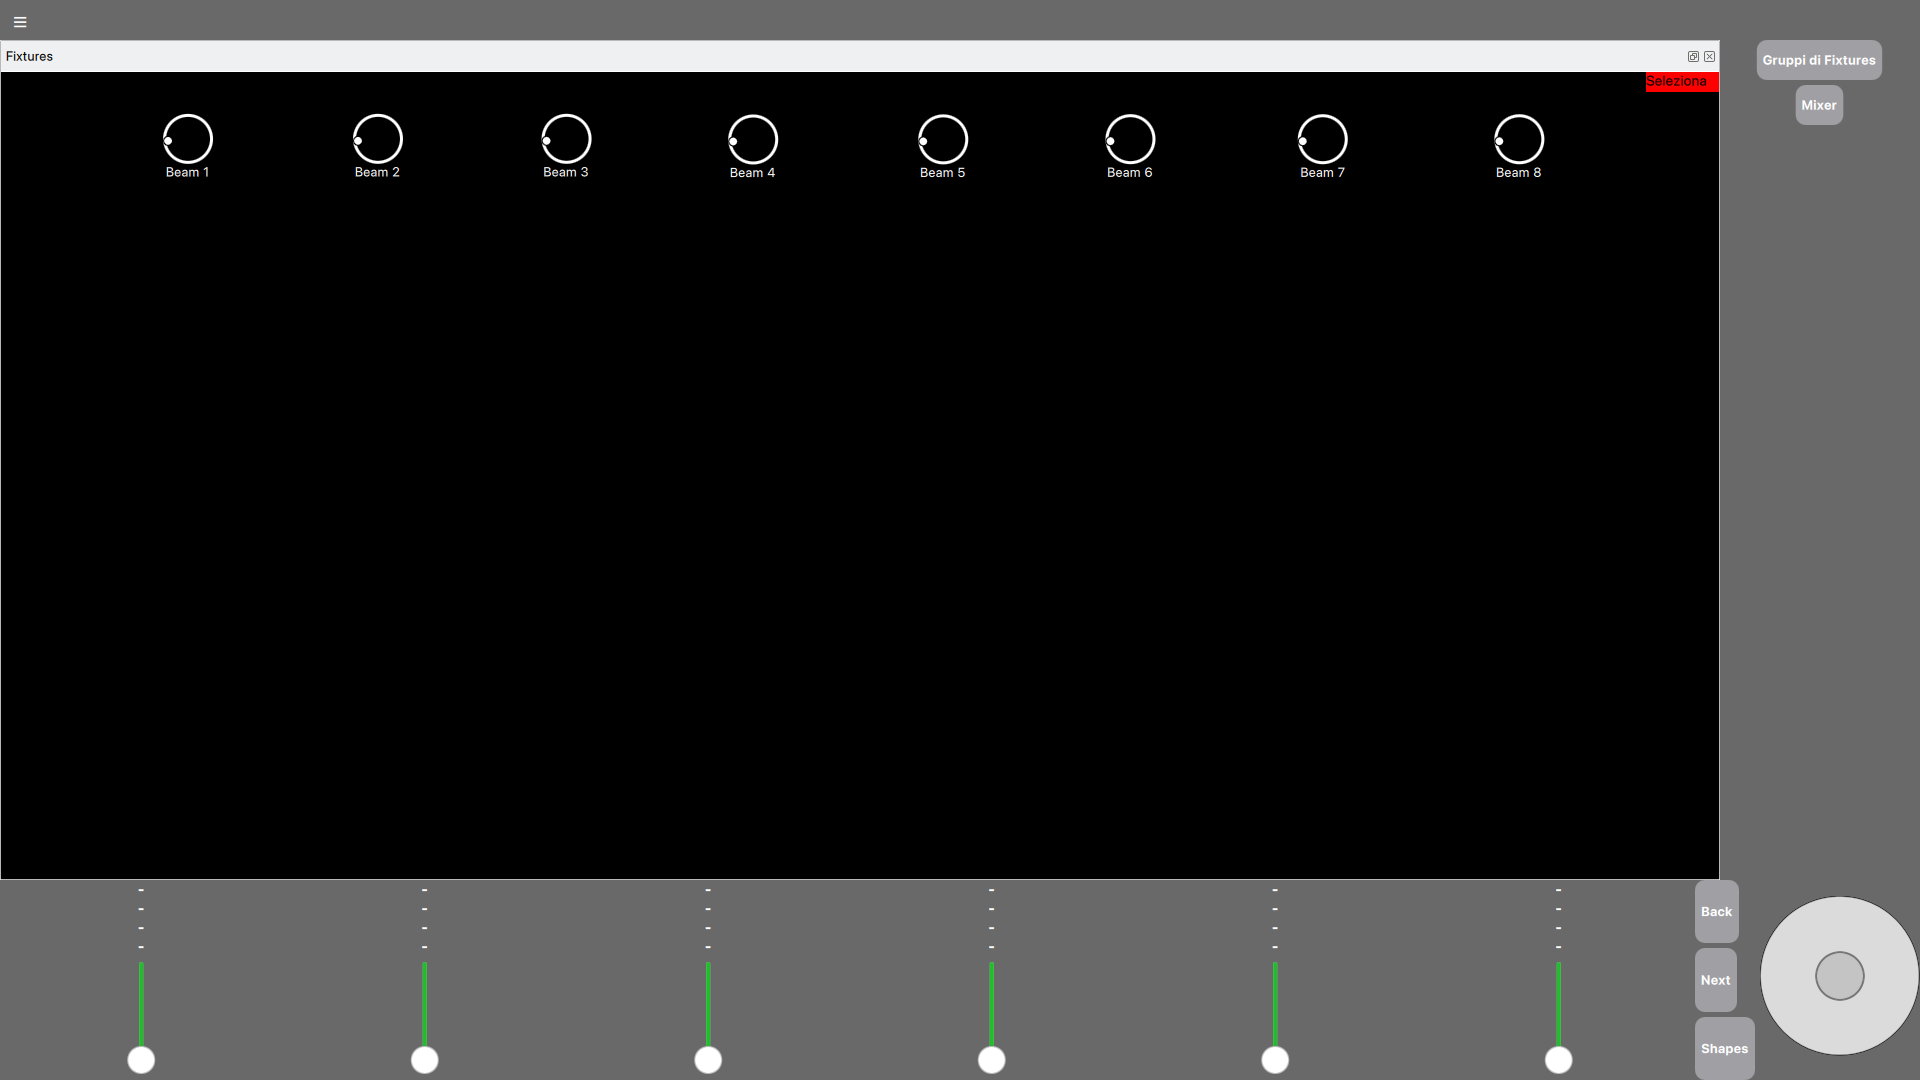
Each type of fixture inserted will appear on the main page with a different aspect.
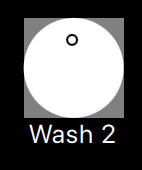
Currently, motorized and non-motorized fixtures are distinguished. In the first case, that is the one in which the fixtures are equipped with Pan and Tilt parameters, the displayed aspect will be the following, and the small white circle will move according to the pan and tilt parameters:
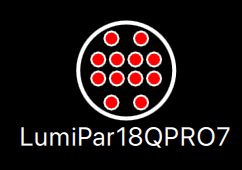
In the second case, that is the one represented by the non-motorized fixtures, the appearance will be the following. Furthermore, if the fixture is equipped with the "Red" or "Green" or "Blue" parameters, the color of the individual leds of the icon will change according to the aforementioned parameters. In this case, a non-motorized fixture is displayed in which the "Red" parameter has been set to 255:
Layout Editing
From the home page it is possible to change the position of the fixtures on the screen by clicking on the "Select" button at the top right. This will change the button's name (from "Select" to "Edit") and its background (from red to green). This means that you are into the "Edit Layout" mode.
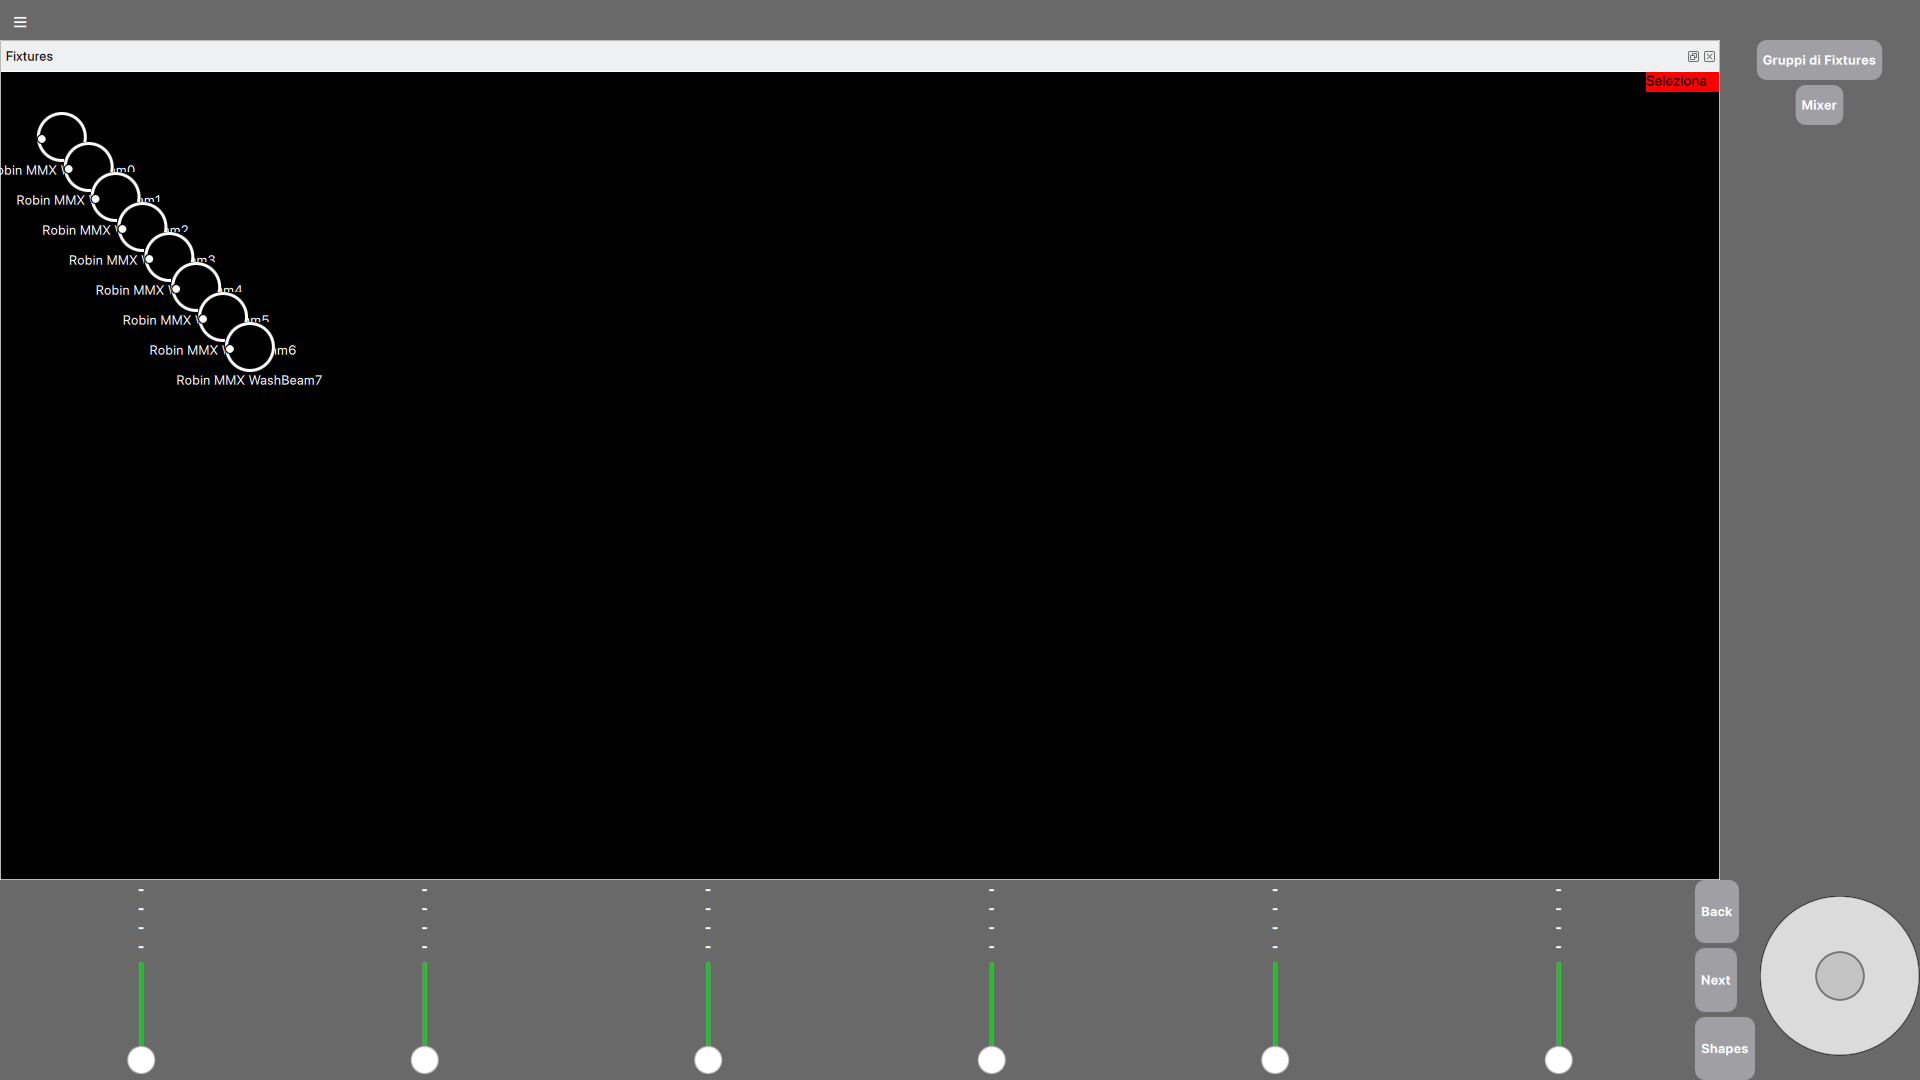
In "Edit Layout" mode, simply click and hold the left mouse button to drag the fixture to the desired position. After making the desired changes, to return to the "Selection" mode, press the "Edit" button at the top right corner. A possible final realization is the following:
Selection and Control
To select and deselect a fixture from the main page, just click with the left button on the fixture itself. The selected fixtures will appear with a gray background.
In the following example you can see how the selected fixtures are "Wash 3", "Wash 4", "Wash 5" and "Wash 6".
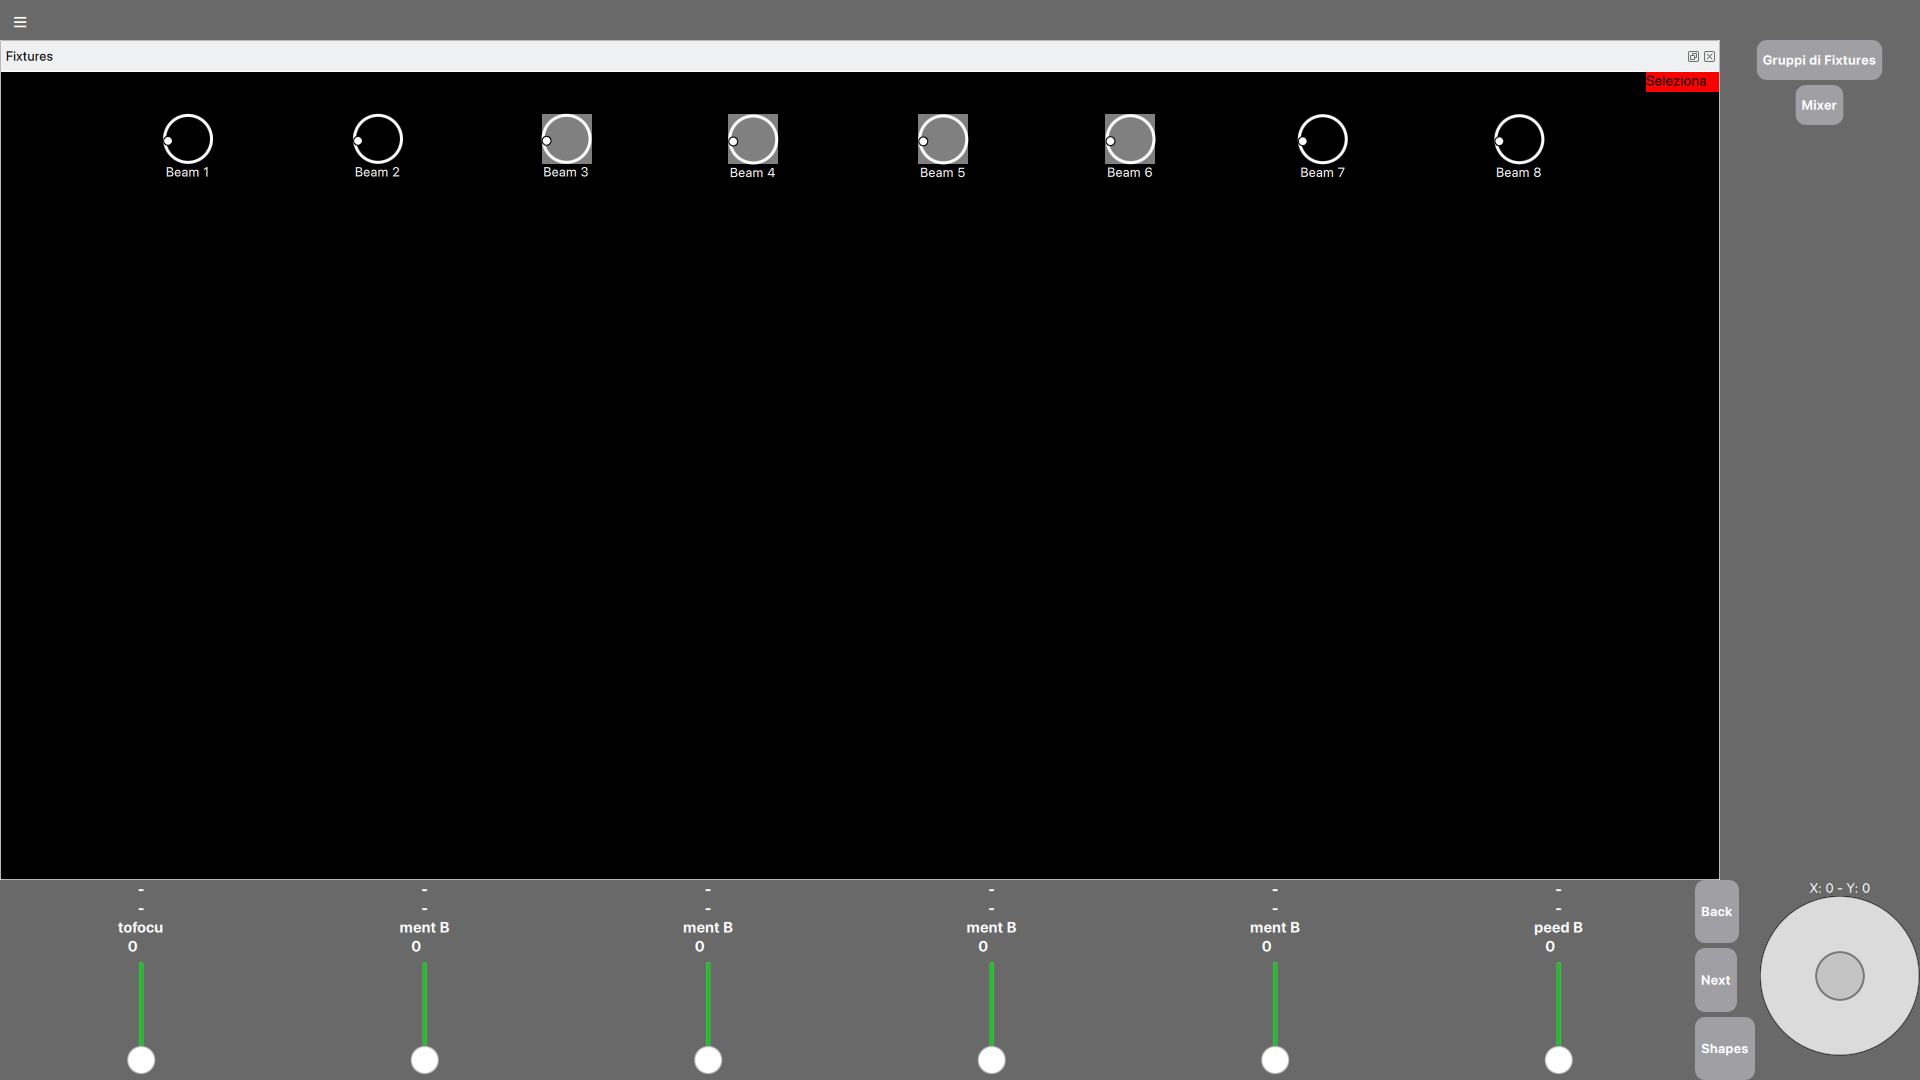
After selecting one or more fixtures, the names of the channels will appear above the faders located on the bottom side of the application.
These channels can be controlled by the sliders immediately below. Using the "Prev" and "Next" buttons it is possible to change the page to view the other parameters.
This part of the application simulates the 40x4 character LCD display that will be used in the mixer (for more information about this see the homepage).
The Joystick allows you to control the "Pan" and "Tilt" parameters.
Groups
You can open the fixture groups windows pressing the button "Fixture Groups" on the top right of PiDMX or clicking the button "Groups" on PiDMX Mobile.
Select the fixtures which you make a group and then press the button "New Group" to create a new fixture group. Then, click on the new button that appears to select/deselect all the fixture of the group.
Effects
ATTENTION: for the example we used the "Circle" effect belonging to the "Movement" category.
First of all, select the fixtures with which you want to create the effect. Then press the "Shapes" button located on the bottom side of the application.
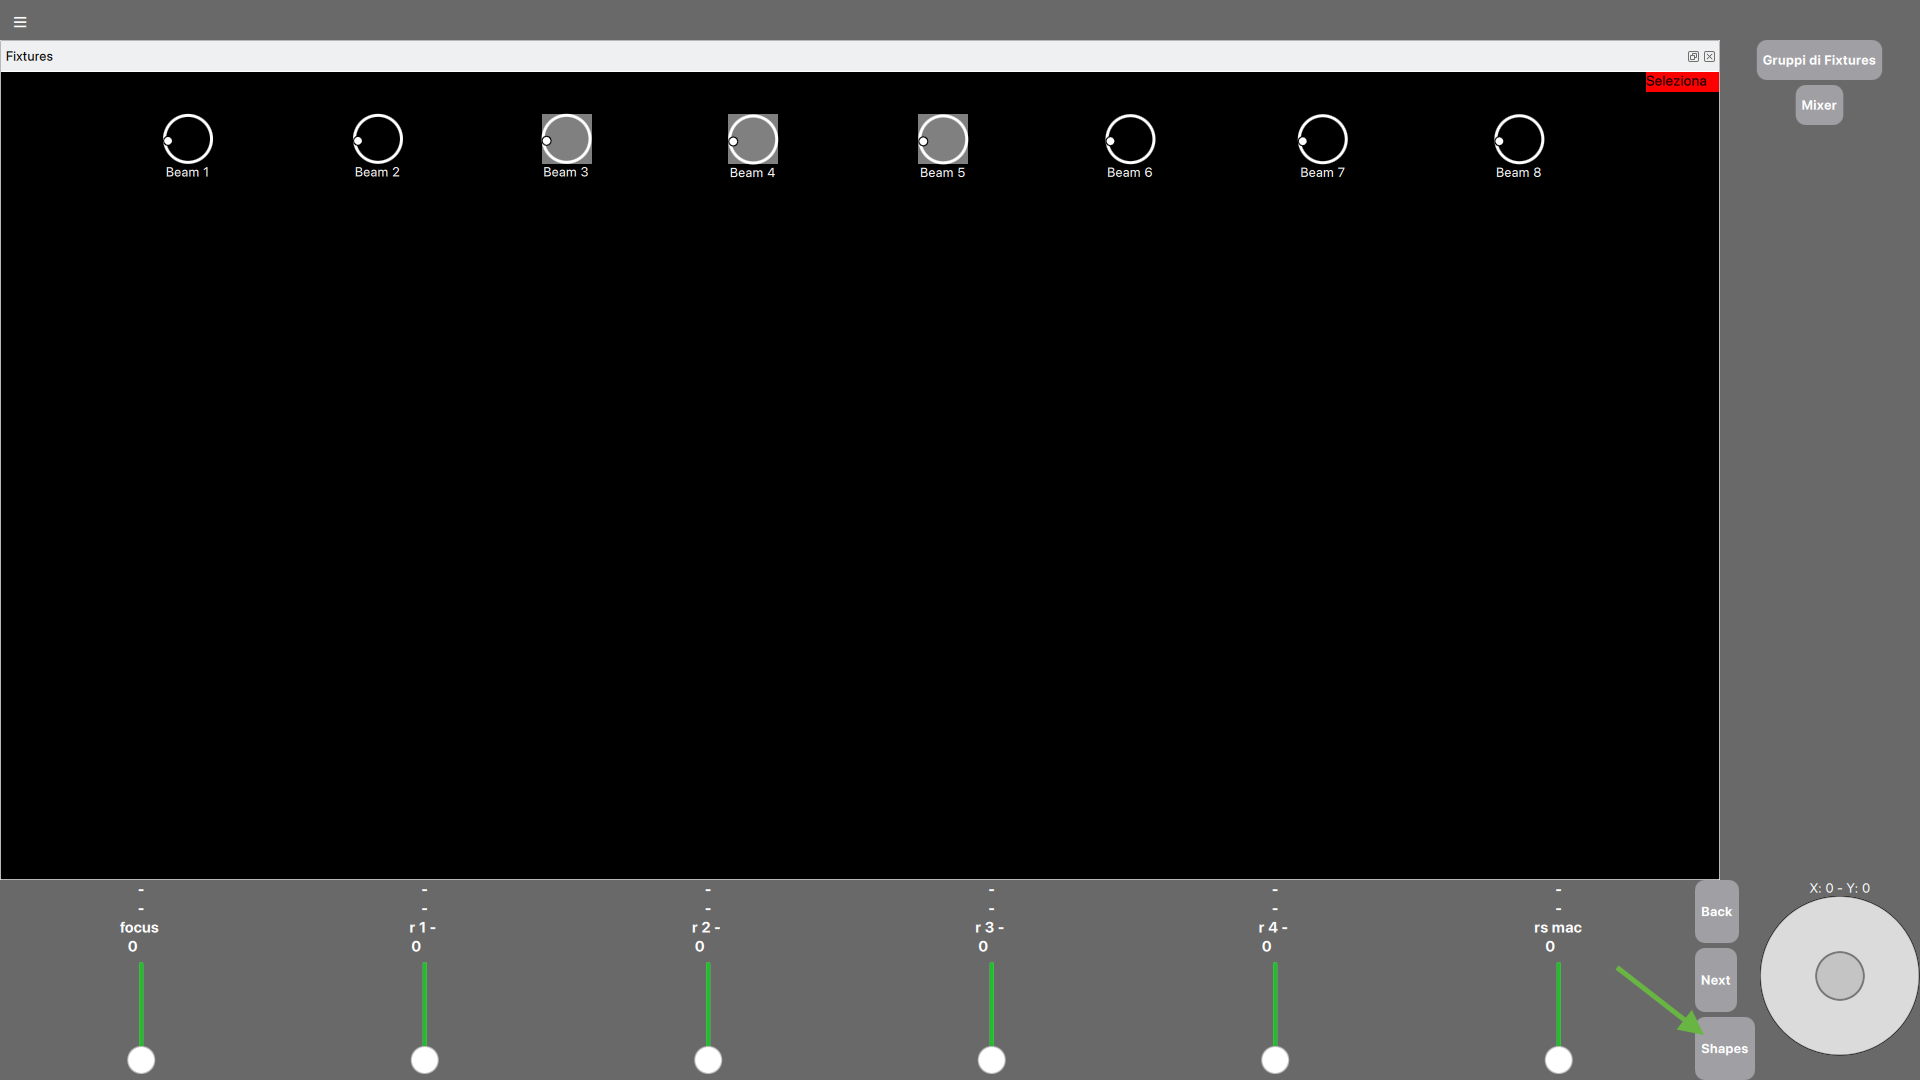
After pressing the "Shapes" button, the cursors below will assume the following functions:
Note: Depending on the effect category you choose, controls 3 and 4 will take on different functions.
After creating the effect, you can go to the next page ("Next" button) to add a new one. To modify one or more effects previously created, simply return to the page of the effect to be modified using the "Prev" button. The change can also be done while the effect is running.
To remove an effect, simply reset the slider for the category to 0.
To exit the effect mode and go back to modifying the DMX parameters of the selected fixtures, simply press the "Shapes" button again.
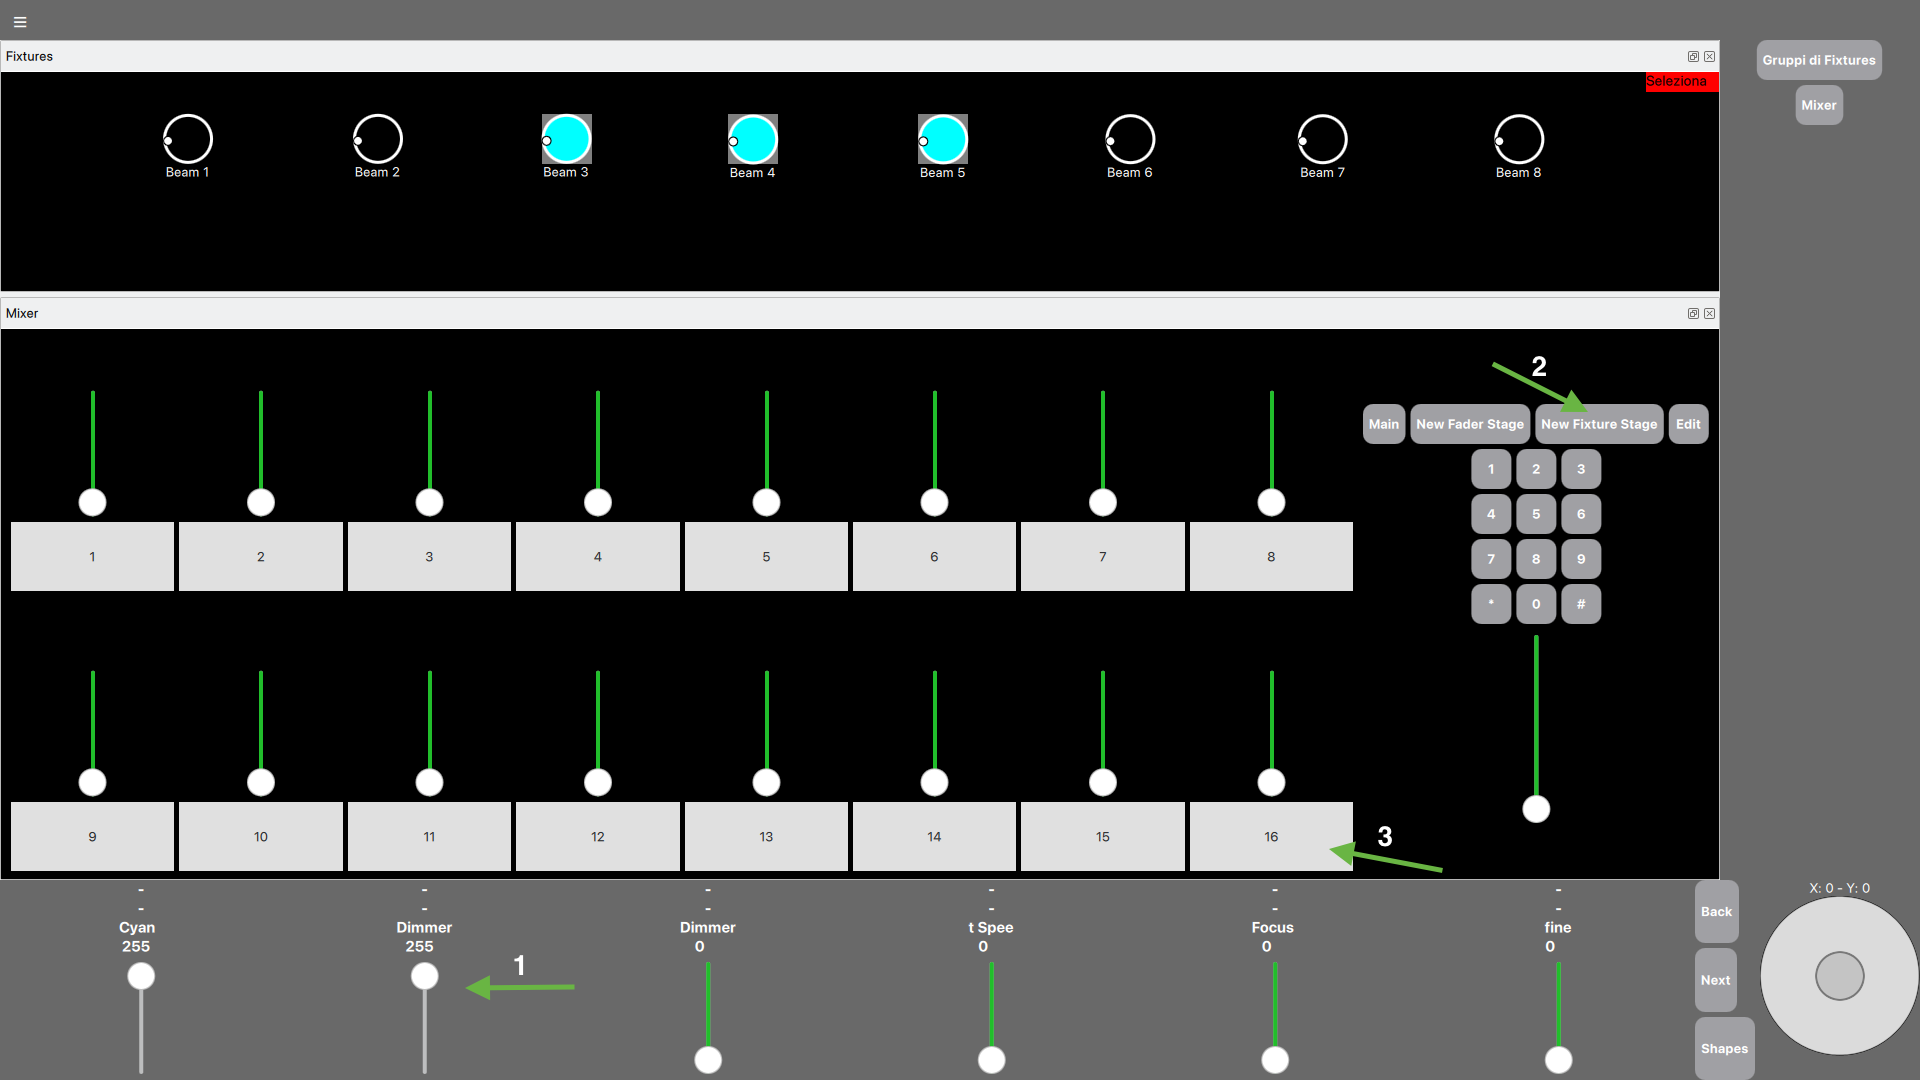
Storing a chase from fixture's parameters
First locate a "Chase" type fade (see Faders Customization).
ATTENTION: the chase will be stored only with the values of the selected fixtures.
In a new chase, to insert the values of the selected fixtures's parameters it is sufficient to:
After releasing the key associated with a "Chase" type fader, move the fader to evaluate the saved effects.
The following screenshot shows the steps to be taken for saving:
Creating a chase list
First of all, make sure you have at least one "Scene List" type cursor available (see Editing cursors).
Once we have a "Scene List" type cursor, it is sufficient to start memorizing the sequence of scenes as illustrated in the paragraphs "Storing a chase" and "Storing a scene from the parameters of a fixture".
After that, raising and lowering the slider switches from one scene to the next.
It is also possible to move from one scene to the next by pressing the key associated with the cursor. To do this you need to change the cursor transition mode by holding down the "Edit" key and changing the "Mode" to "On Key".
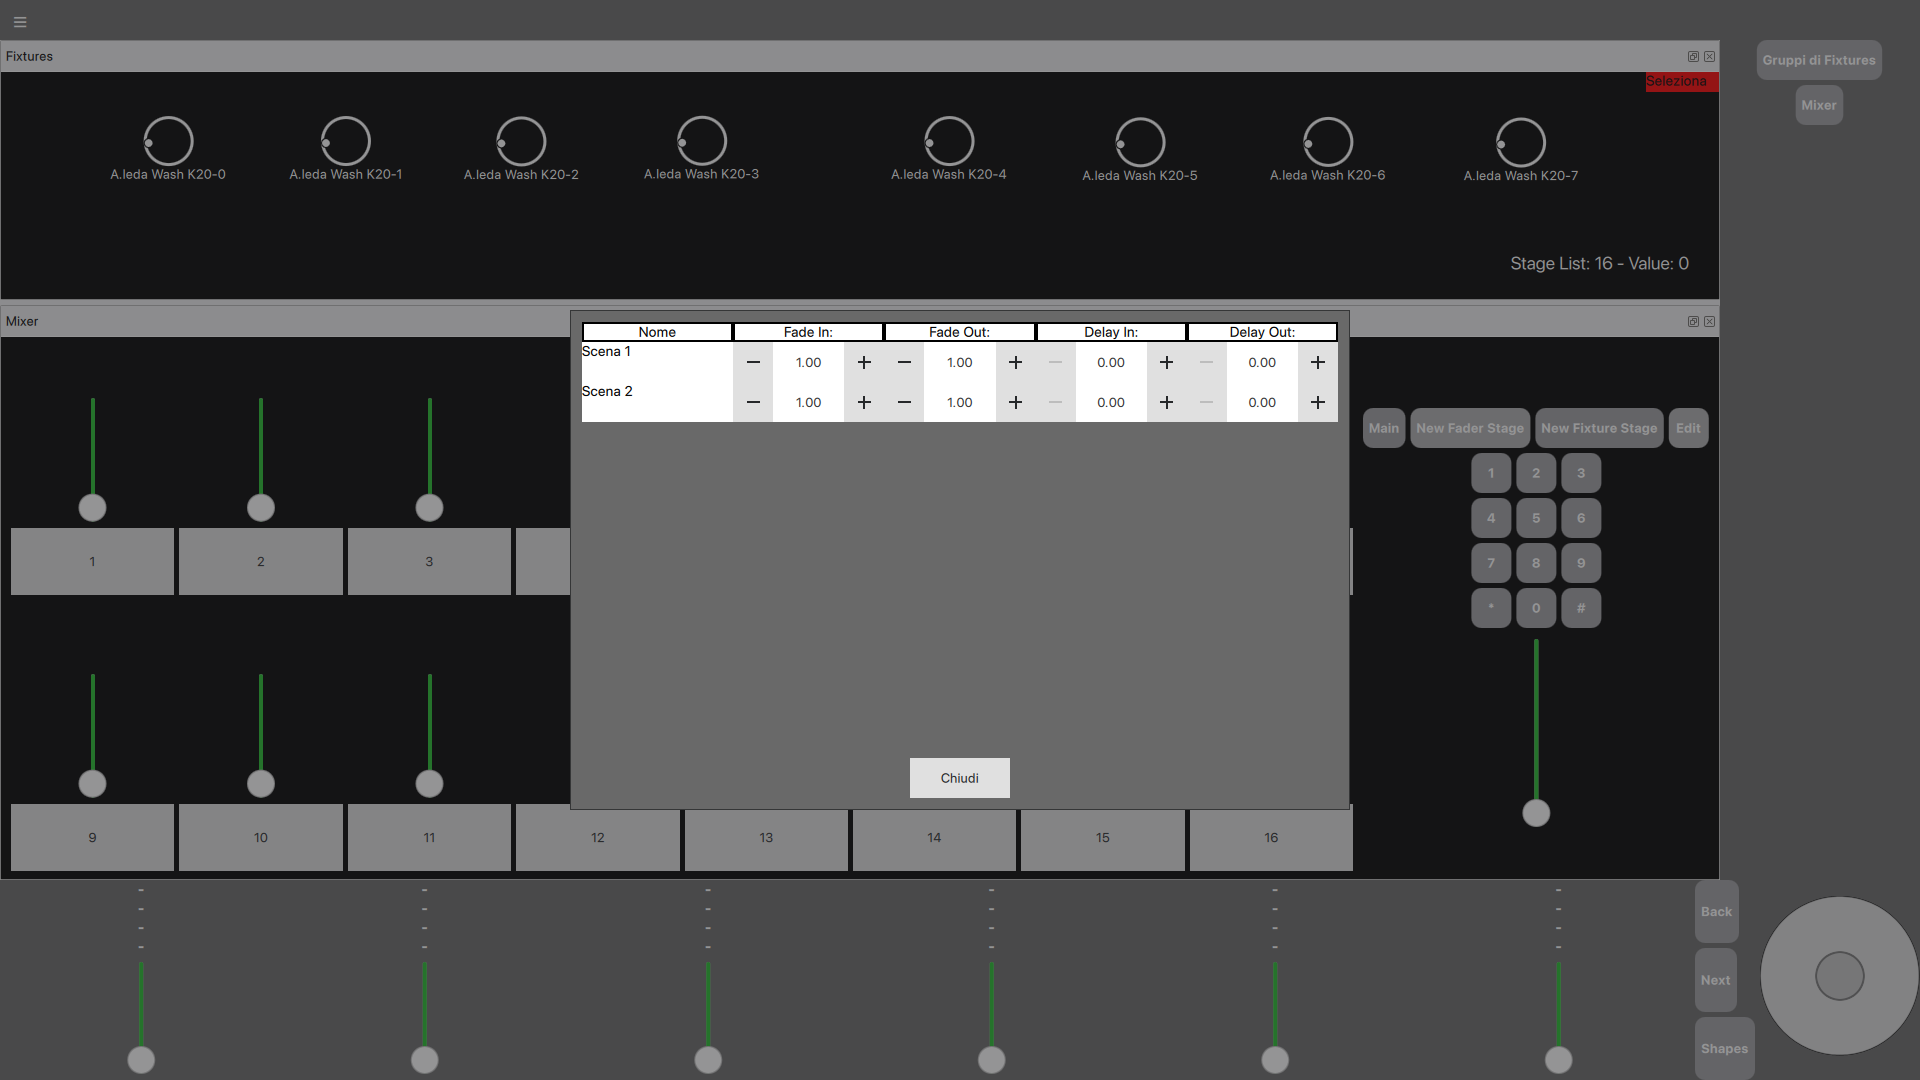
By clicking on "Edit Scene List", however, you can specify the fade in/out times and delays that will be applied when the key associated with the cursor is pressed.
Network Management
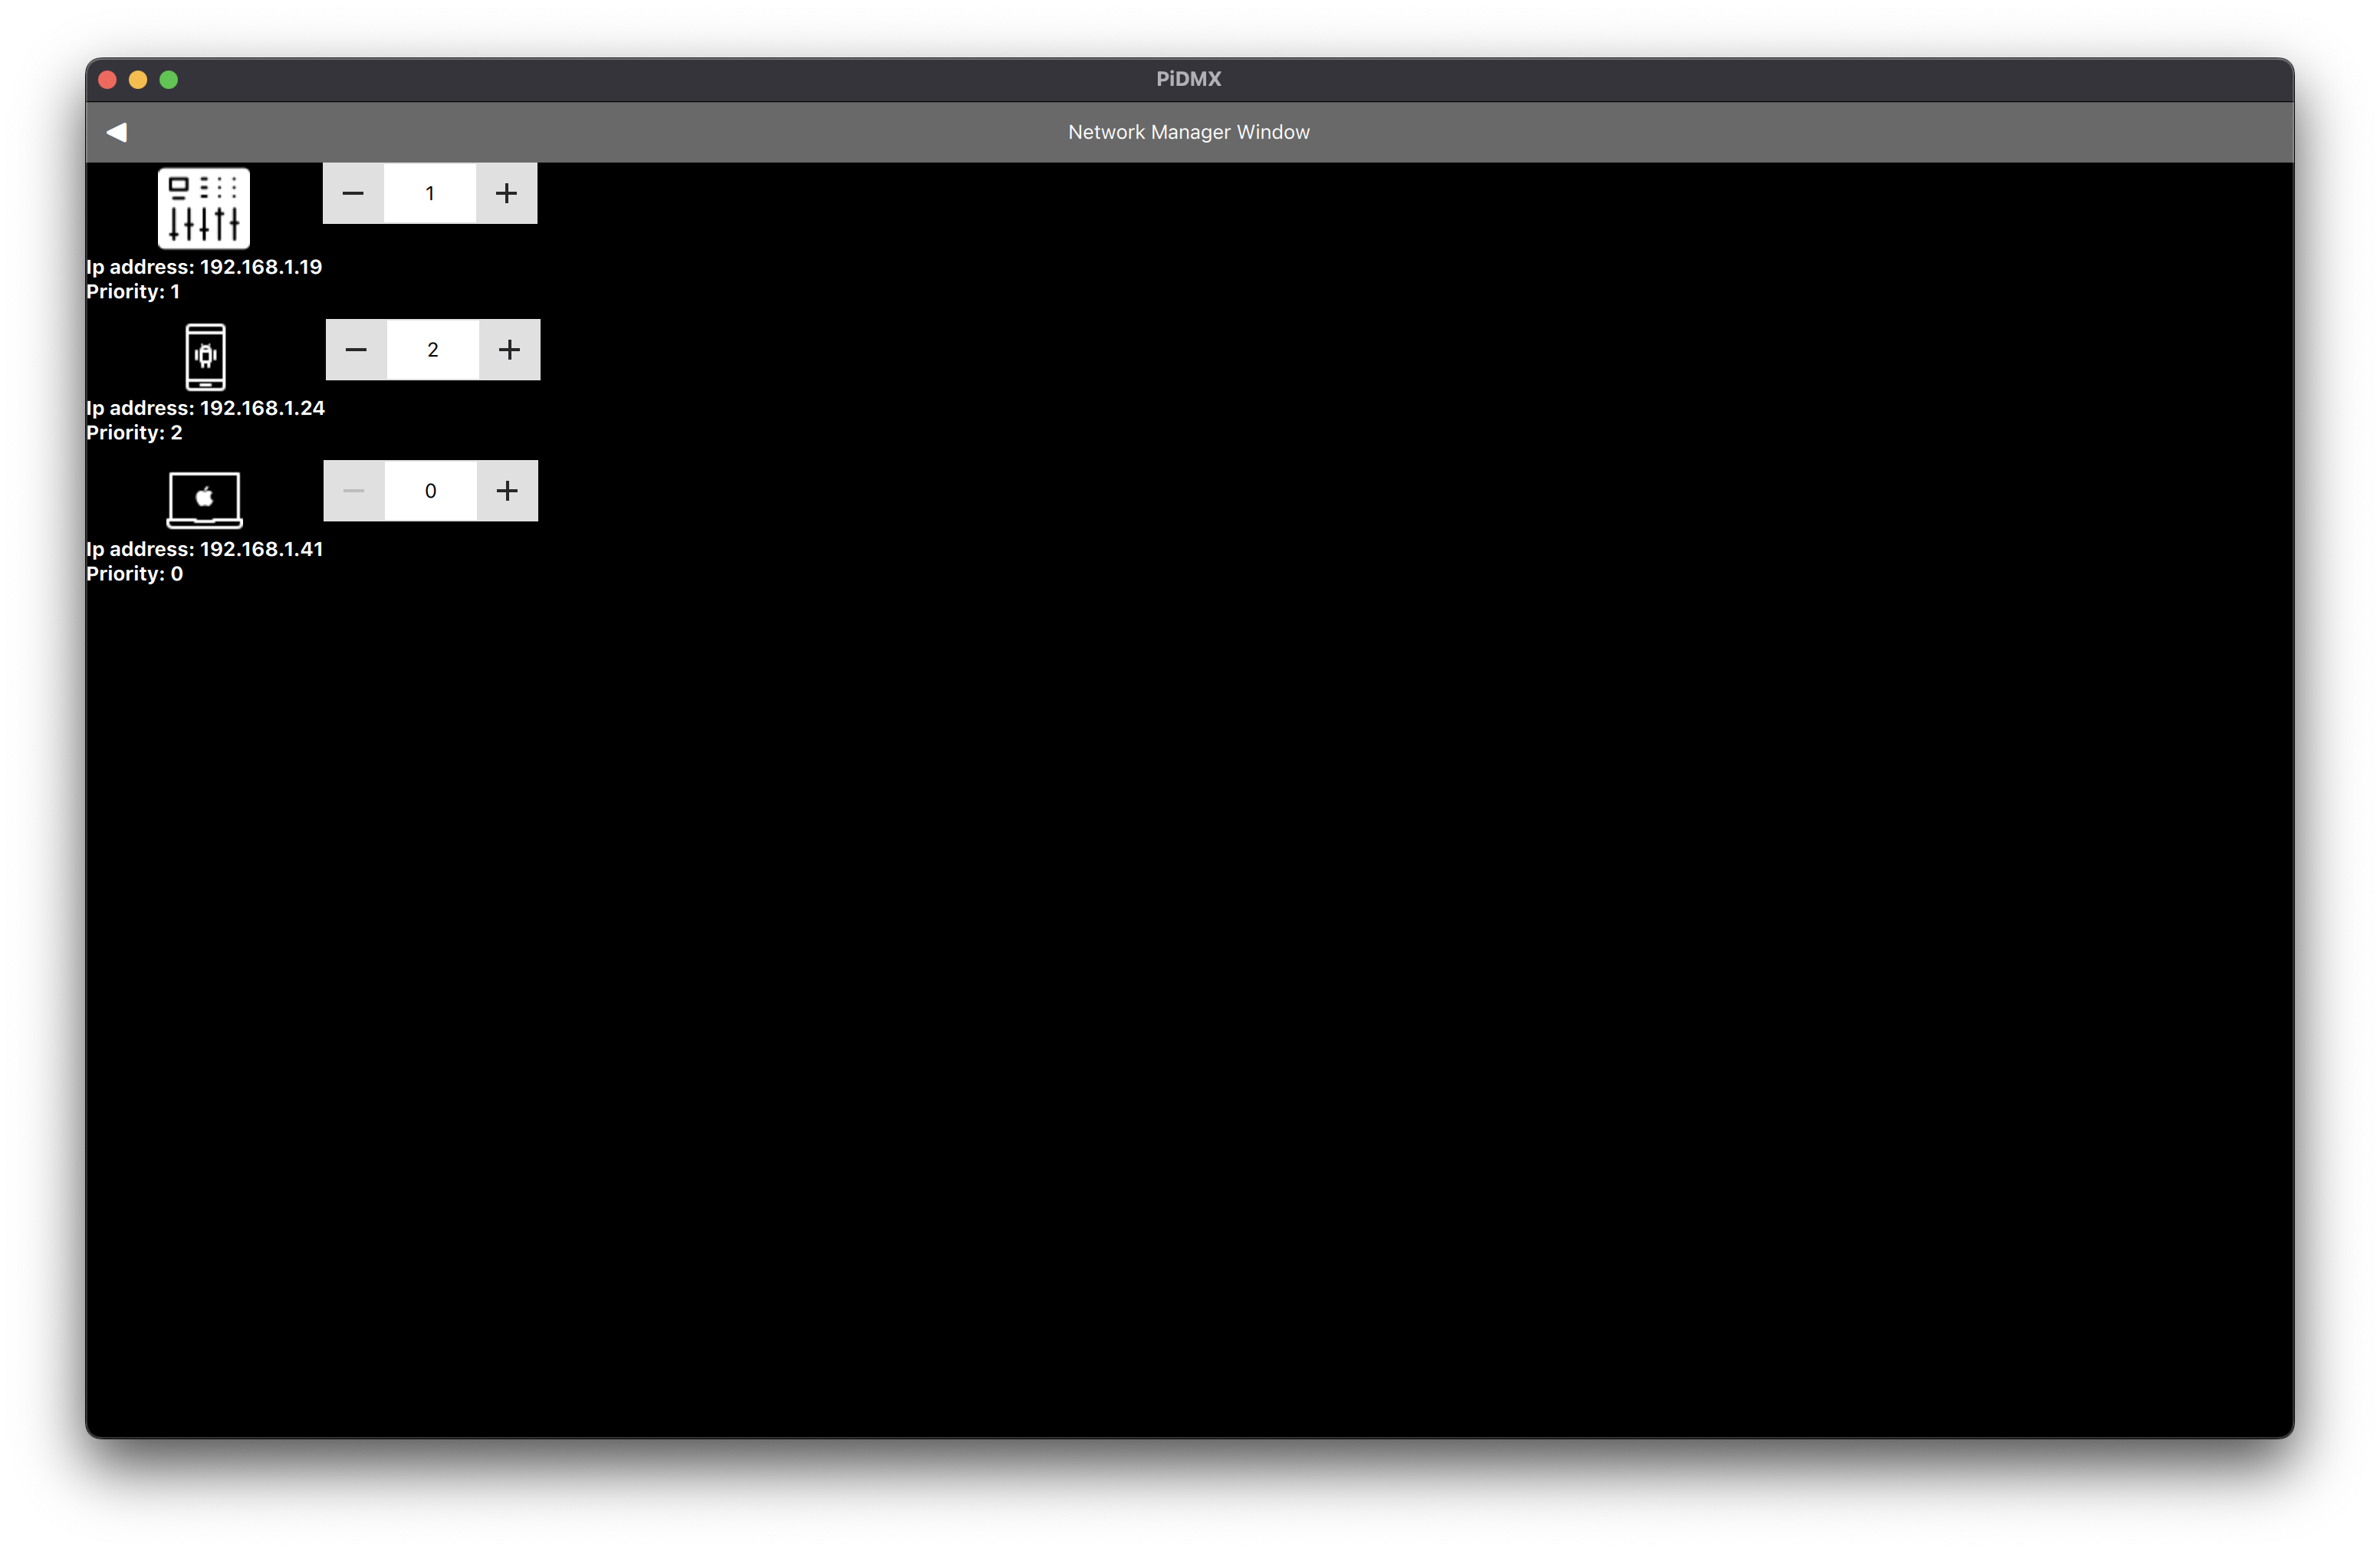
A set of separate devices running "PiDMX" and "PiDMX Mobile" create a "PiDMX network". In what follows, we will use the term "PiDMX node" to identify one of these devices.
Each PiDMX node has its own priority represented by an integer (from 0 to infinity). The lower this number is, the higher its priority is.
The PiDMX node that has the highest priority (lowest number) is the node from which the DMX signal will come out, all the other nodes with lower priority (highest number) will be nodes that will only be able to control the highest priority node.
Consequently, if the higher priority node were to interrupt its execution (for example, due to a crash), the control of the system and the DMX signal output will switch to the next higher priority node.
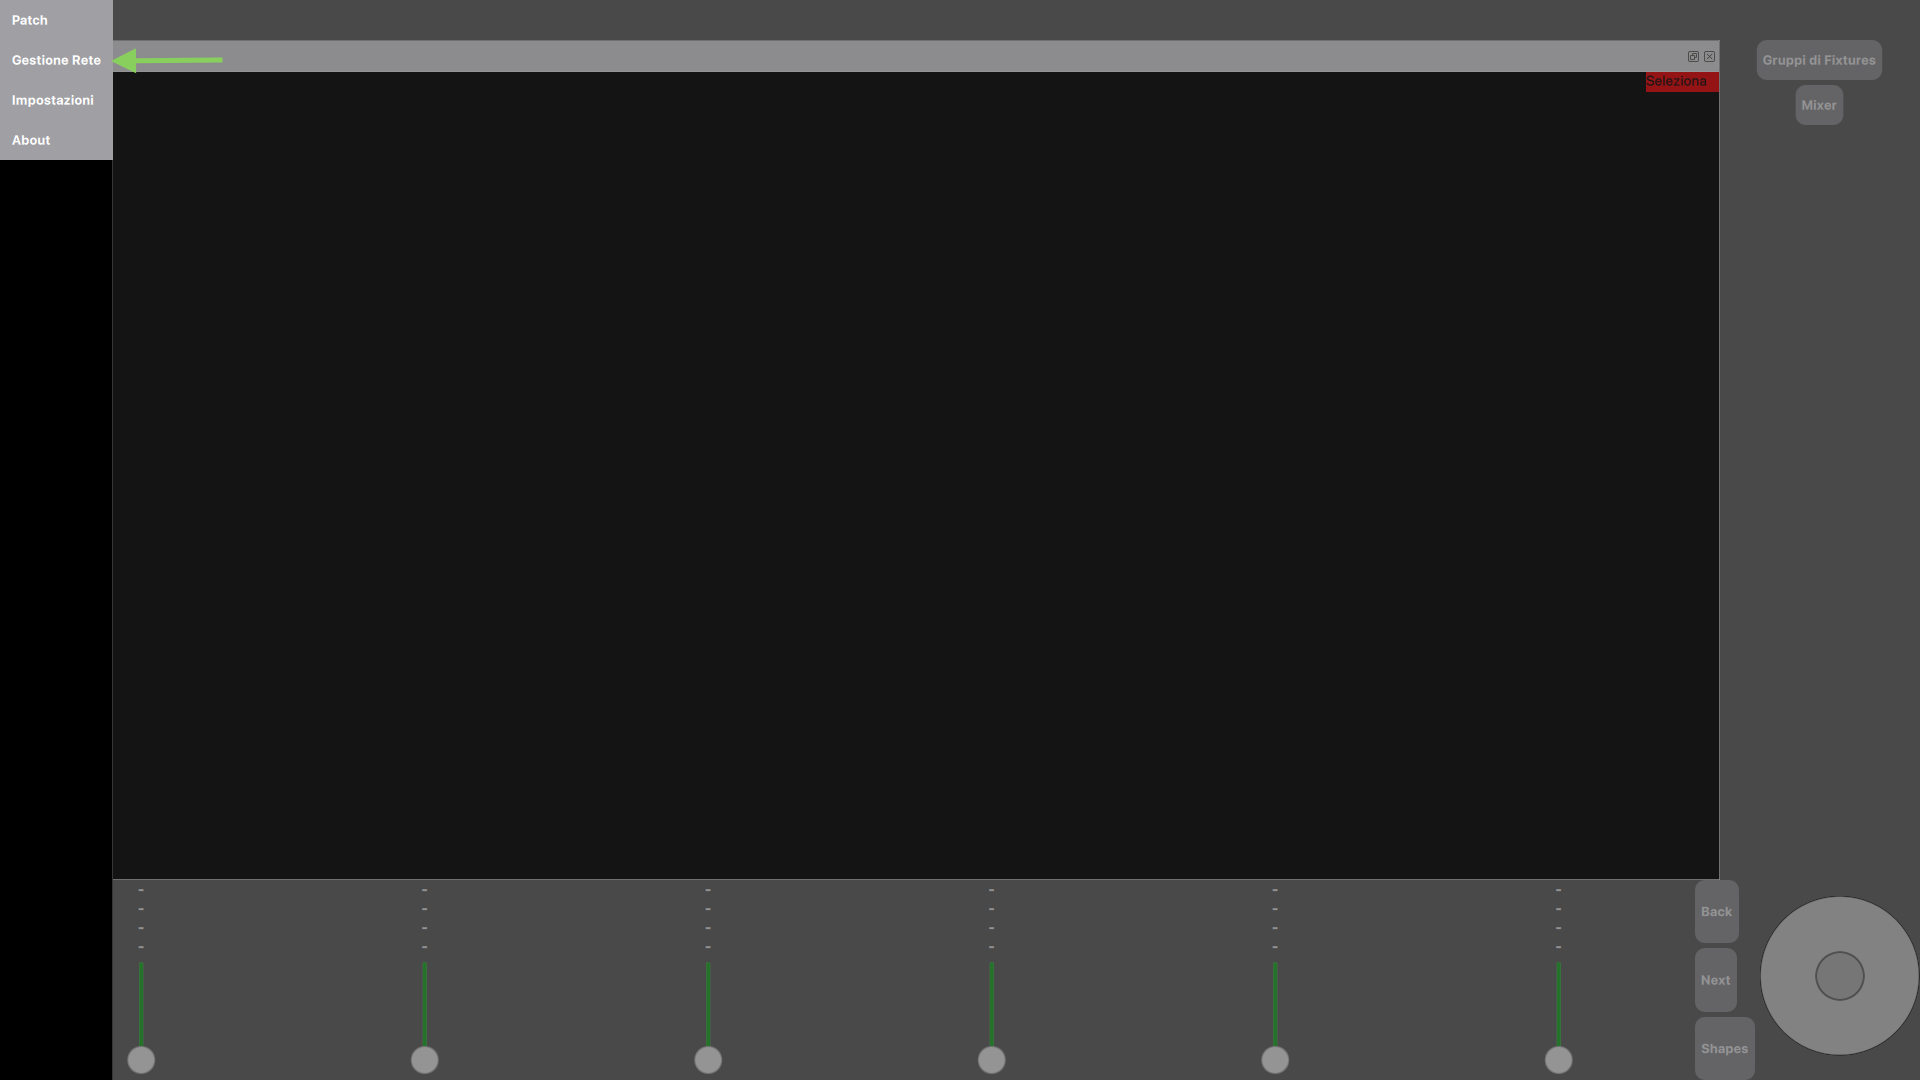
To change the priorities of each node on the network, simply open the main menu and click on the "Network Manager" item, as shown in the following screenshot:
N.B: for the nodes to be discoverable among themselves, they must all be connected to the same network.
For example, assuming you have the following nodes connected:
The window that will appear is the following:
Settings
Changing led color
It is possible to change the color of the LEDs associated with the individual cursors displayed on the control surface. The color is distinguishable based on the function of the individual slider. To change them, simply open the menu from the button at the top left of the Home screen and go to the "Settings" page:
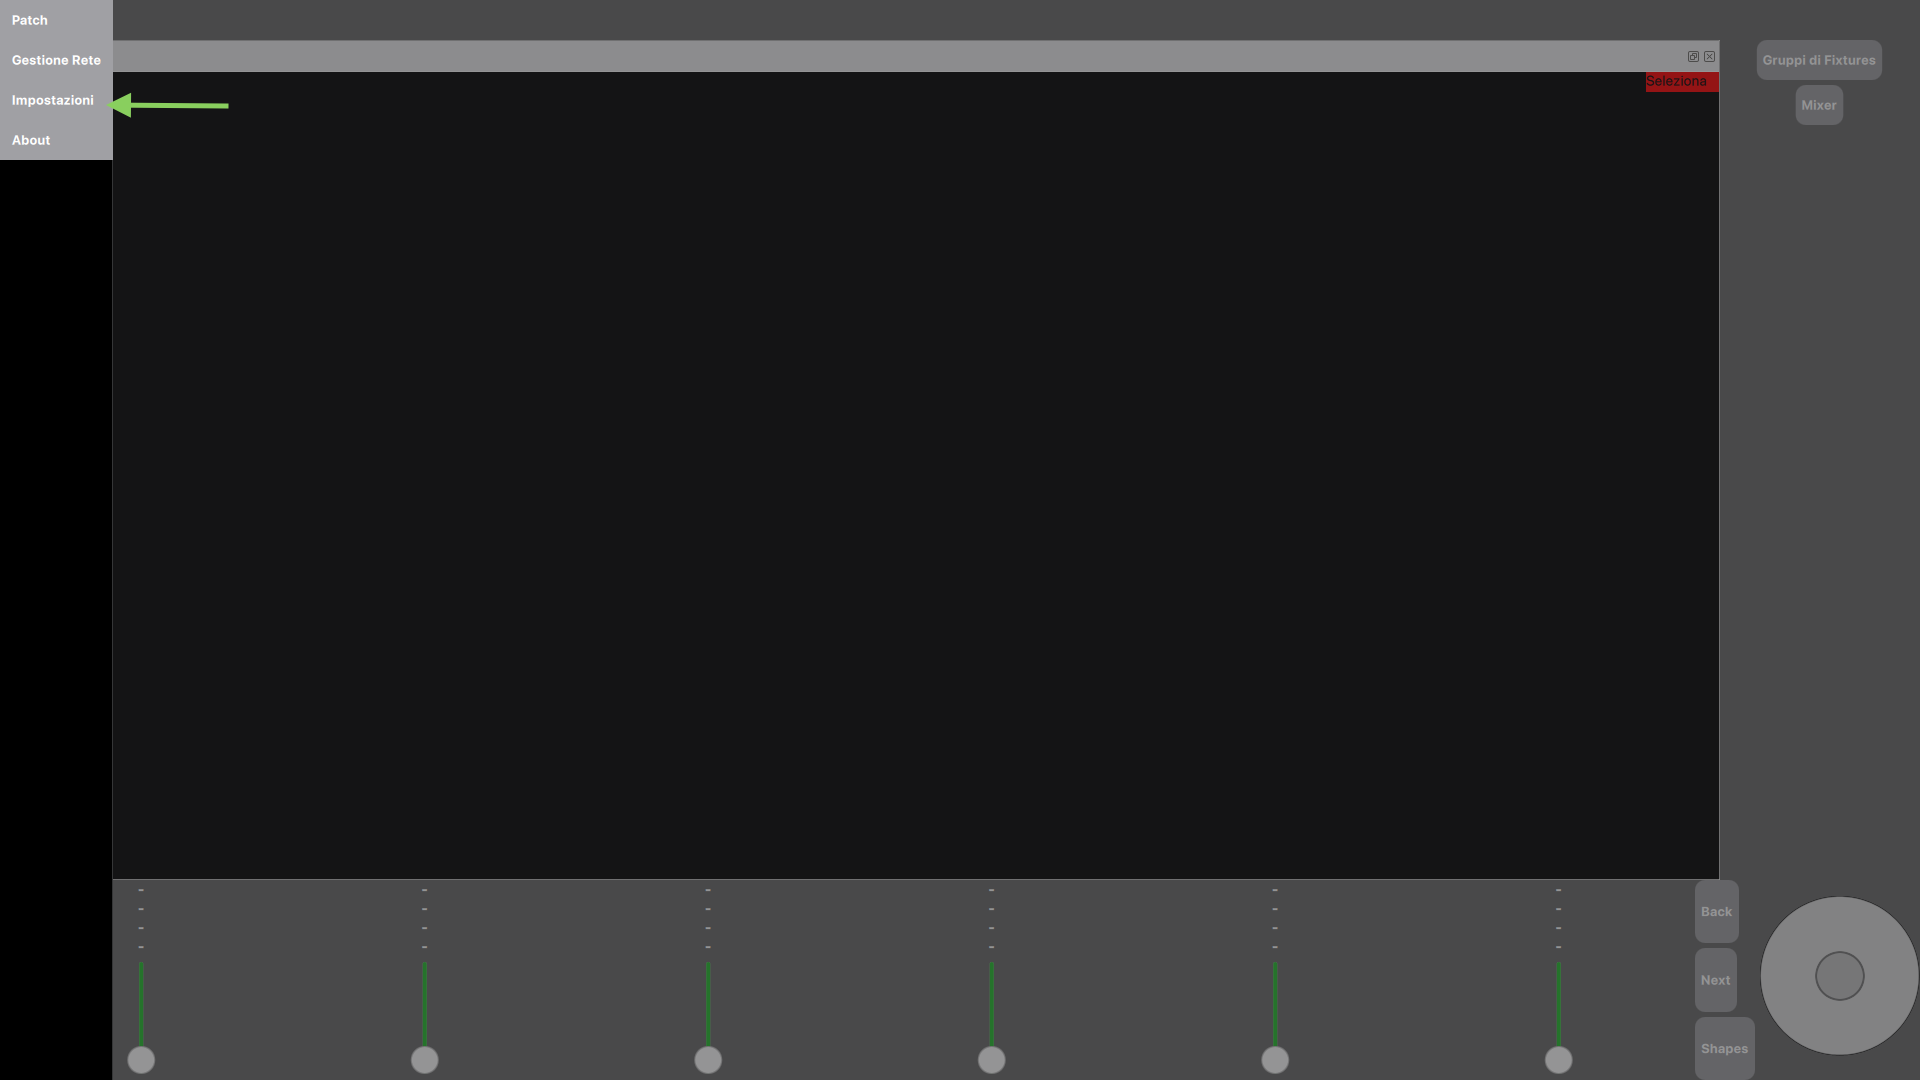
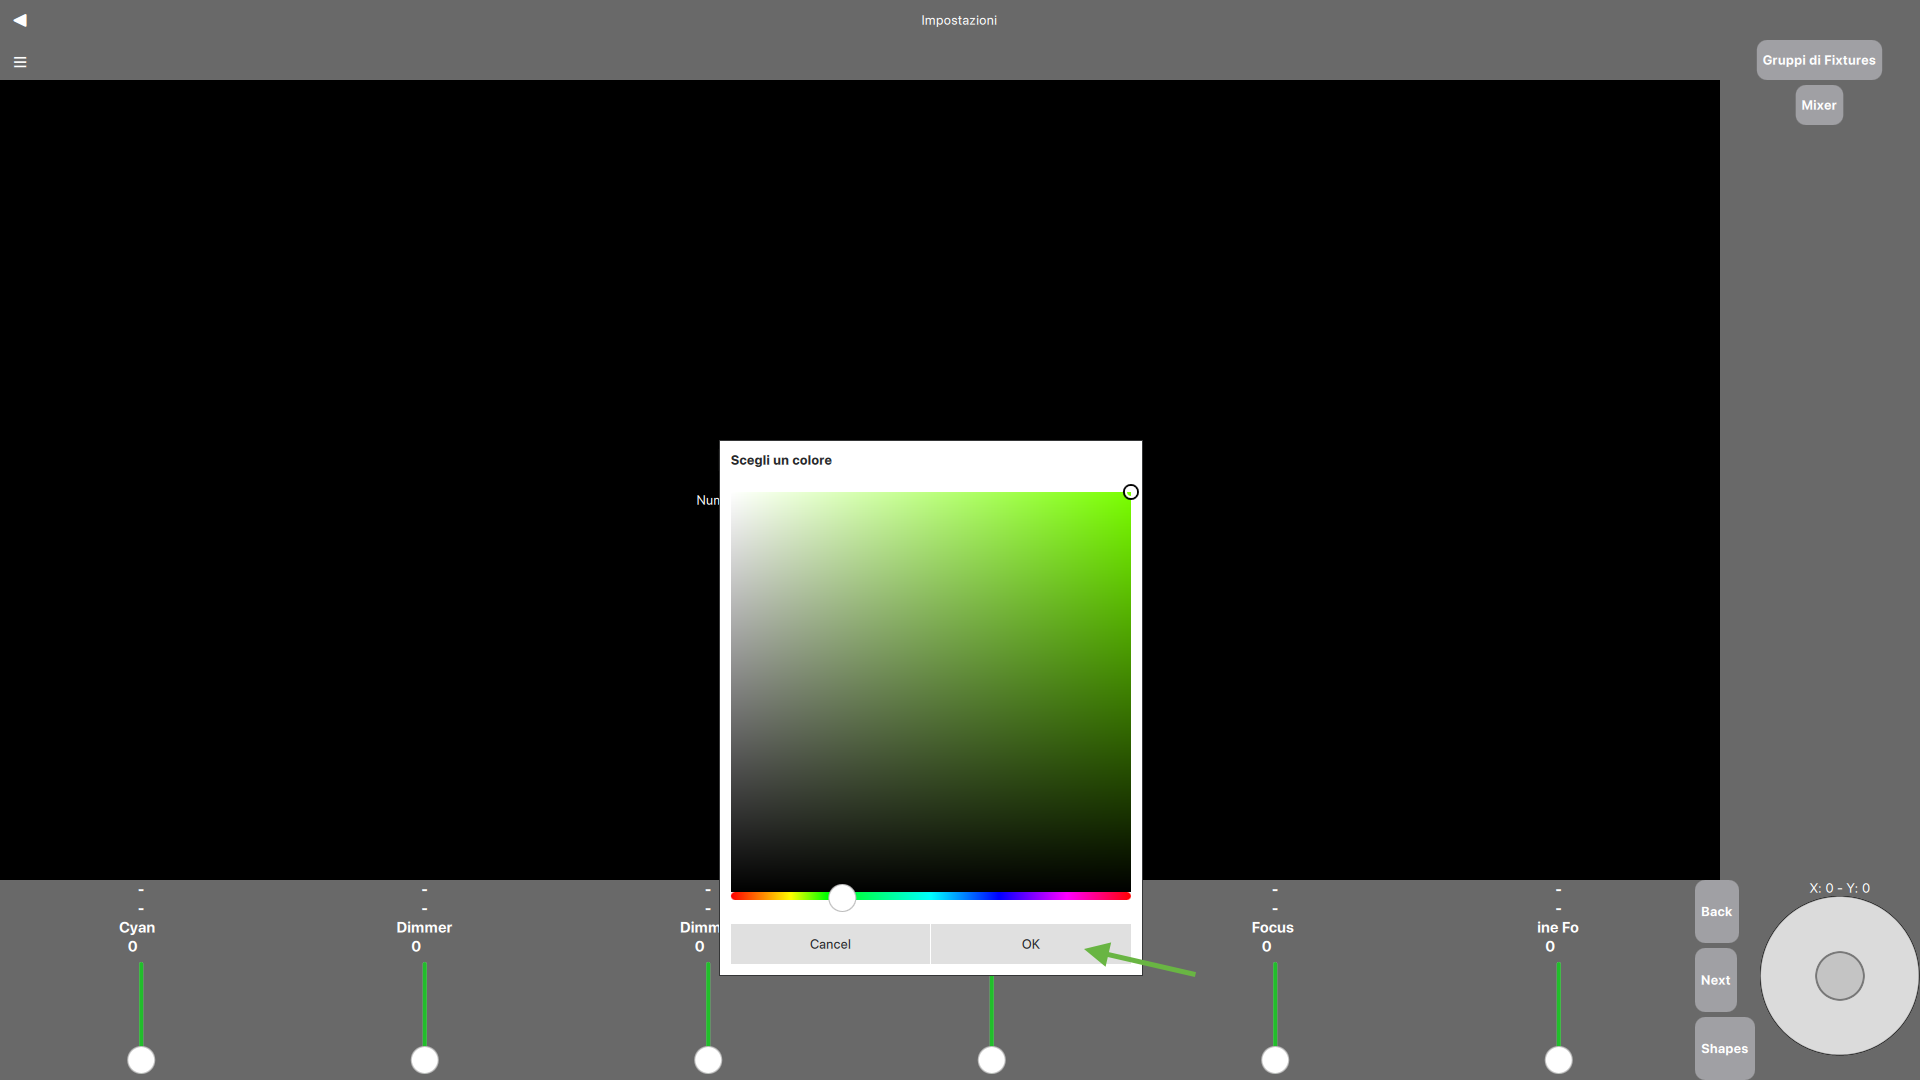
Next, press the "LED color for channels" or "LED color for stage" buttons to change the colors of the channel-type or scene-type cursors, respectively. After choosing the desired color, simply click on "OK".
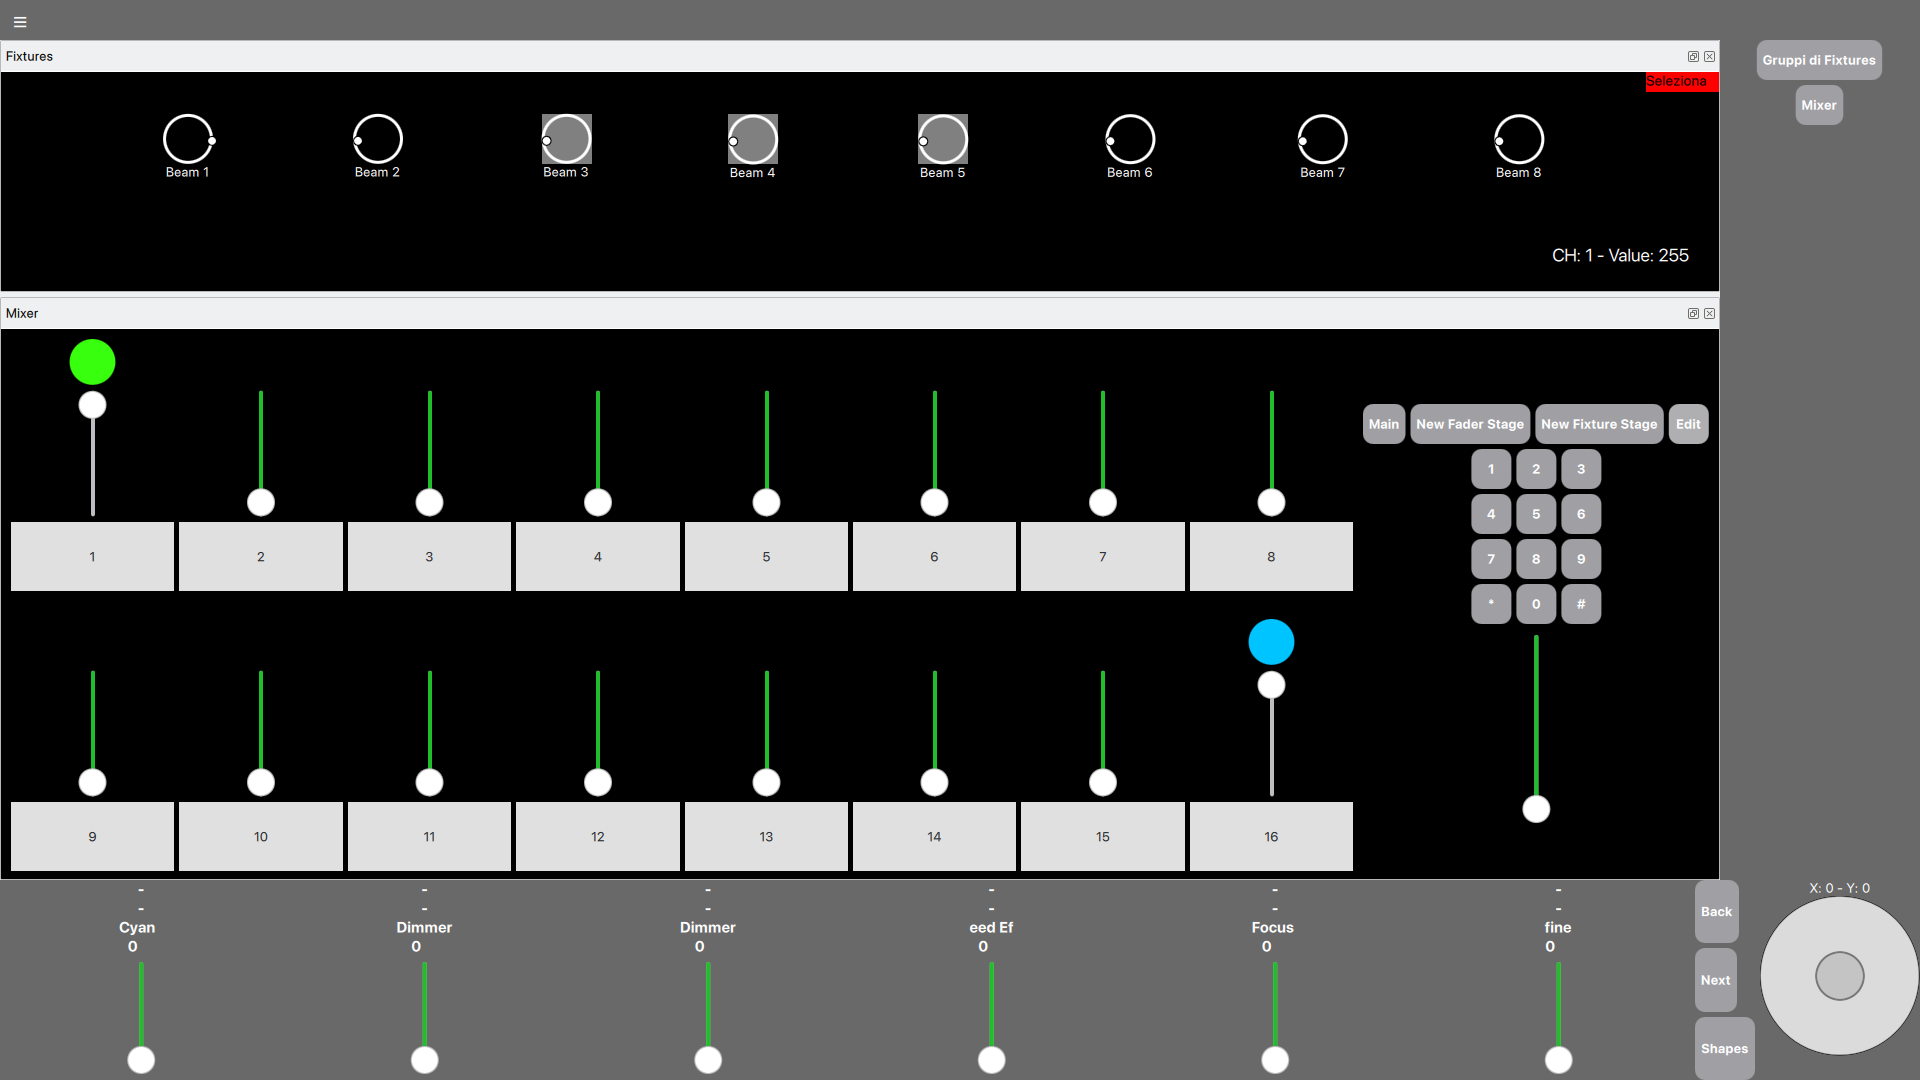
A possible final result could be the following in which green was chosen for the channel type cursors and cyan for the scene type cursors.
Changing the number of motorized faders
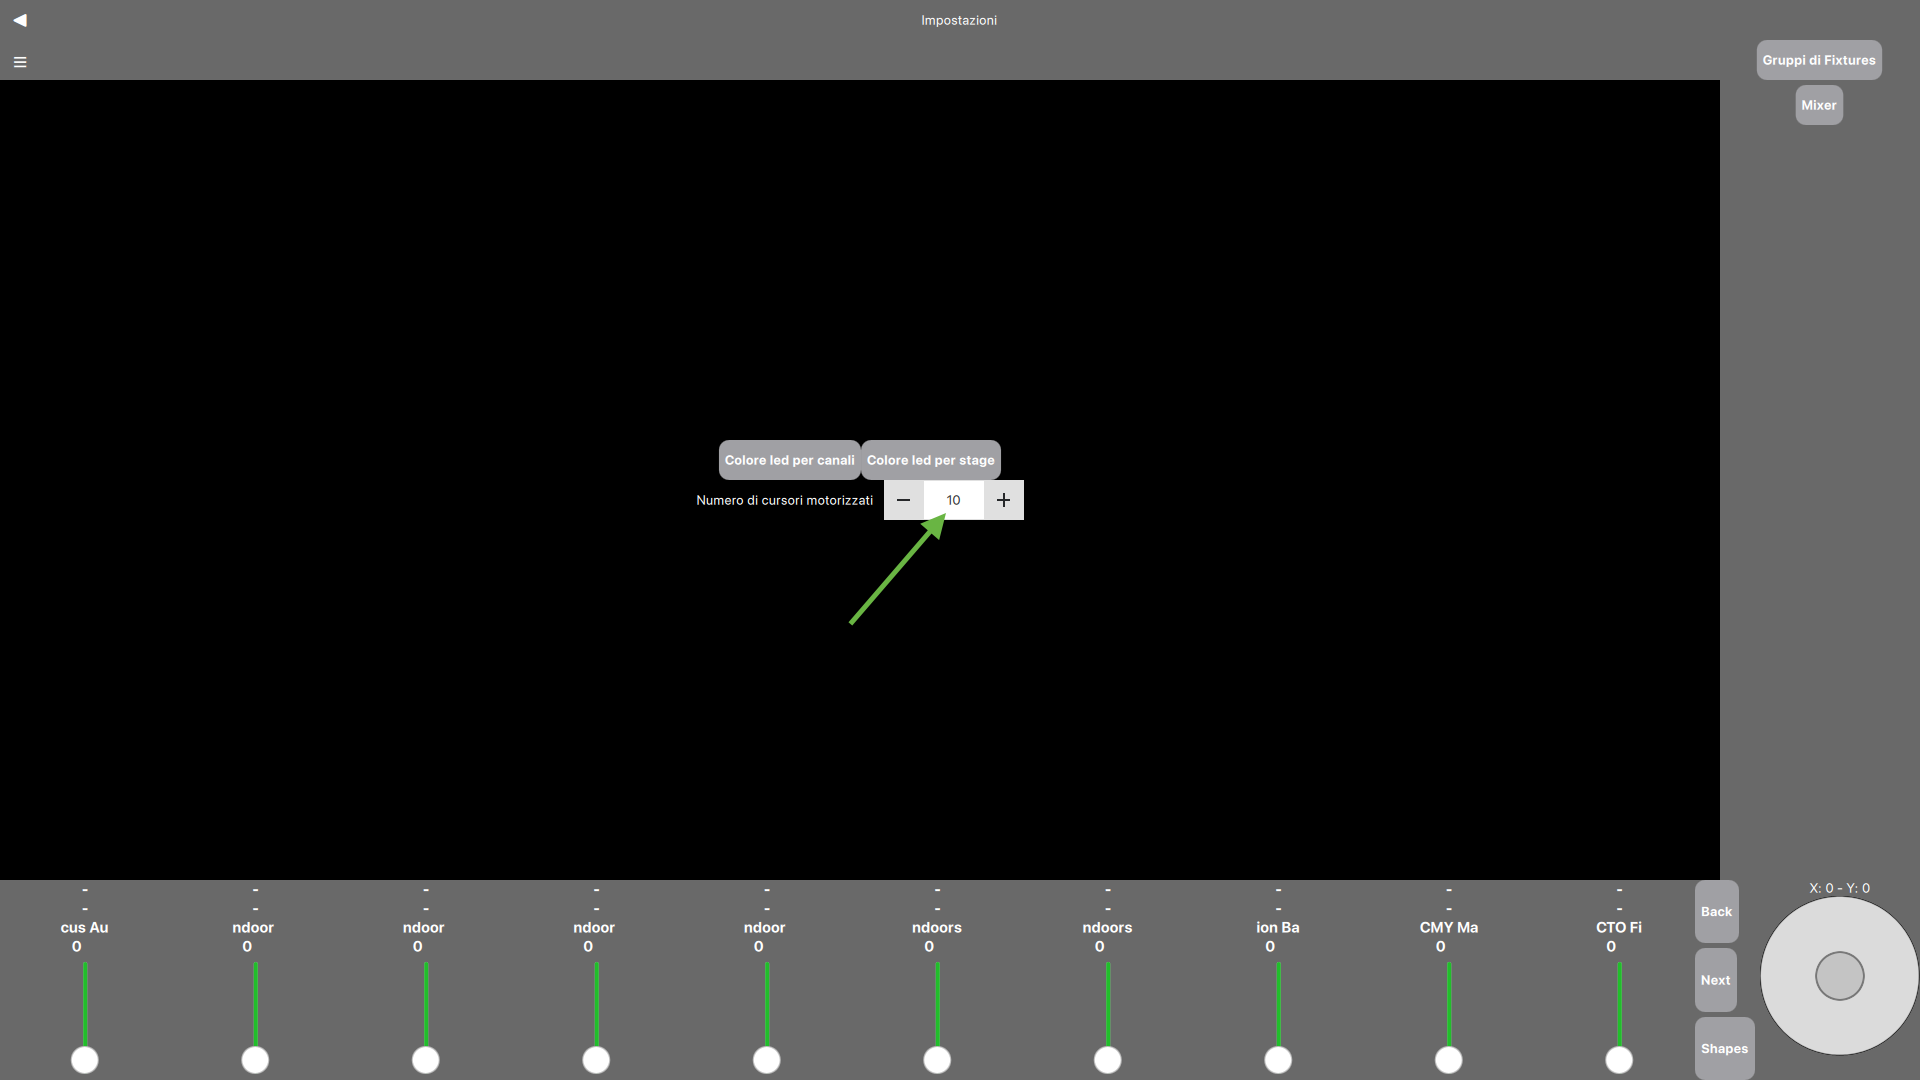
You can change the number of motorized sliders at the bottom of the application. To do this, simply open the menu from the button at the top left of the Home screen and go to the "Settings" page:

Subsequently, clicking on the + or - button of the "Number of motorized cursors" item increases or decreases the number of motorized cursors by 1. Changing this value affects the "PiDMX Mobile" application.
MIDI Mixer
Is possible to control "PiDMX" from a MIDI-USB Mixer also. Actually, is supported the AKAI's "MIDI MIX" only. To do this, is sufficient to connect the MIDI-USB Mixer to the device which "PiDMX" is running (Windows, Mac or Raspberry Pi) and open the "Settings" Menu.

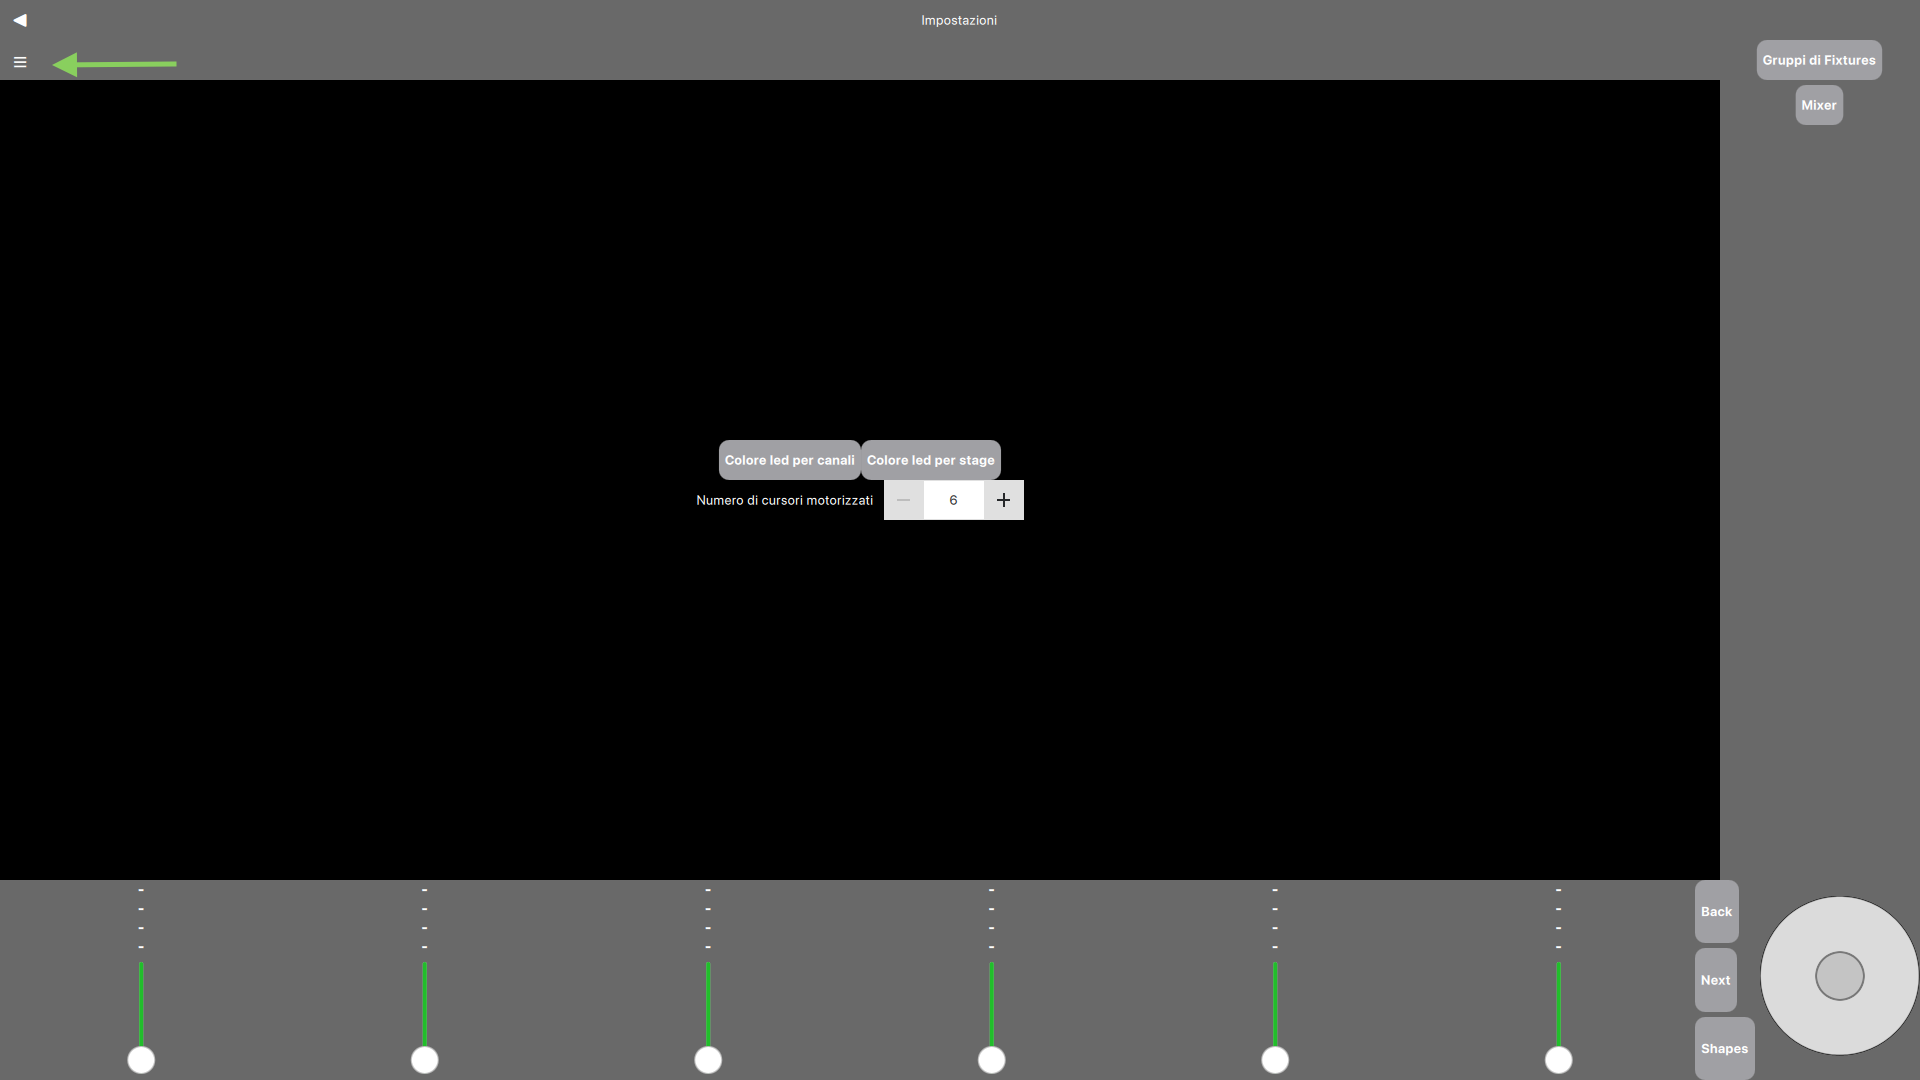
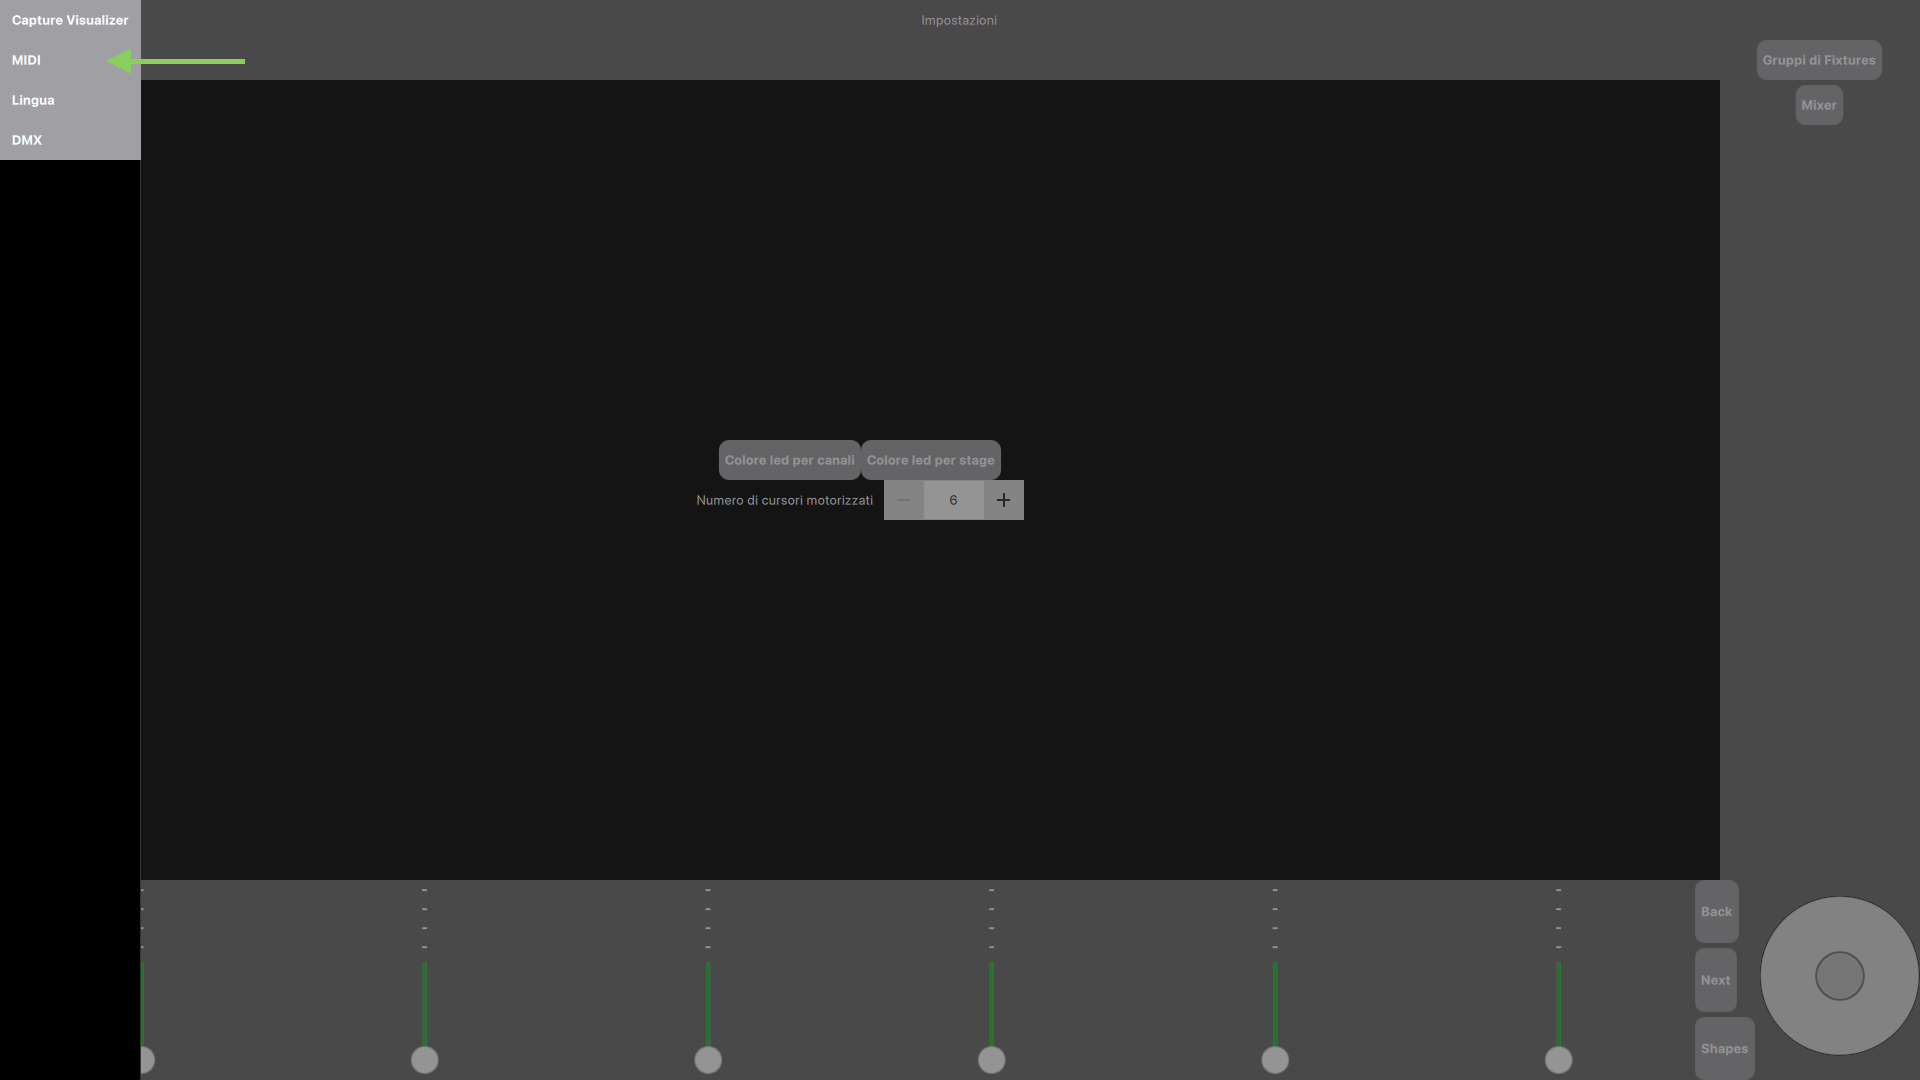
Then, open the second menu to go to the "Midi" page as shown in the following screenshots:
The following is the window that will be showed:
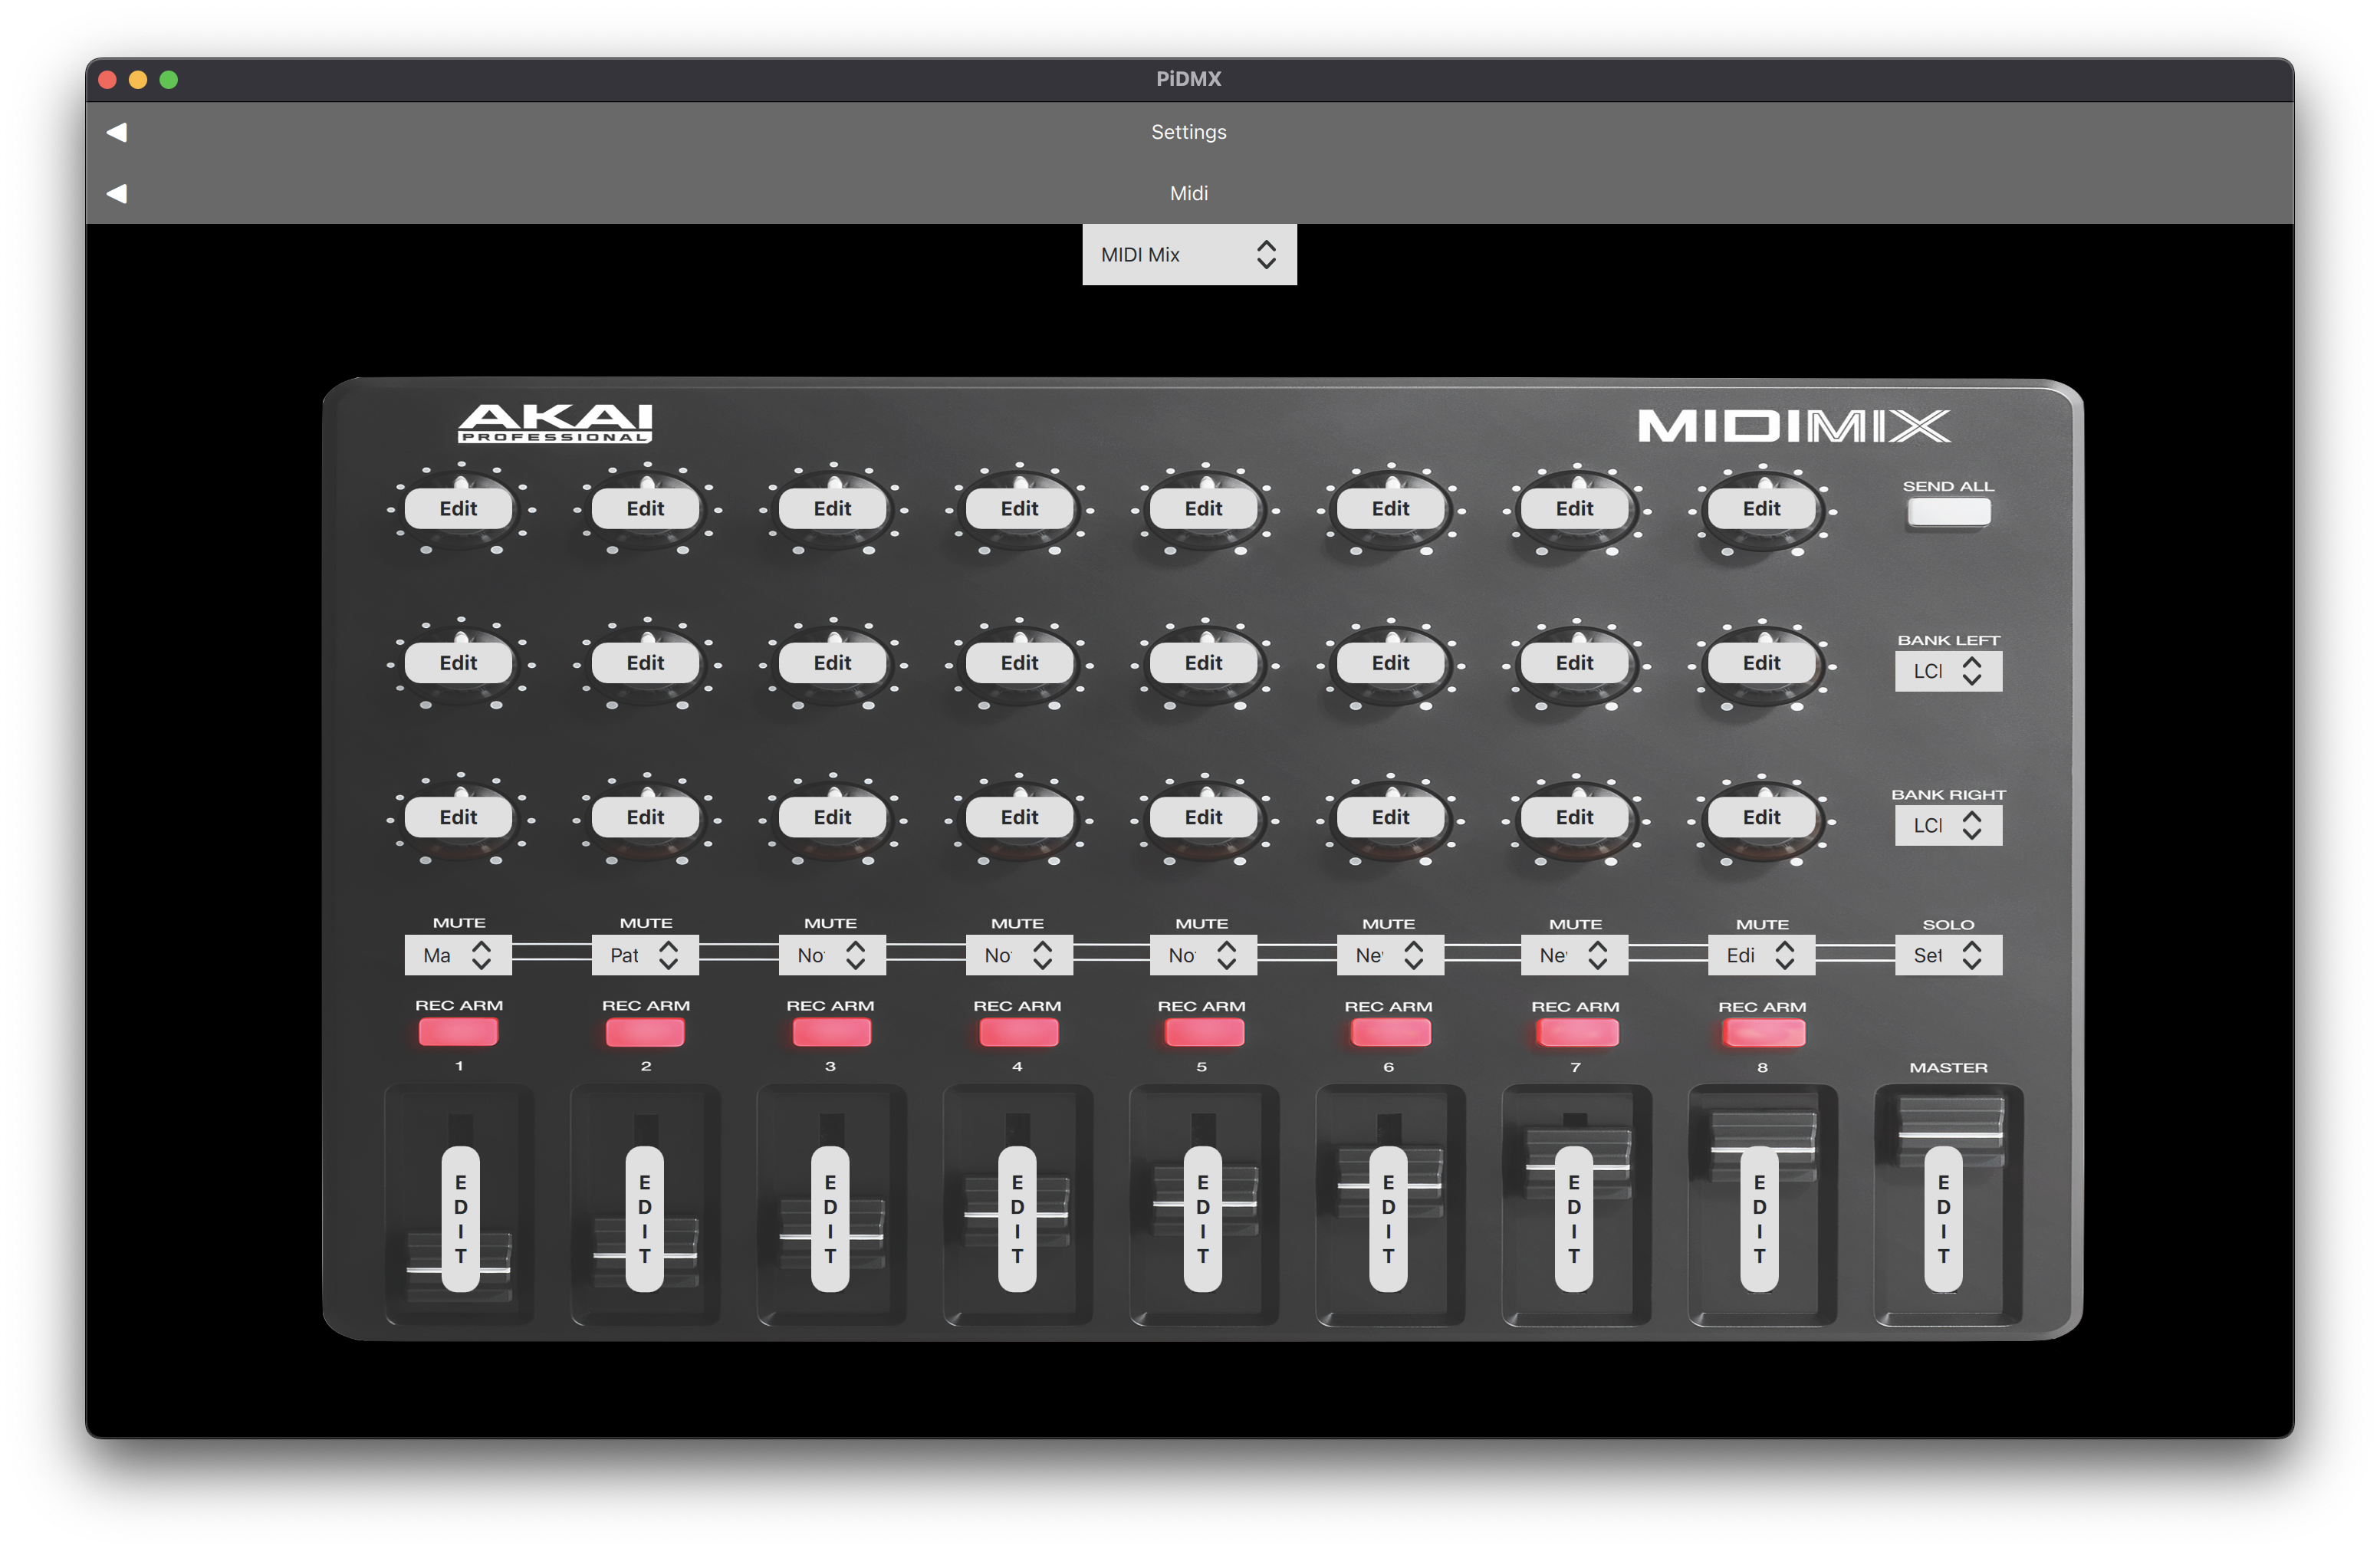
From this interface, you can edit the functions associated to each single button using the corrispettive dropdown menus. The "Edit" button placed on each fader allows you to edit the parameters of each fader (as showed in "Faders Customization").
The only non editable buttons are the "Rec Arm" buttons which are the button associated to the underlying faders.
Change Language
In this section, we show how to change the language used by "PiDMX". The available languages at the moment are "Italian" and "English". So, click on the top left corner to open the menu and click on "Settings" as showed in the following screenshot:

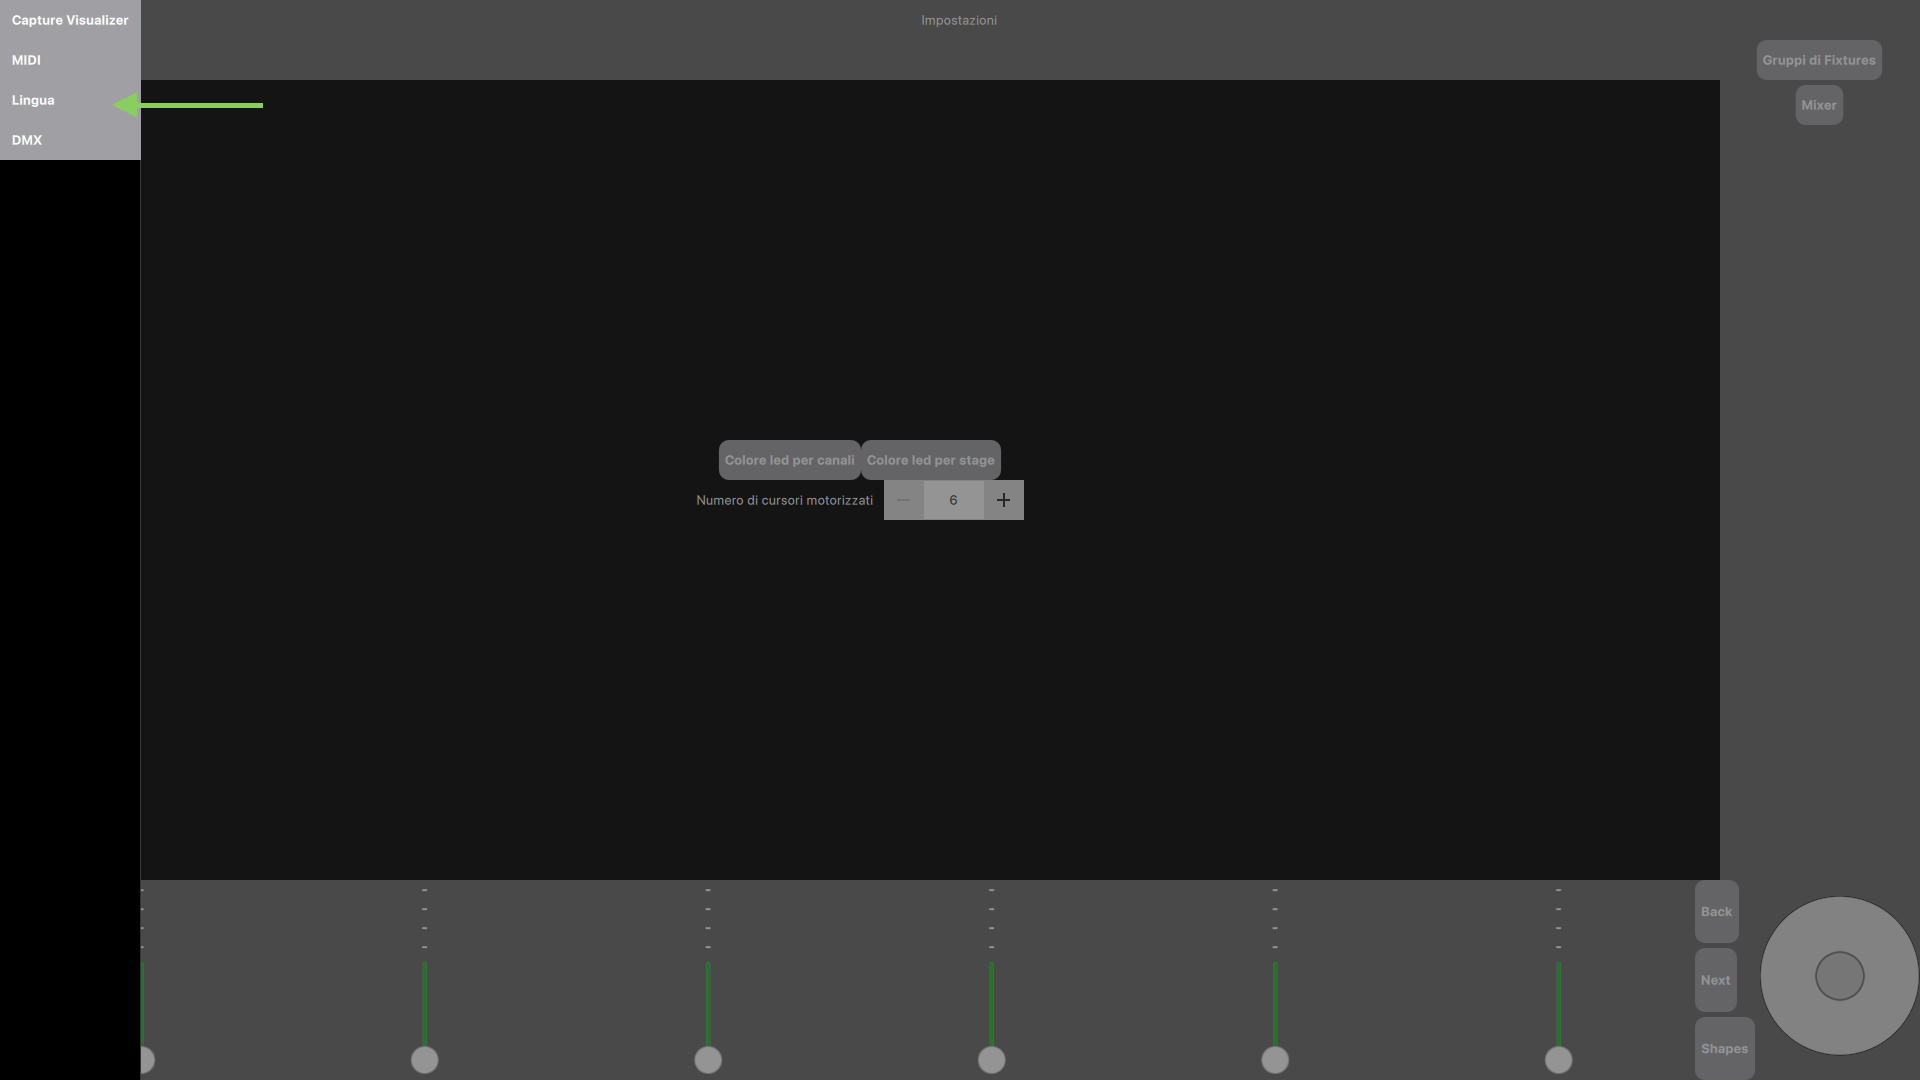
Next you need to open the second menu to go to the "Language" page as shown in the following screenshots:
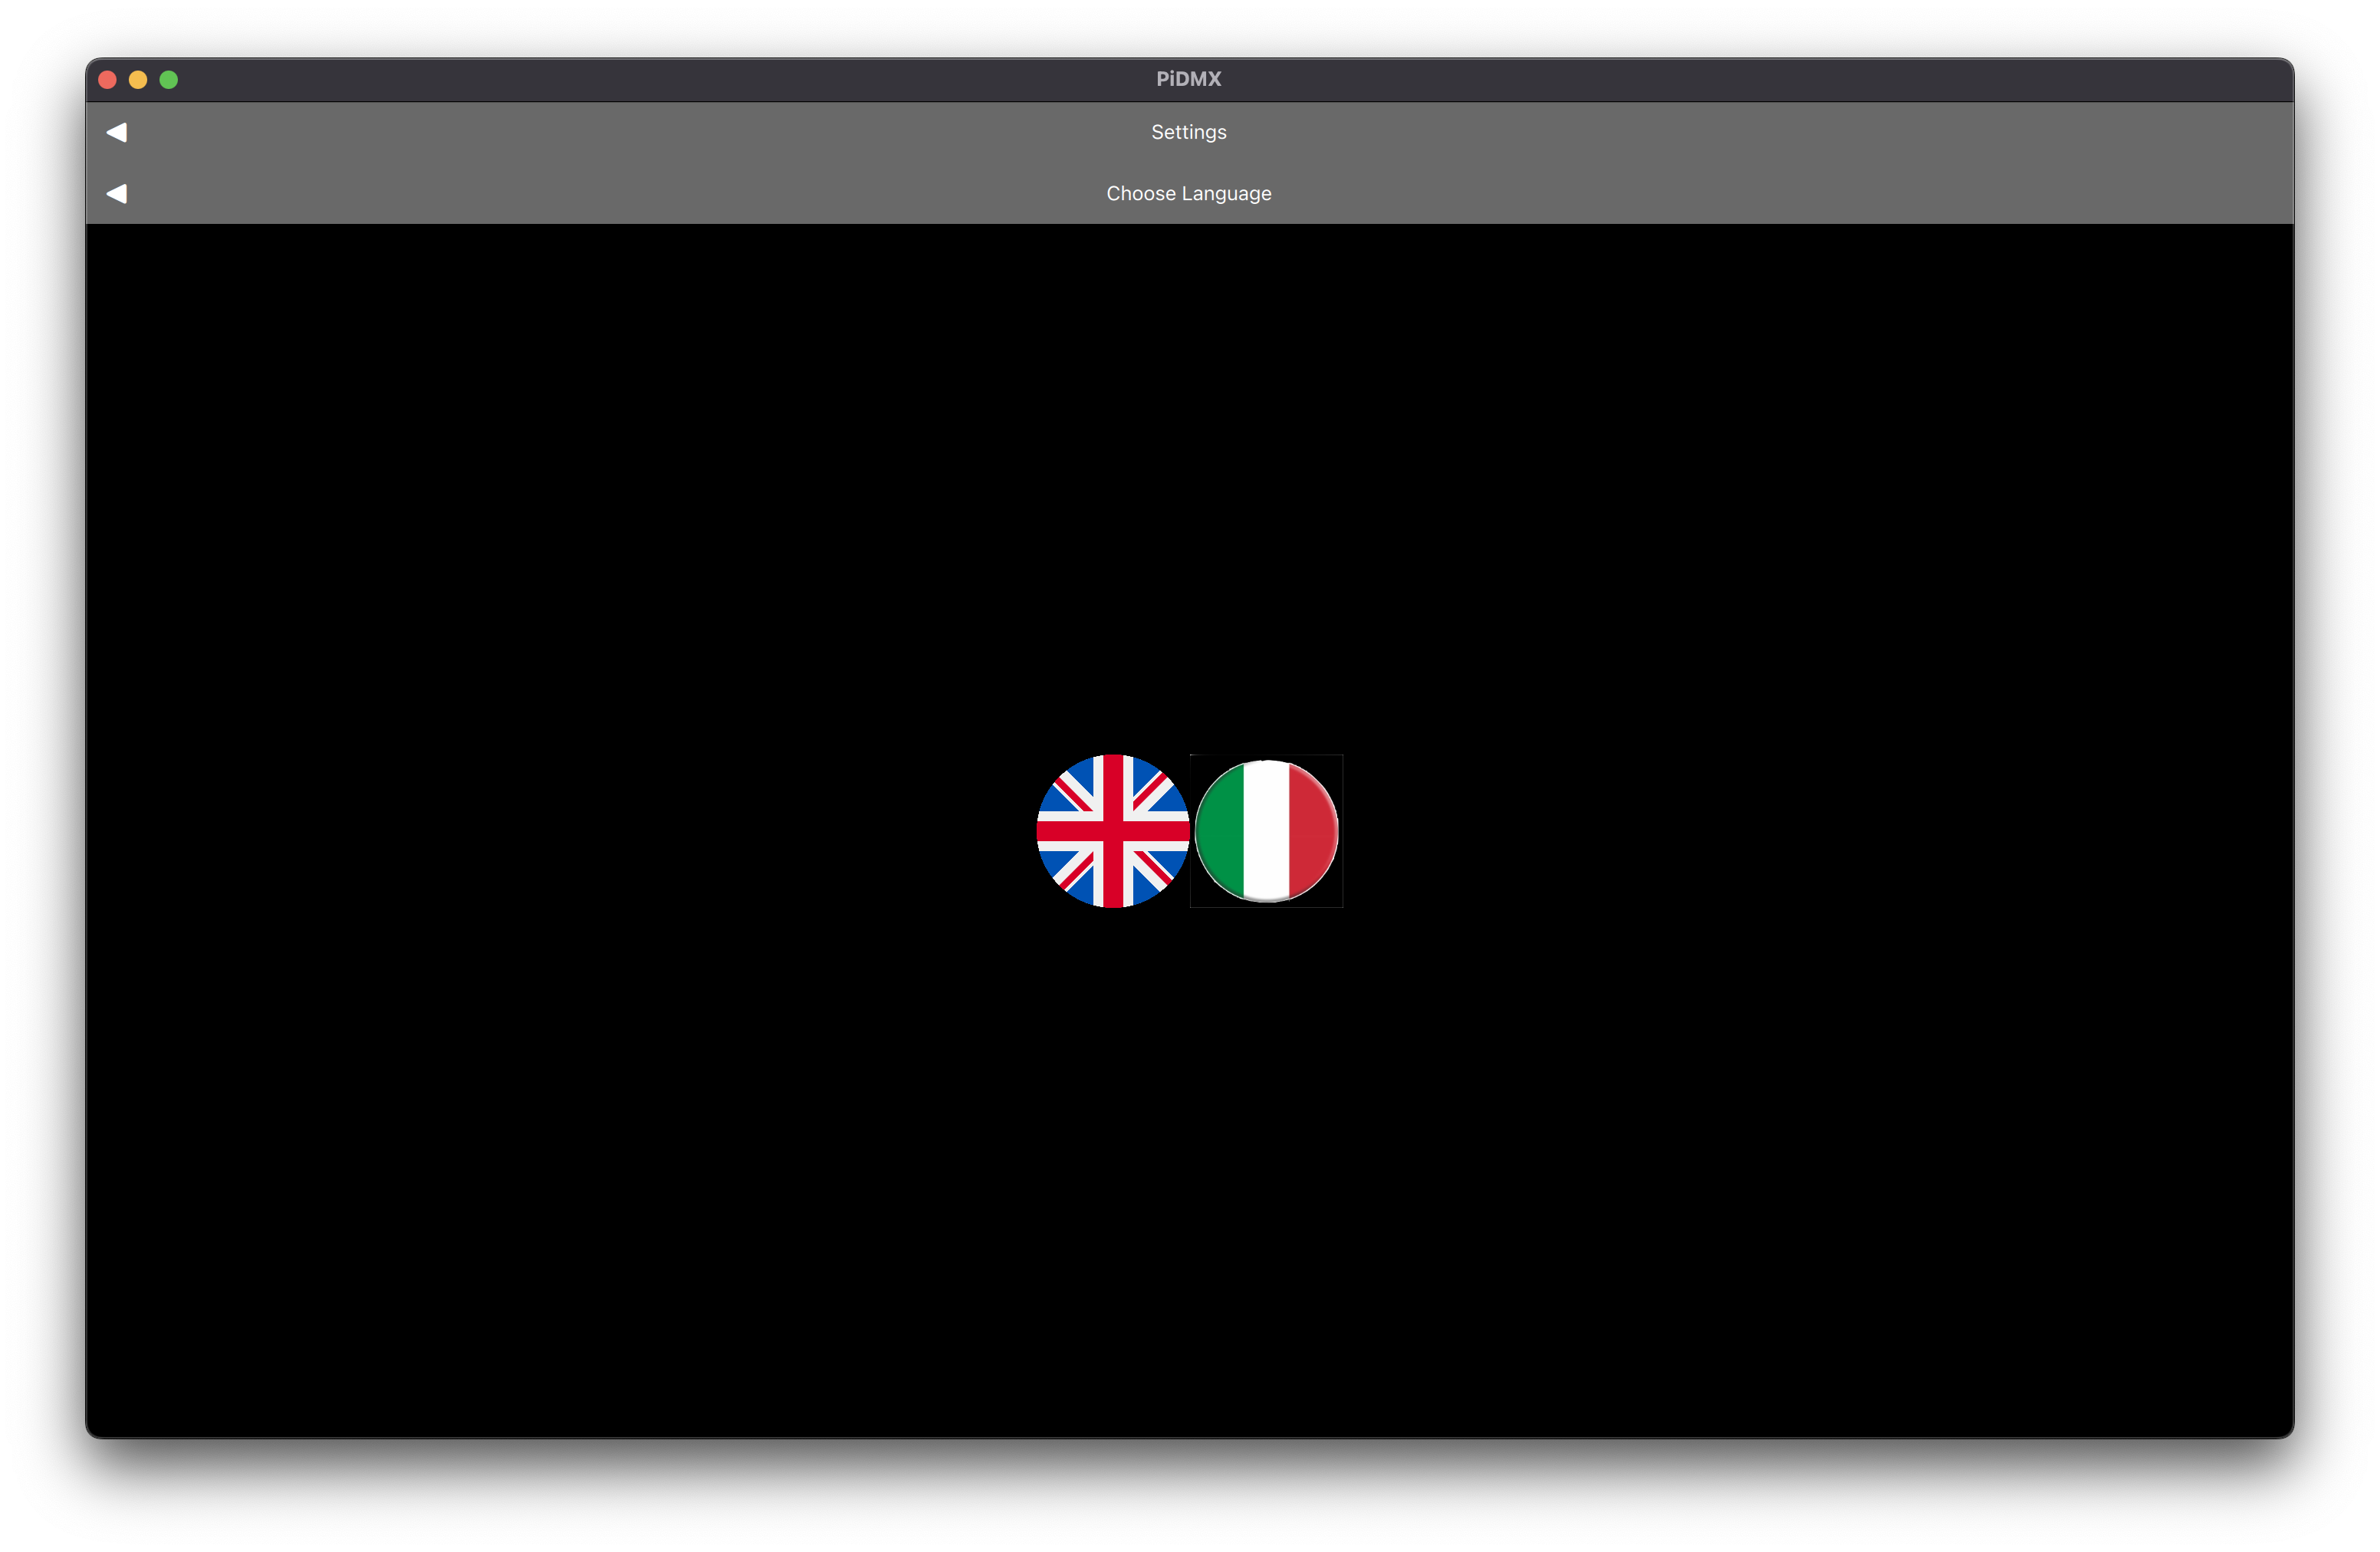
From the following window, you can click upon the corrispettive flags to switch between different languages.
Connect to Capture Visualizer
Capture Visualzier is a software that allows you to save time during the lighting design of a show. Capture is a software available for macOS and Windows that allows you to work with lights, video, lasers, moving scenes and other types of effects. You can download it at the following link: Click me.
After downloading and installing Capture, to be able to use it with "PiDMX" simply open the menu and go to the "Settings" page as shown in the following screenshot:

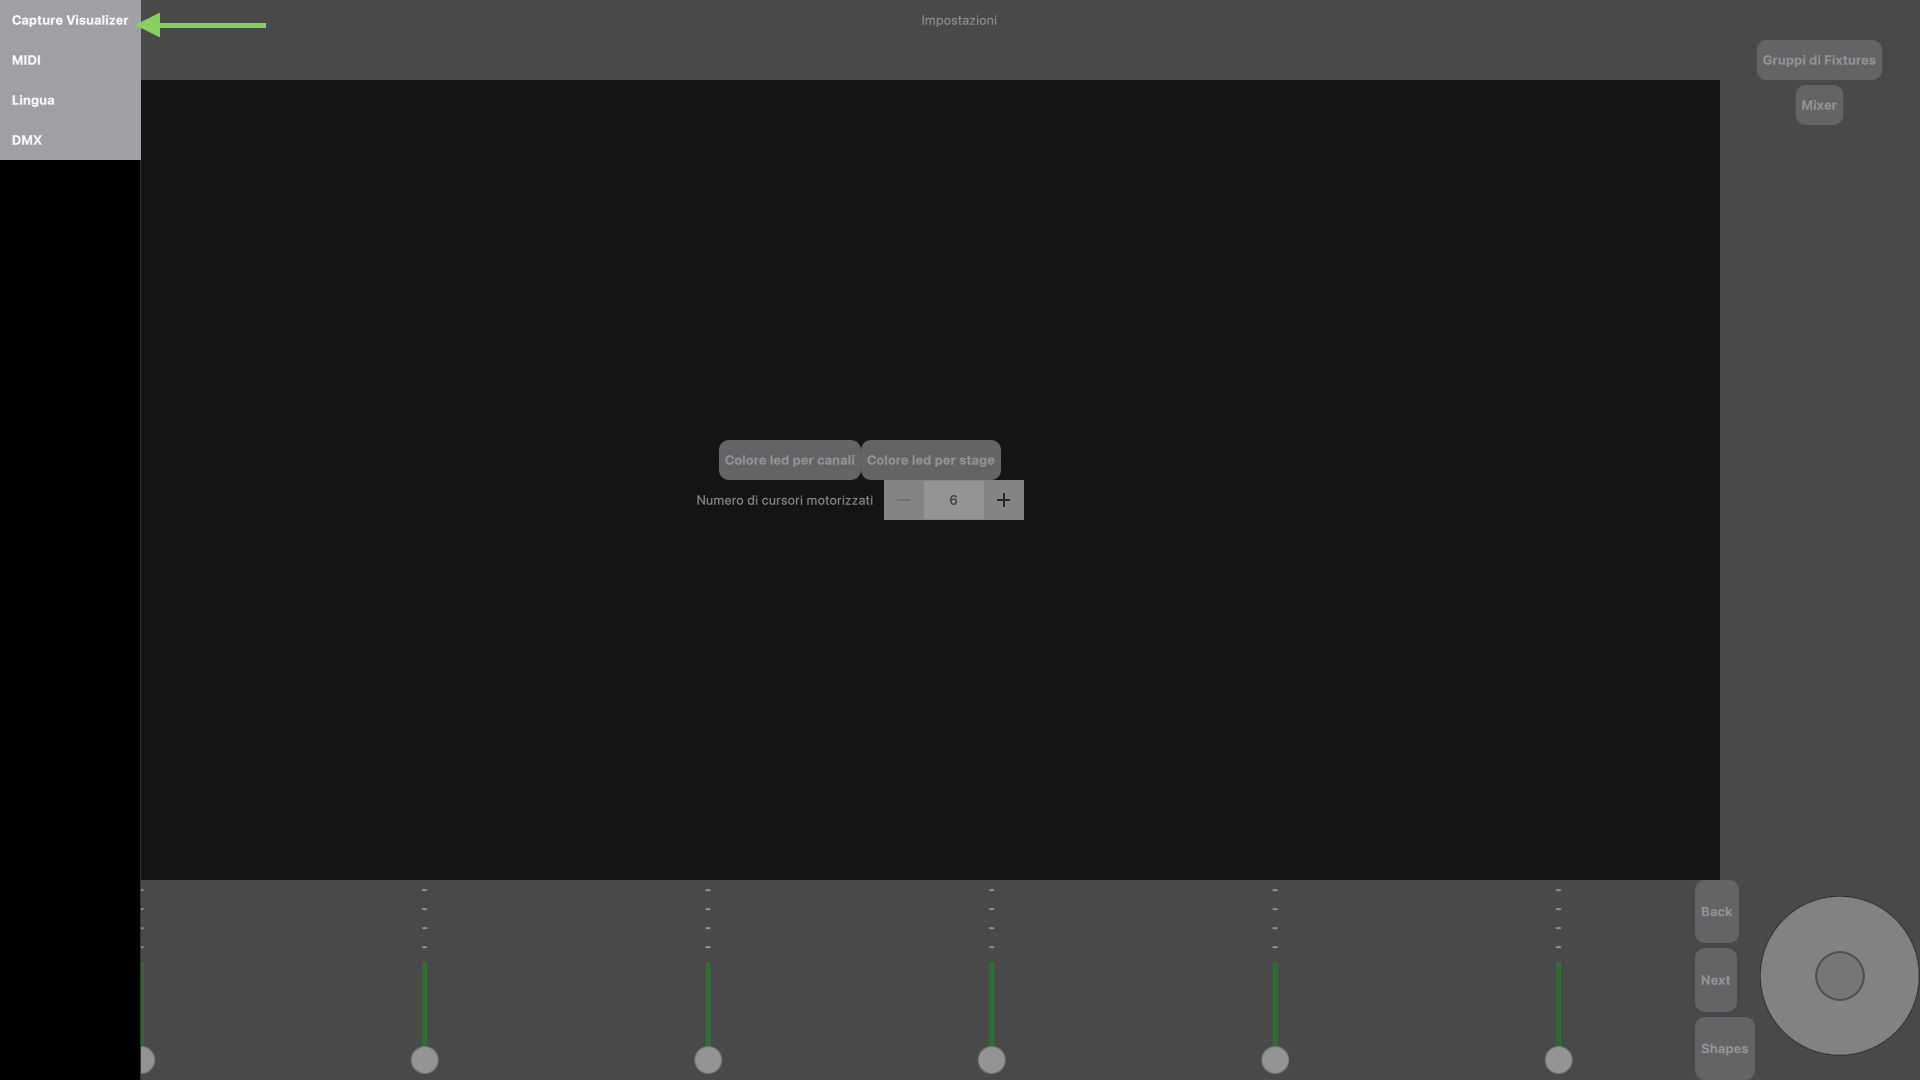
Next you need to open the second menu to go to the "Capture Visualizer" page as shown in the following screenshots:

Pressing the "Connect" button, the following warnings will appear in which you must confirm to continue:
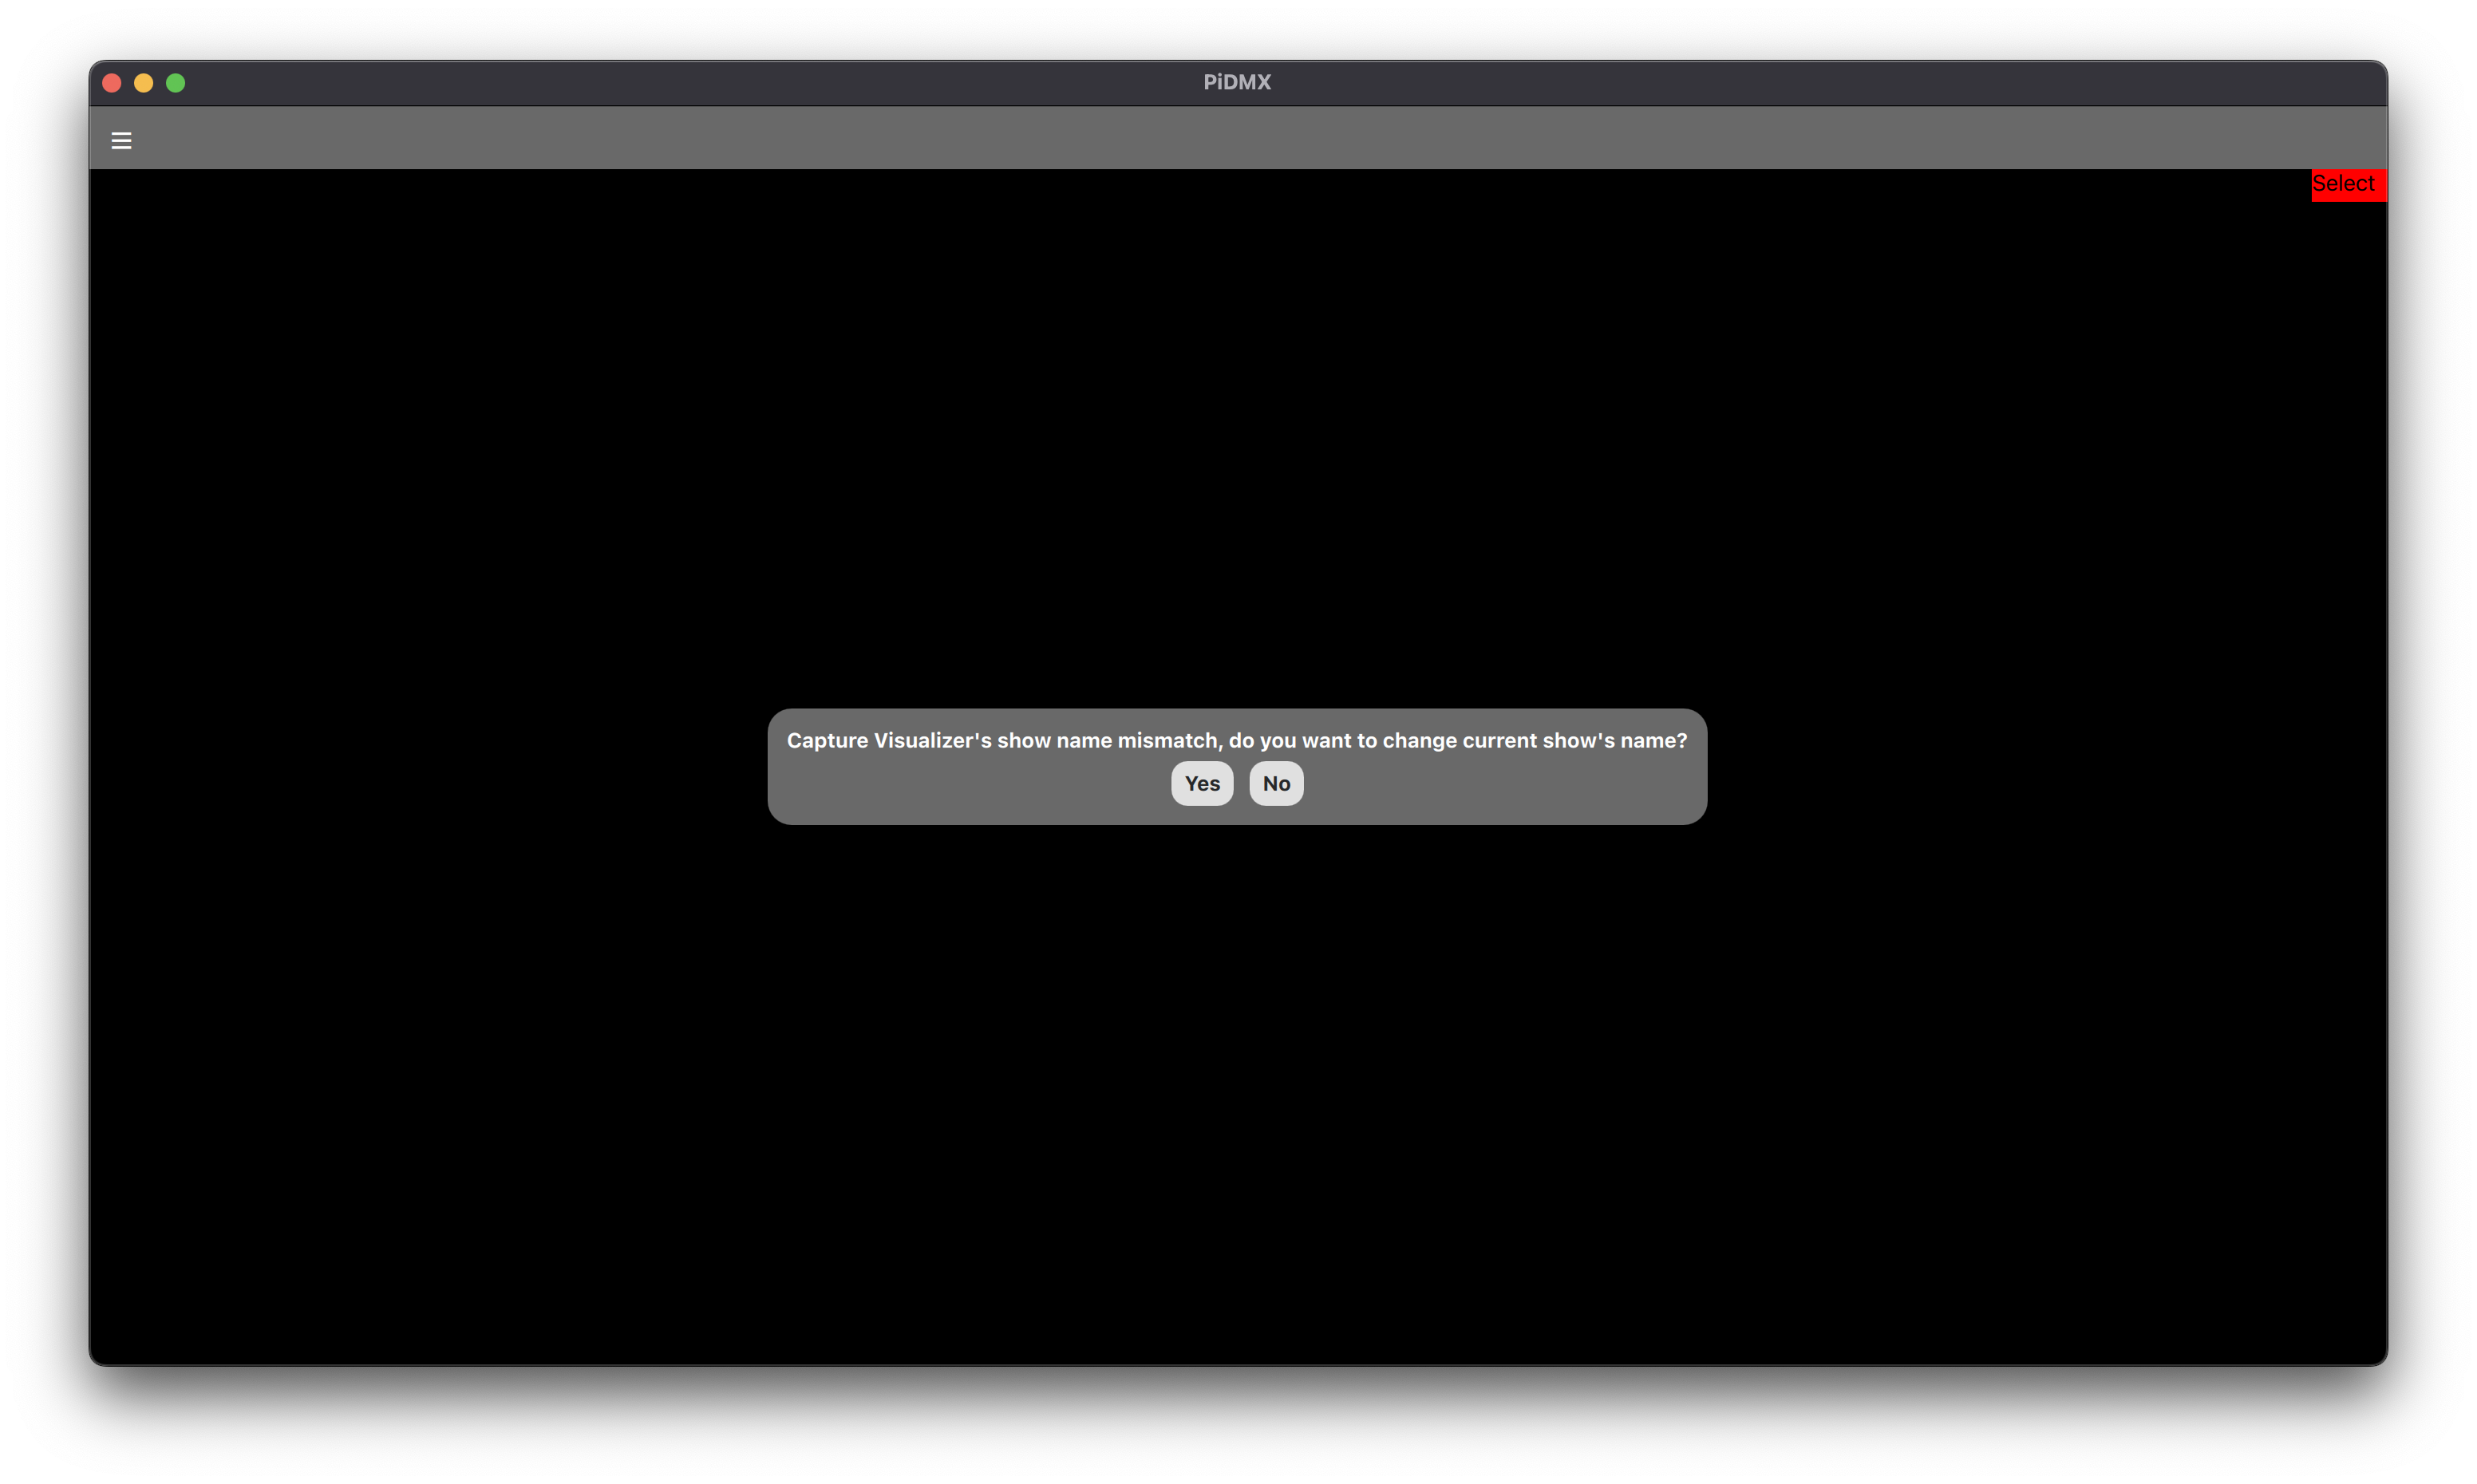
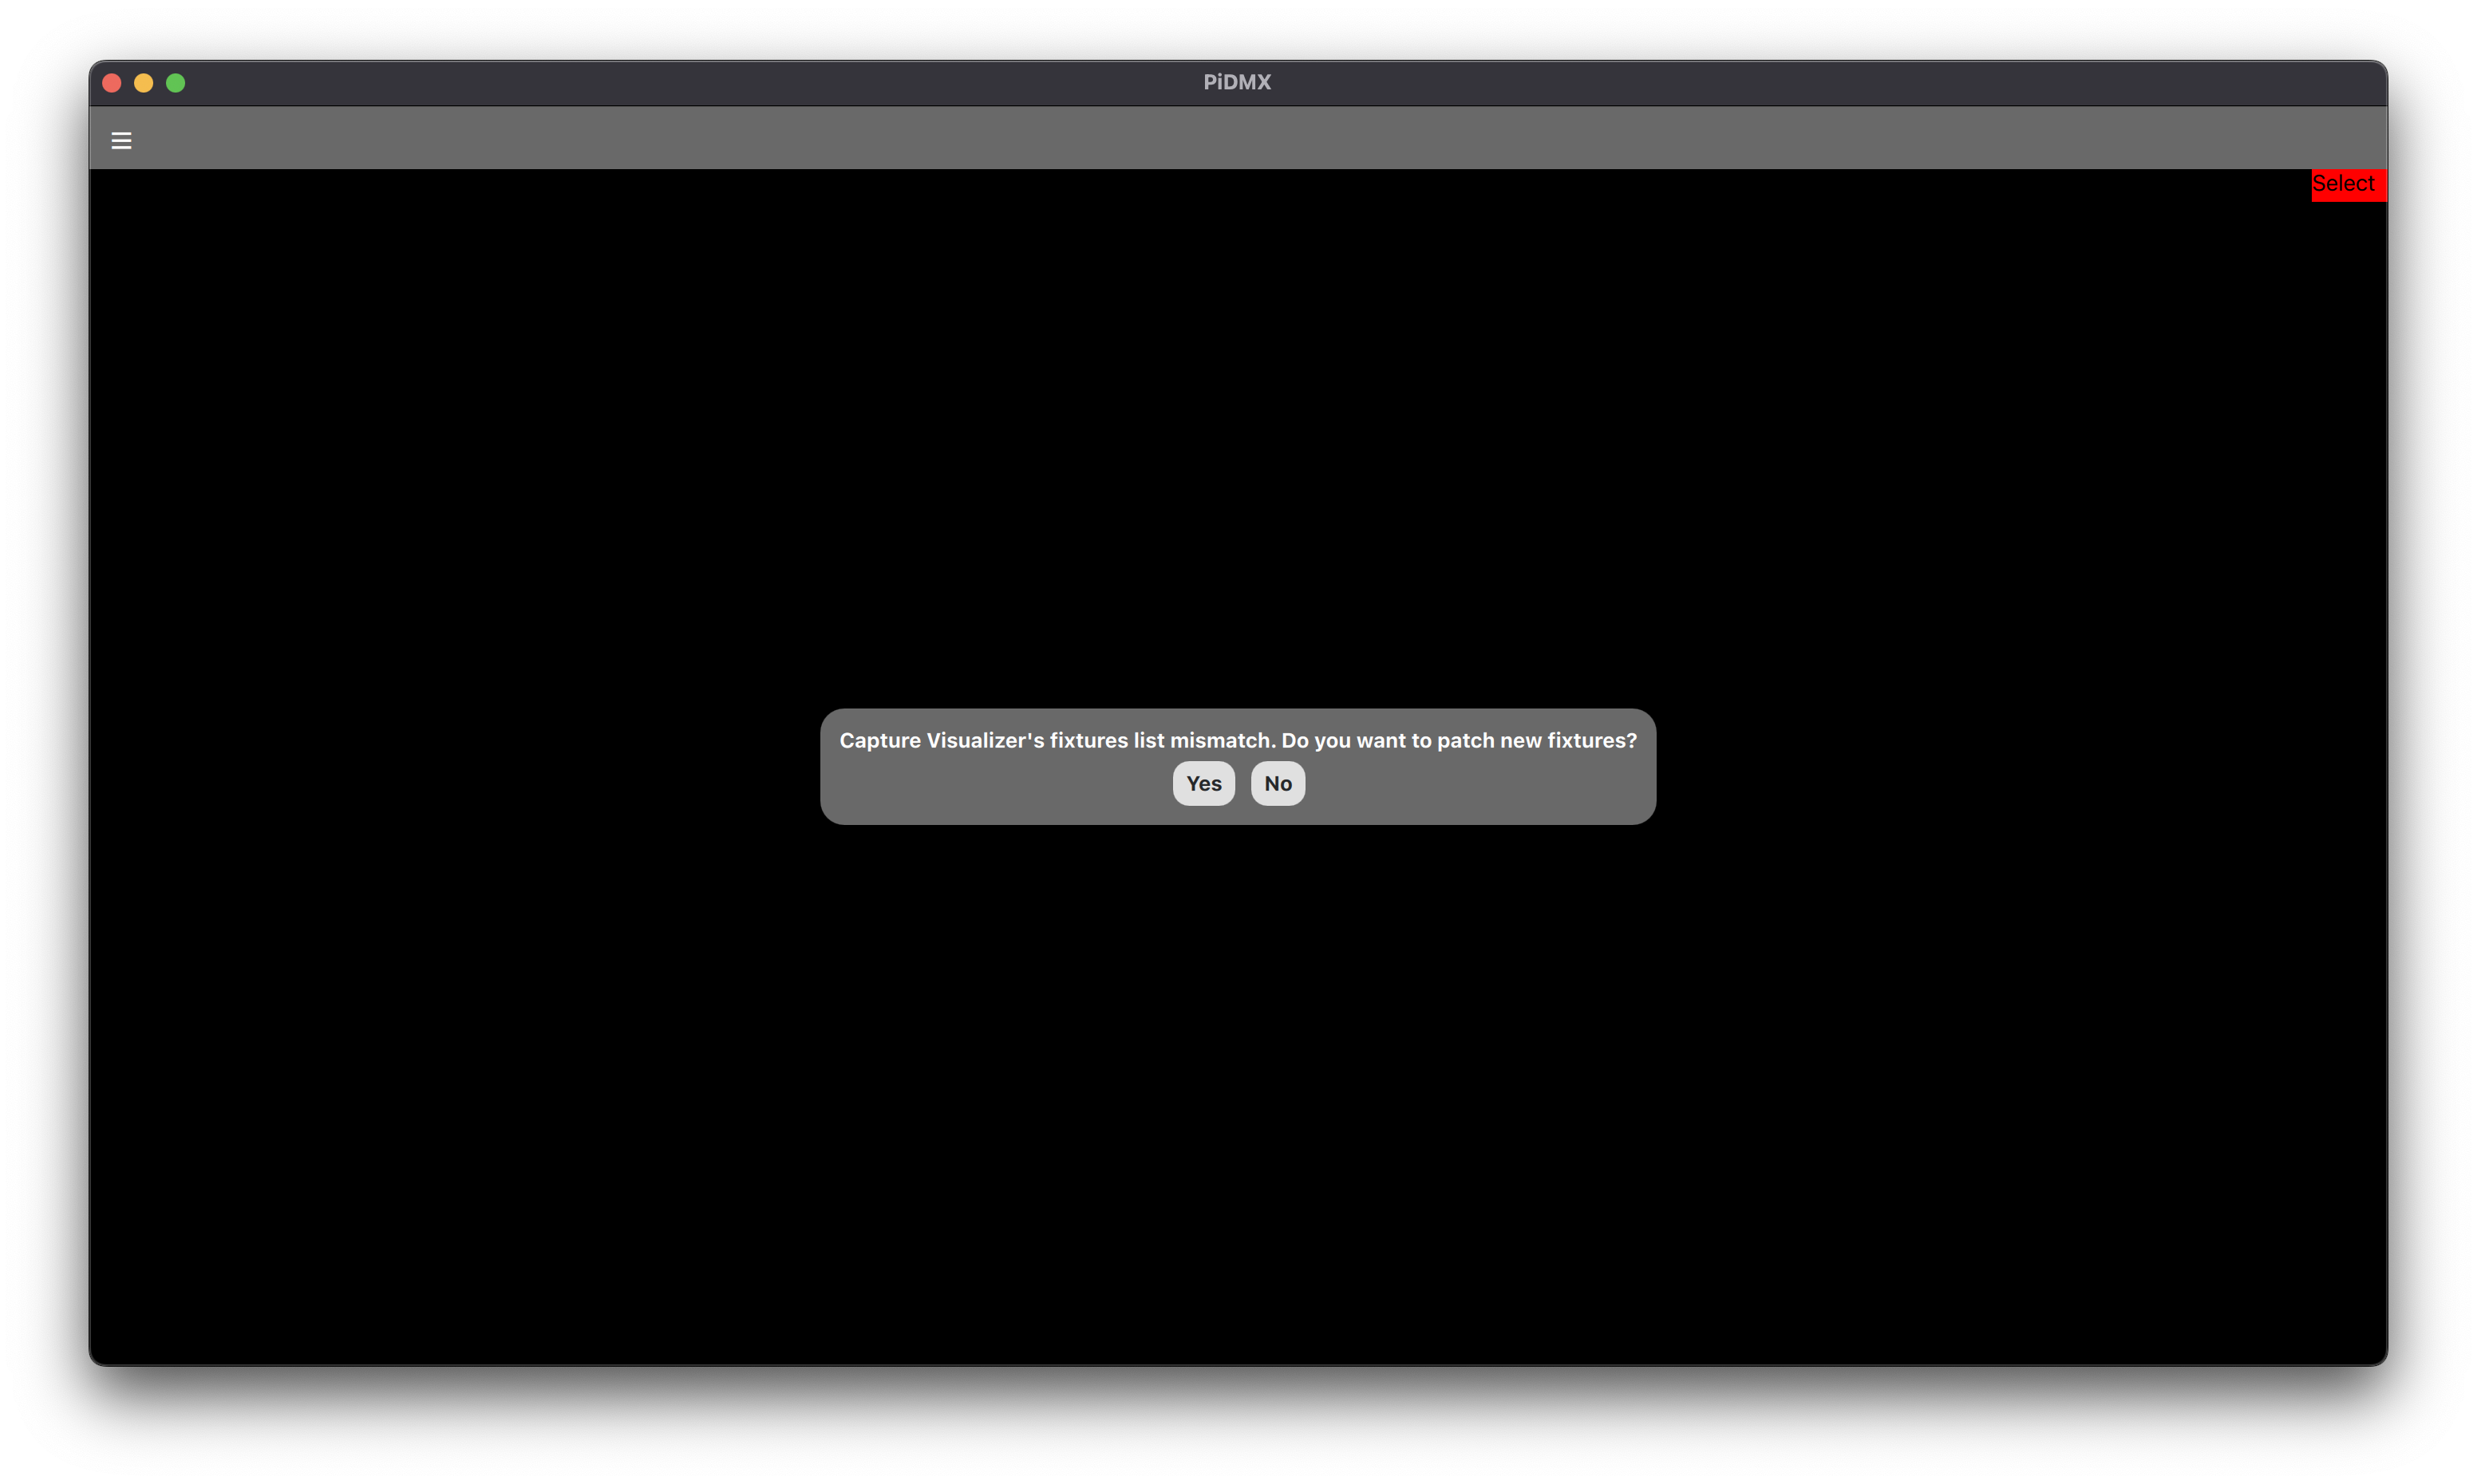
After pushed "Yes" for the two warnings (the first changes the name of the current show making it equal to that of Capture and the second inserts the fixtures present in the "Capture" show on "PiDMX"), the fixtures will appear on the main page.
At this point, it means that the synchronization has taken place and that it is therefore possible to see on Capture what is done with "PiDMX".
Connect "PiDMX Mobile" to "PiDMX"
Connection with a mobile device happens instantly, but, first of all, make sure your computer and mobile device are connected to the same Wi-Fi network. You therefore need to have "PiDMX" running on your computer and then open the "PiDMX Mobile" application and then control the software directly from your mobile device.
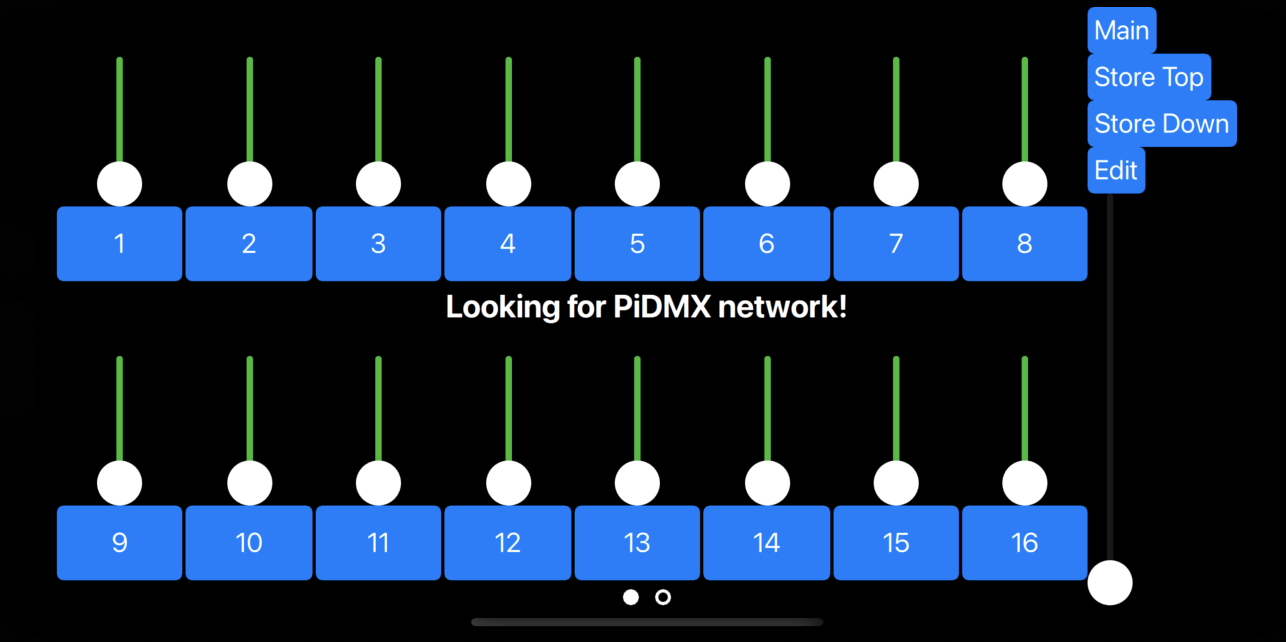
When "PiDMX Mobile" starts, the label "Looking for a PiDMX Network" will appear. If this label disappear, it means that "PiDMX Mobile" is connected successfully.
For example:
If not connected:
If connected:
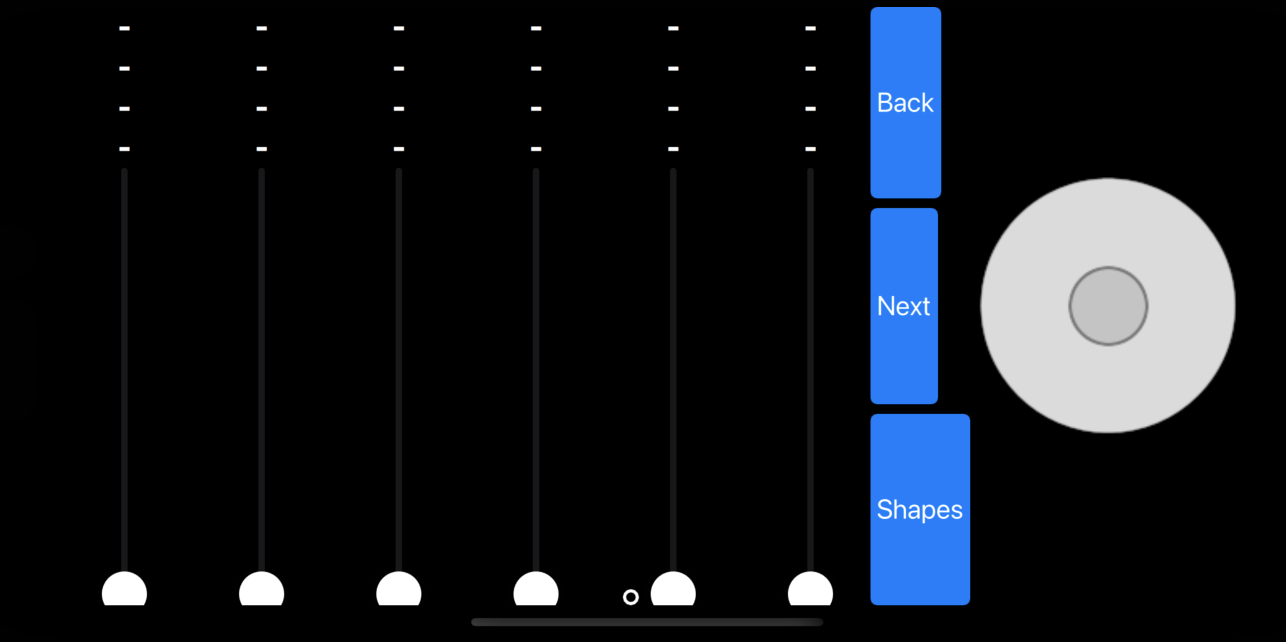
After that, you can swipe left or right to switch between two windows. The first window (showed in the previous screenshot) allows you to control the first 16 faders, to use 4 functional buttons and to use the ground master fader. The second window (showed in the next screenshot) allows you to control the parameters of the selected fixtures:
